

Install and use Clevera on Linux
Install Clevera for Linux (Intel/AMD or ARM64), finish the short setup with the GNOME extension, and record your screen, voice and camera. Covers requirements, typed text, shortcuts, updates and troubleshooting.
Clevera for Linux records your screen, your clicks and your voice on a Linux computer and uploads the recording to your Clevera workspace, where you turn it into a how-to video, a product demo or an article. This article covers what you need, how to install the app, the short setup the first time you open it, and how recording on Linux differs from the Mac and Windows apps.
Before you start
- A Clevera account and a role that can record: workspace owners, Administrators and Content Creators. Editors can't start recordings. See Understand workspaces, roles and creator seats.
- An internet connection. Clevera needs to reach your workspace to start a recording. An upload that loses the connection later waits and resumes on its own.
- Your own user account. Clevera doesn't run as root. If you start it as root it says "Clevera can't run as root. Open it as your own user."
System requirements
| Requirement | Linux |
|---|---|
| Processor | 64-bit Intel or AMD (x86_64), or 64-bit ARM (ARM64, also called aarch64). Each has its own download. |
| Desktop | A current desktop Linux with GNOME 46 or later or KDE Plasma 6, on Wayland or X11. Clevera is tested on Ubuntu with GNOME. |
| Package | One AppImage file. No package manager and no administrator rights are needed. |
| Internet | Required to start a recording and to upload it |
Not sure which processor you have? Open a terminal and run uname -m. It prints x86_64 for Intel or AMD and aarch64 for ARM64.
Download and install the app
Download Clevera for Linux
Download the file for your processor:
- Intel or AMD (x86_64):
https://app.clevera.ai/download/app/linux - ARM64 (aarch64):
https://app.clevera.ai/download/app/linux?arch=aarch64
A file ending in
.appimagedownloads.- Intel or AMD (x86_64):
Move it to a folder in your home
Move the file to a folder in your home folder, for example
~/Applications, and keep it there. Clevera updates itself by replacing this file, so it can't update from a read-only folder or a USB stick.Allow it to run
In Files, right-click the file, choose Properties and turn on Executable as Program. In a terminal you can run
chmod +xon the file instead.Open Clevera
Double-click the file. The first time it starts, Clevera adds itself to your apps list, so next time you can open it from there like any other app. The Set up Clevera window opens.
Finish setup the first time
The Set up Clevera window ("A few steps and you're ready to record.") lists everything Clevera needs. A progress line shows how many required steps are done, and the footer names the next one, for example Next: sign in.
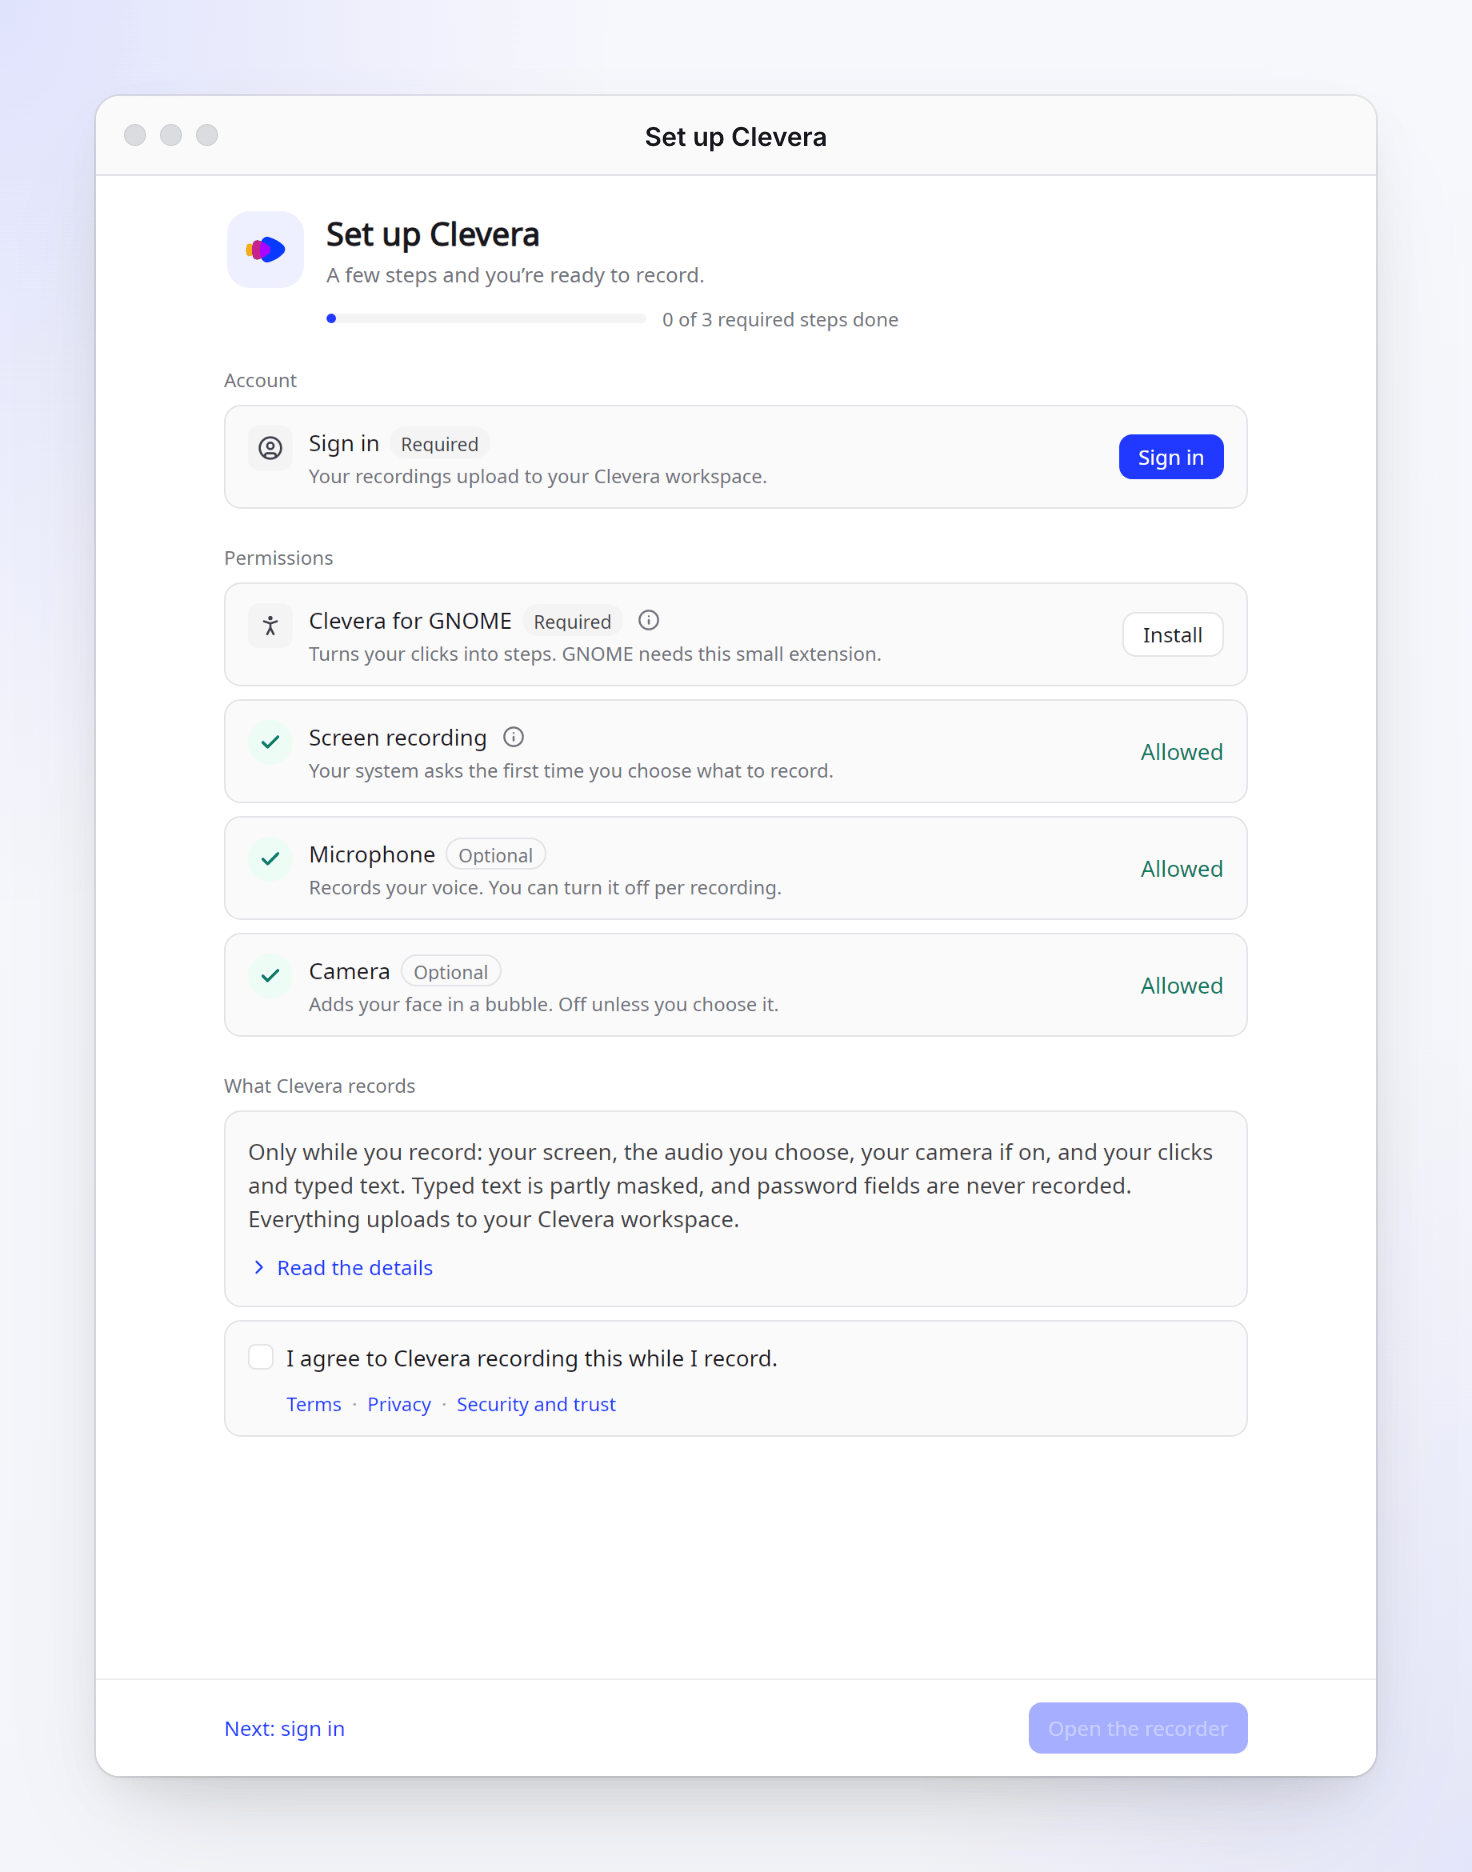
| Row | What you do | Required |
|---|---|---|
| Sign in | Click Sign in and finish in your browser. If your browser asks to open Clevera, choose Open. See Sign in to the desktop app. | Yes |
| Clevera for GNOME | Click Install. This small GNOME Shell extension "turns your clicks into steps" and keeps the recording bar out of your video. GNOME loads it after you log out and back in once: the row says "Installed. Log out and back in to finish." and offers Log out…. | Yes, on GNOME |
| Screen recording | Nothing to do now. "Your system asks the first time you choose what to record." | Yes |
| Microphone, Camera | Allow them if you want your voice or your camera. | Optional |
| Typed text | Click Turn on to add what you type to your guides. Clevera turns on your desktop's accessibility support, which apps use to share what you type. Restart your browser and other open apps once afterwards. | Optional |
| What Clevera records | Read the summary (or Read the details) and tick I agree to Clevera recording this while I record. See Understand what the desktop app captures. | Yes |
When every required step is done, the footer says You're ready to record. Click Open the recorder. The first time, a short narrated tour plays; you can watch it again from Settings → Advanced → Tour.
If you close the window early, the recorder lists what's missing under Finish setting up Clevera. You can run the whole setup again from Settings → Advanced → Setup → Run setup again.
Record
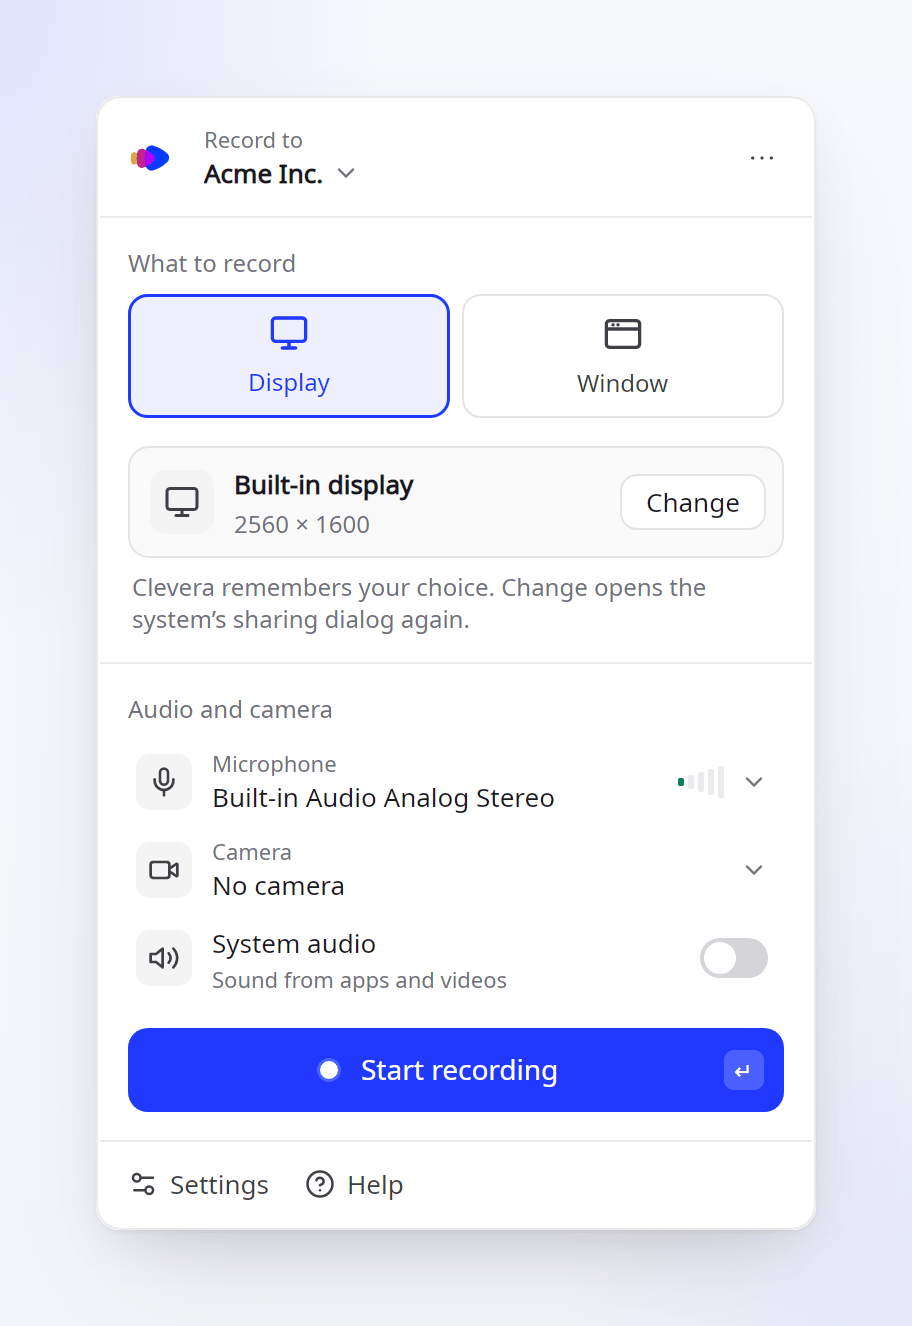
Open the recorder
Open Clevera from your apps list. If your desktop shows tray icons (Ubuntu does), you can also click Clevera's icon and choose New recording, or press a shortcut once you've added them (see Keyboard shortcuts).
Choose where it goes and what to record
Under Record to, pick the workspace. Under What to record, choose Display or Window. The first time, your desktop's own sharing dialog asks which display or window to share. Clevera remembers your choice, so you aren't asked again; click Change to pick another one.
Choose your audio and camera
Under Audio and camera, pick your Microphone and Camera, and turn on System audio for sound from apps and videos. Use headphones when you record system audio, so your microphone doesn't pick up the same sound. See Add your microphone, camera or system audio.
Start recording
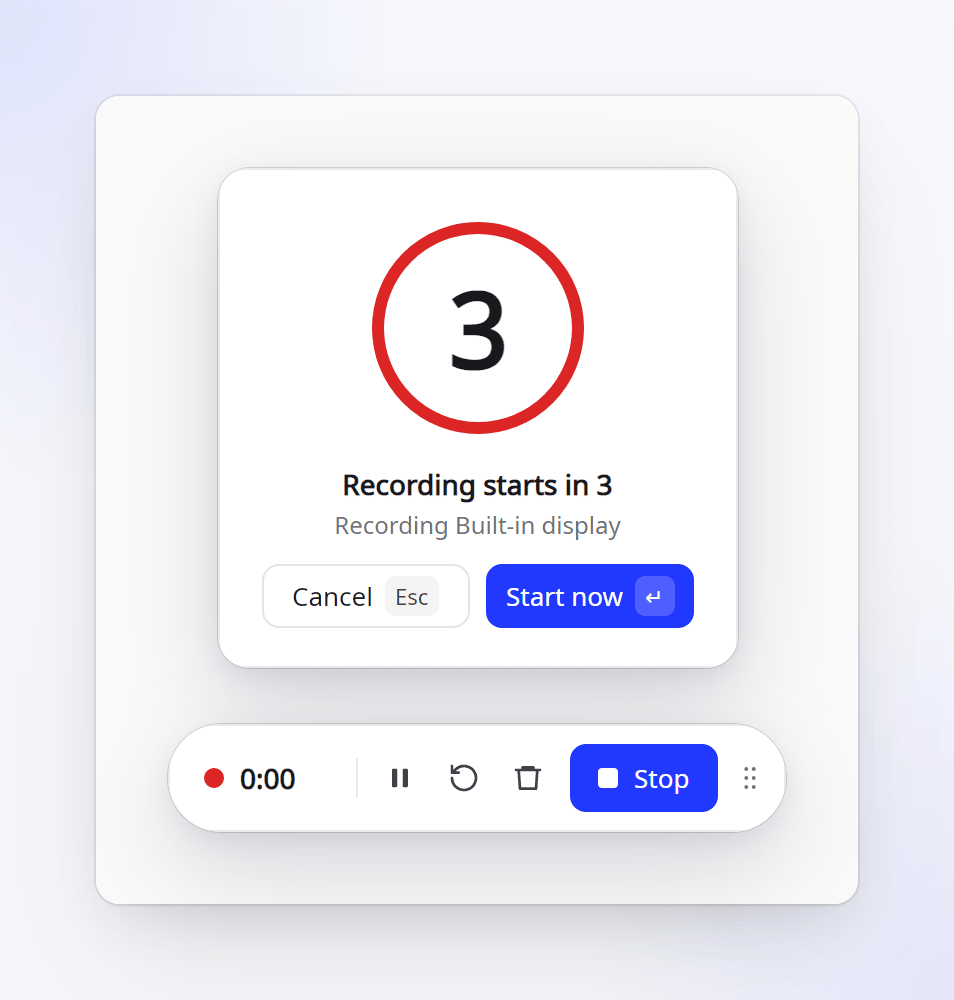
Click Start recording. A countdown shows ("Recording starts in 3"); click Start now to skip it or Cancel to stop.
While you record, the recording bar shows the time and has Pause, Restart…, Delete… and Stop. On GNOME the bar is drawn by Clevera's extension, so it never appears in your video. Recordings stop and upload at 60 minutes, with a warning 5 minutes before. See Pause, restart or cancel a recording.
After you click Stop
Clevera saves the recording on your computer first, then uploads it. A card in the corner of your screen shows the progress and time left. When it says Uploaded, click Open in Clevera to open it in your browser.
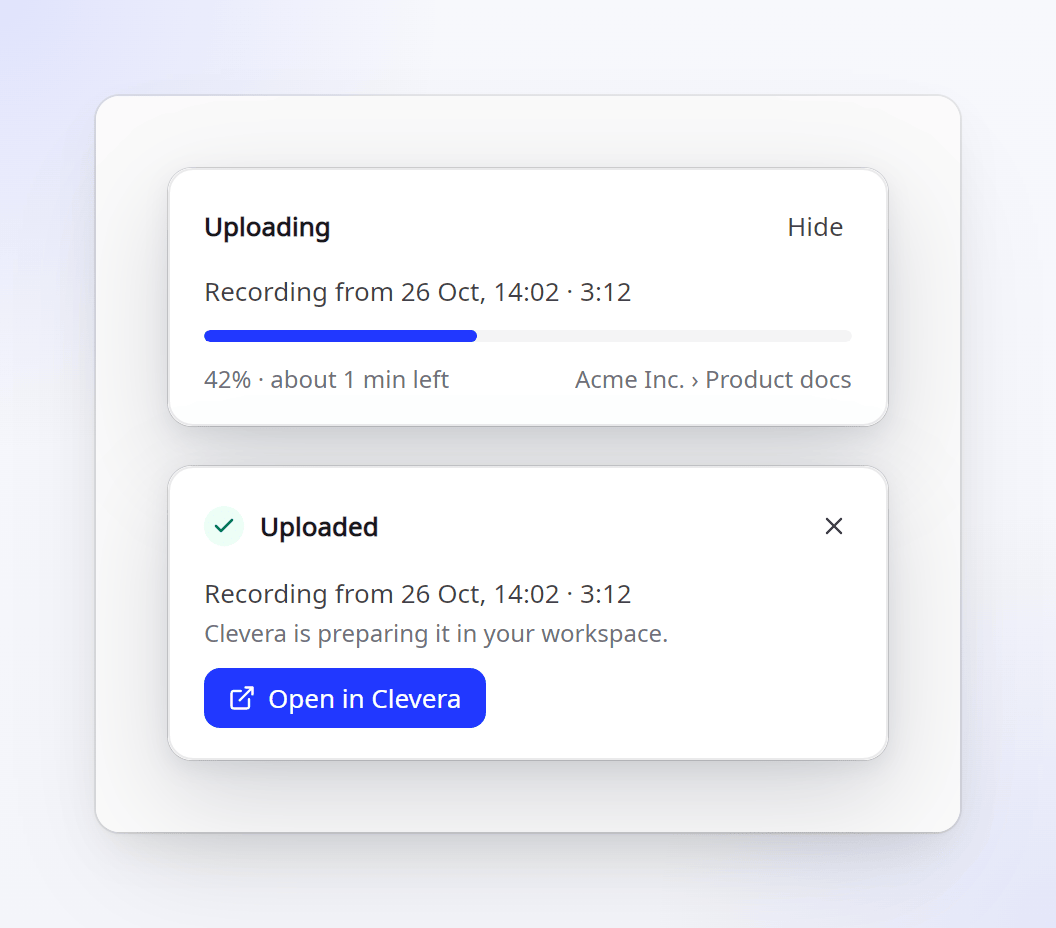
- The local copy is removed only once the upload has finished. If the connection drops, Clevera closes or your computer crashes, the recording is kept and uploads the next time Clevera starts. See Recover a recording that didn't finish uploading.
- Settings → General → Open recordings in Clevera when uploaded is on by default. Turn it off to stay where you are.
- See Find your recording after it uploads.
What Clevera captures on Linux
| What | On Linux |
|---|---|
| Your screen | The display or window you chose in your desktop's sharing dialog |
| Clicks and the app in focus | On GNOME, through the Clevera for GNOME extension. They become the steps of your guide and drive the automatic zooms. |
| Typed text | Only with Typed text turned on. Typed text is partly masked before upload, and password fields are never recorded. On GNOME with Wayland, keys that don't type anything (Enter, shortcuts) can't be captured. |
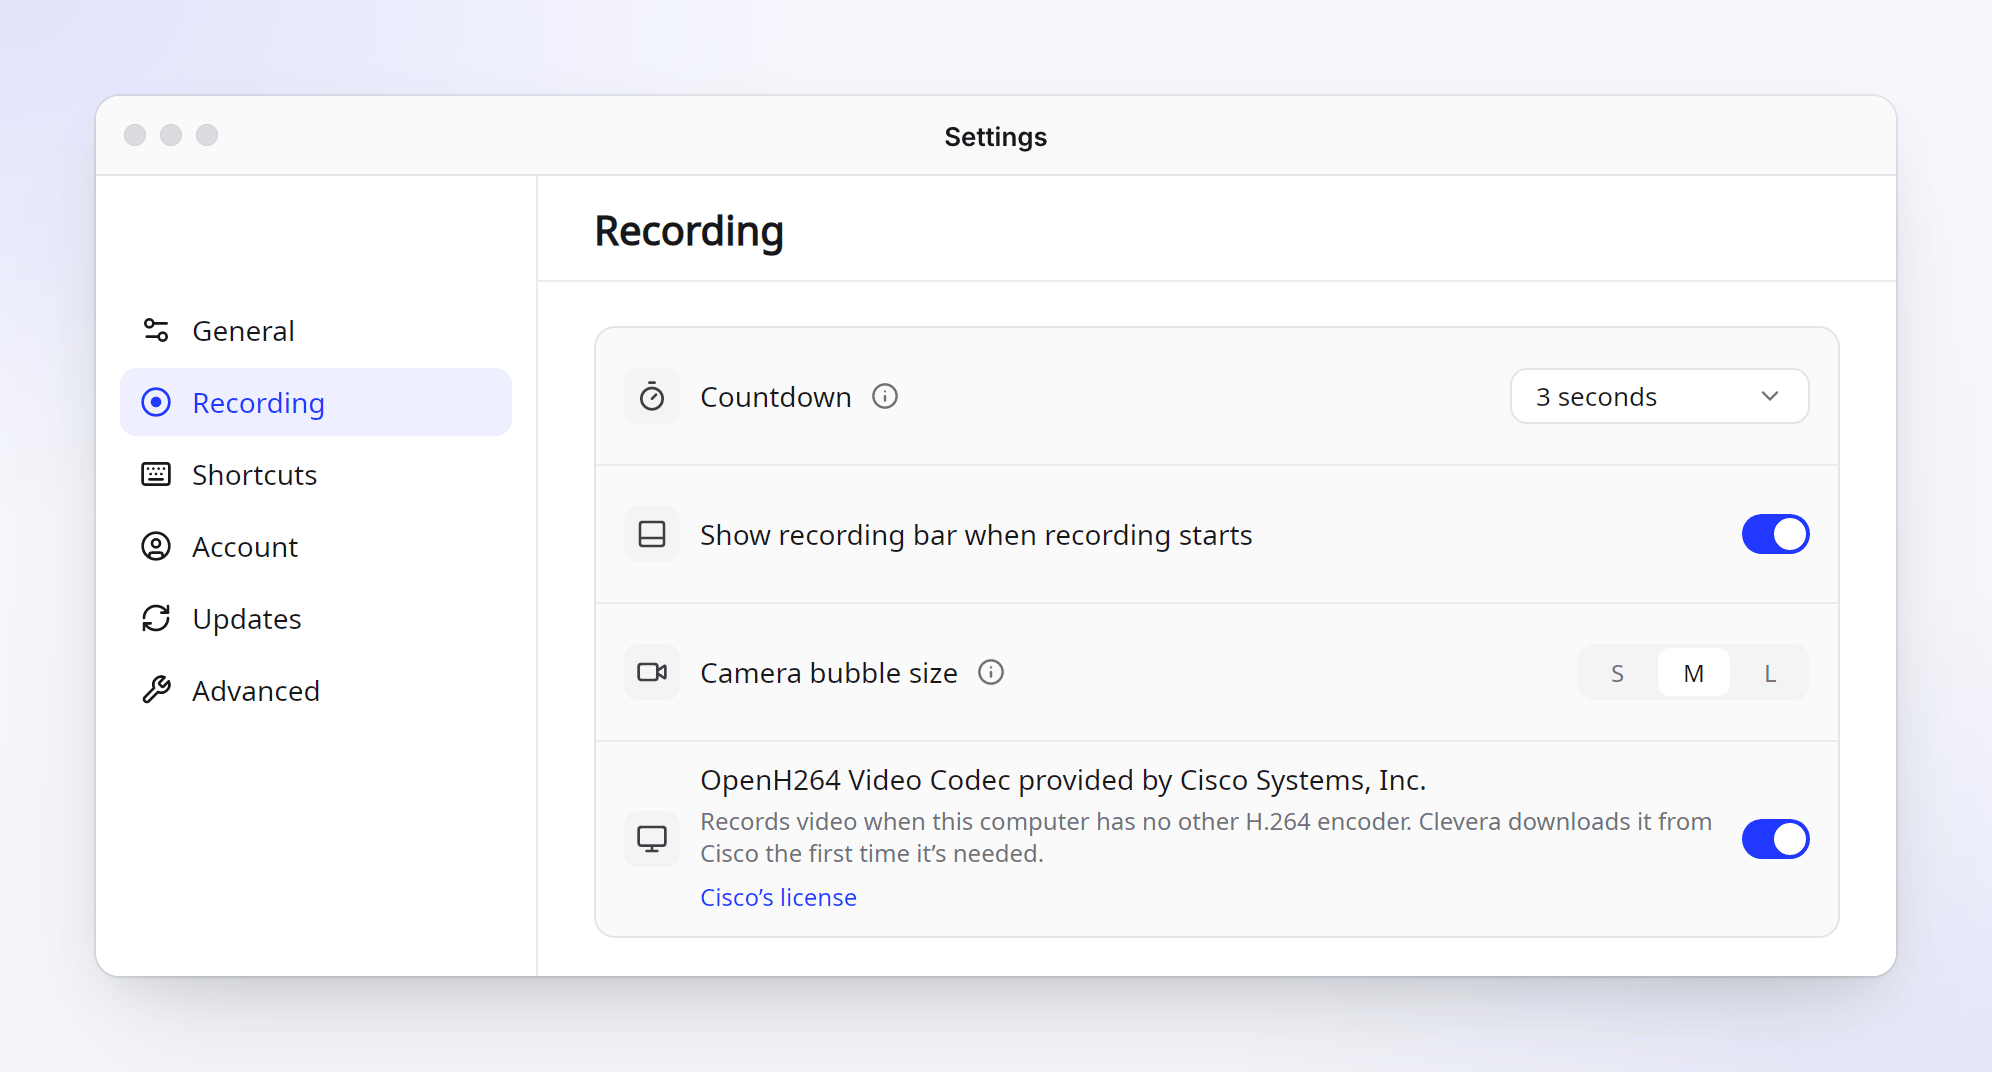
| Microphone, camera, system audio | Only when you turn them on. The camera shows as a bubble you can make small, medium or large (Settings → Recording → Camera bubble size). |
Nothing is collected when you're not recording. See Understand what the desktop app captures.
Video encoding
Clevera records video with your graphics card when it can. When your computer has no other H.264 encoder, Clevera downloads Cisco's OpenH264 codec the first time it's needed. You can turn that off in Settings → Recording.
Keyboard shortcuts
Shortcuts are kept by your desktop, not by Clevera. Open Settings → Shortcuts and click Add shortcuts…. Your desktop asks once before Clevera can use them; after that you change the keys in your desktop's own settings.
| Action | Default |
|---|---|
| Open recorder / start (press again to start recording) | Alt+Shift+R |
| Stop and upload | Alt+Shift+S |
| Pause / resume | Alt+Shift+P |
| Show / hide recording bar | Alt+Shift+H |
| Restart recording, Delete recording | Not set |
Recording shortcuts work only while you record, so they don't take keys from other apps. If your desktop doesn't let apps add shortcuts, Settings → Shortcuts lists a command for each action that you can bind in your desktop's keyboard settings. See Use keyboard shortcuts.
Updates
Clevera checks for updates in the background and installs them when it's idle, never during a recording or an upload. Updates are signed, each processor gets its own build, and if a new version doesn't start, Clevera goes back to the one that worked. Settings → Updates shows your version and has Check now. See Update the desktop app.
Troubleshooting
| What you see | What to do |
|---|---|
| Nothing happens when you double-click the file | Make it executable: Properties → Executable as Program, or chmod +x. |
| "Clevera can't update itself from this folder." | Move the AppImage to a folder in your home, such as ~/Applications, and open it from there. |
| "Installed. Log out and back in to finish." | GNOME loads the extension after you log out and back in once. Click Log out… or log out from the system menu. |
| "Log out and back in so the recording bar stays out of your video." | Same as above: the extension isn't loaded yet. |
| Typed text is missing from a recording | Check that Typed text is on in Settings → Recording, then restart your browser and the app you typed in. |
| "No keyring is running, so you'll need to sign in again the next time Clevera starts." | Your desktop has no password keyring running. Clevera works, but you sign in each time it starts. |
| "You're offline." in the recorder | Connect to the internet. Clevera can't start a recording without a connection. |
To send us details about a problem, use Settings → Advanced → Report a problem. See Report a problem from the desktop app.