

Export or publish an article
Download an article as PDF, Word, HTML, OpenDocument, EPUB or Markdown, share it with a link, embed it on your site, Notion or Confluence, or publish it straight to your help center, docs or wiki.
When your article is ready you can download it as a file, share a link to it, embed it on your own site, or publish it straight into your help center, docs or wiki. Everything starts from the Share button in the editor's top bar, and none of it uses credits.
Before you start
- The article must be generated. Until then the download panel says "Generate the article first, then download it here."
- Publishing to your tools is part of the Pro plan and above. Downloads, links and embeds work on every plan.
- Shares and downloads use the language you have open in the editor. Switch language in the top bar first to share a translation.
Share options at a glance
Click Share. The modal has four tabs:
| Tab | What it does |
|---|---|
| Link | A public link to the article, and who can open it |
| Embed | Code or a link to put the article on another site |
| Download | The article as a file |
| Publish | Sends the article to a connected tool such as Notion or Confluence |
Download the article
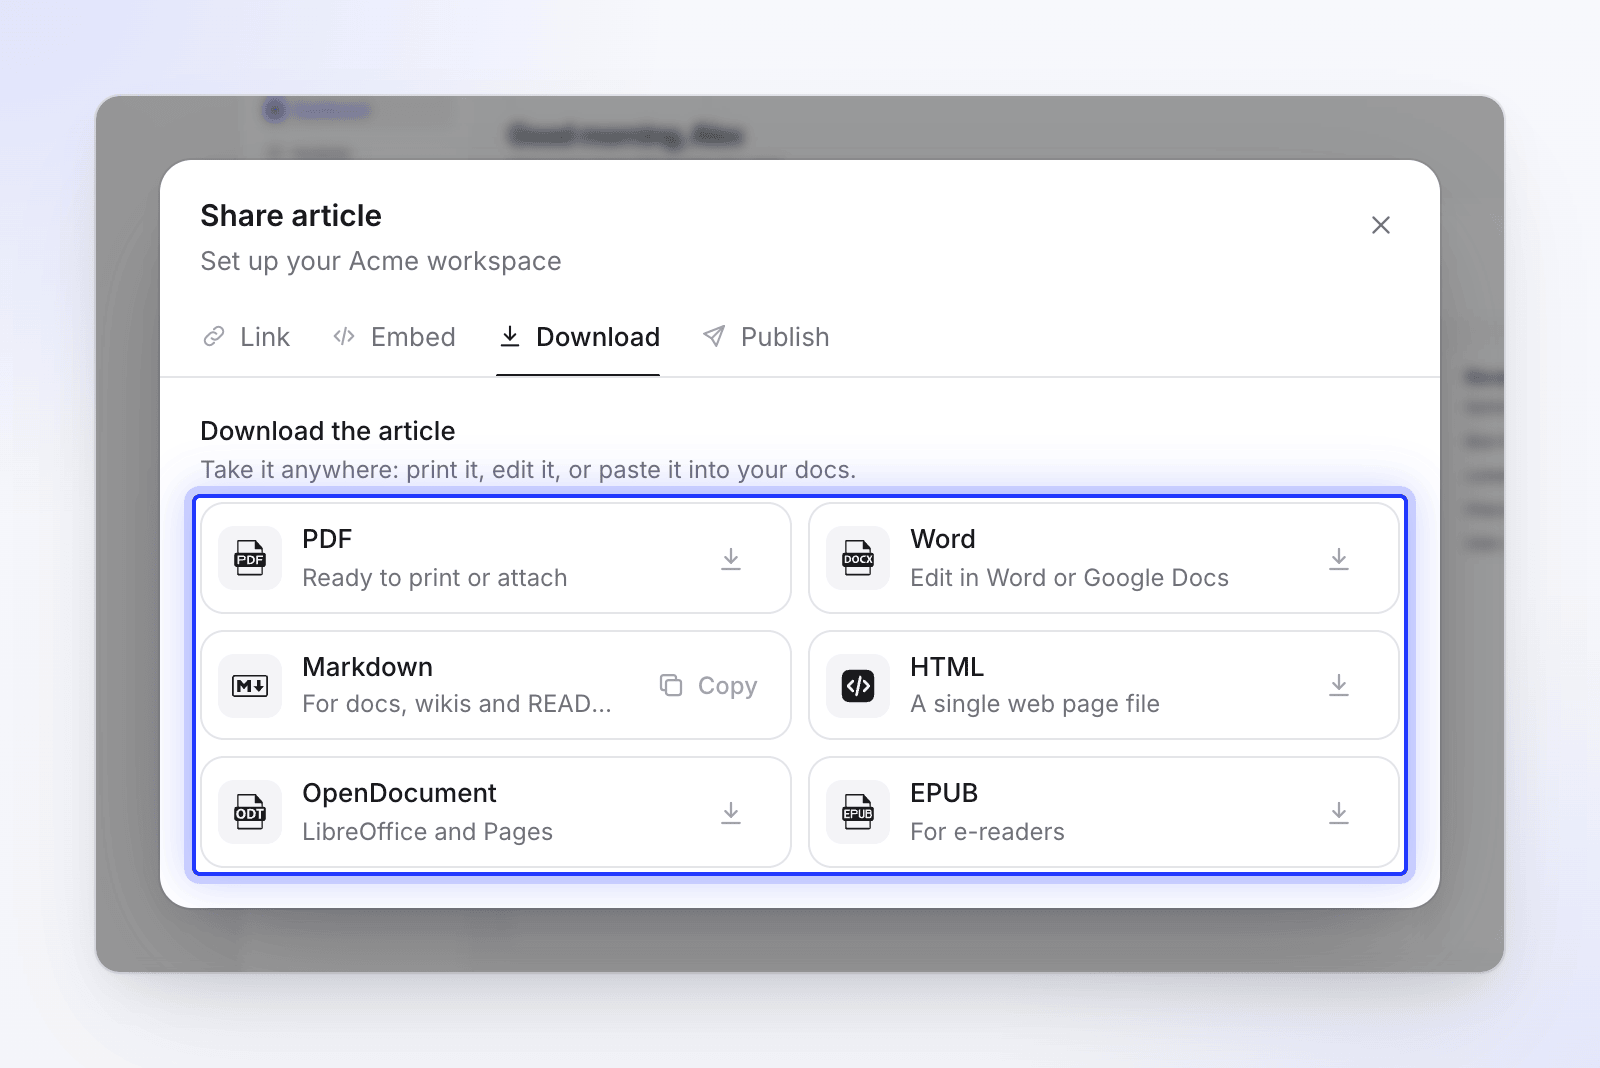
Open the Download tab. Under Download the article ("Take it anywhere: print it, edit it, or paste it into your docs.") pick a format:
| Format | Best for | What you get |
|---|---|---|
| "Ready to print or attach" | A download | |
| Word | "Edit in Word or Google Docs" | A download |
| Markdown | "For docs, wikis and READMEs" | Copied to your clipboard; the button shows Copied |
| HTML | "A single web page file" | A download |
| OpenDocument | "LibreOffice and Pages" | A download |
| EPUB | "For e-readers" | A download |
Each button shows Preparing while the file is built.
Share a link
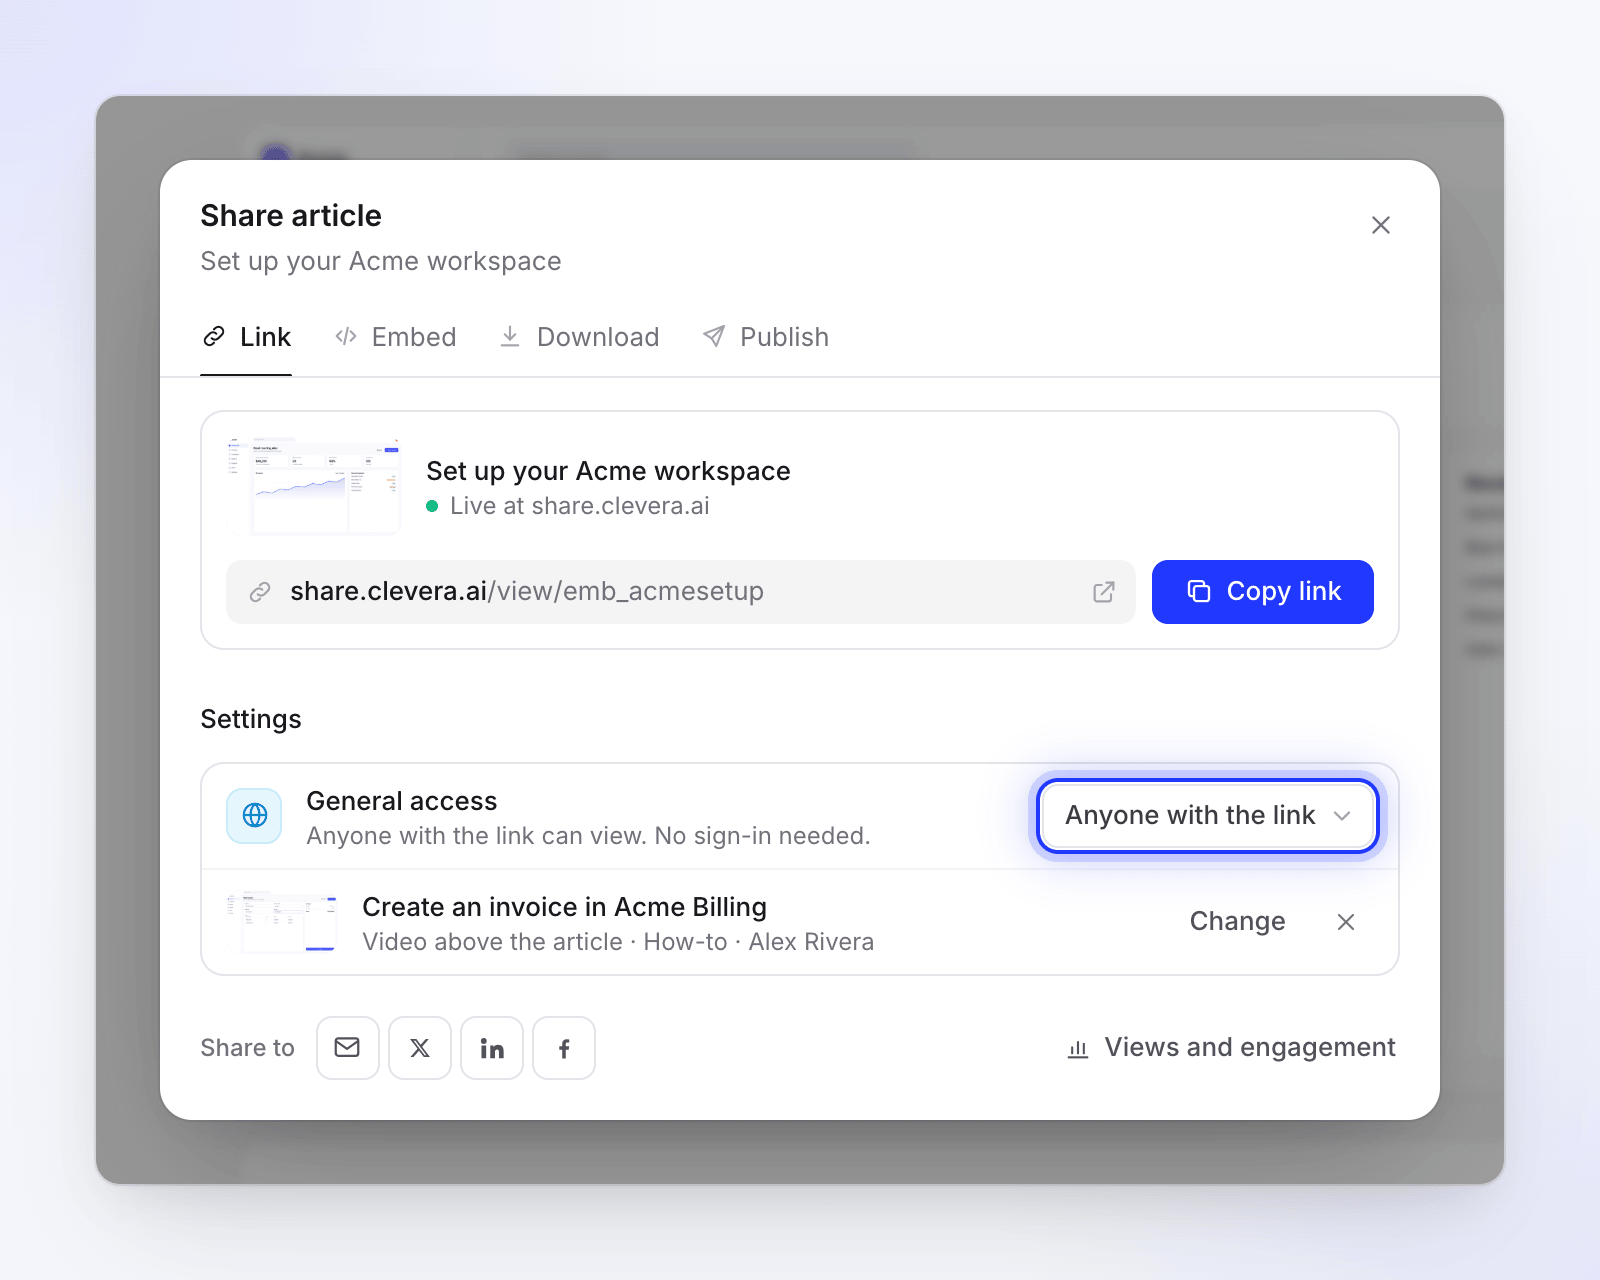
On the Link tab, copy the short link. General access decides who can open it:
| Setting | Who can open it |
|---|---|
| Anyone with the link | "Anyone on the internet with the link can view. No sign-in." |
| Restricted | "Only your workspace can open this article in Clevera. The link and embeds stop working." |
Turning the link off asks first: "Turn the link off?" / "The link and every embed stop working until you turn it back on. The link itself stays the same." Choose Turn off or Keep it on. To share again, click Turn on link.
The shared page shows the article with its title, your workspace name, an In this article list of sections, a light and dark mode switch and, for translated articles, a language menu. Viewers don't need a Clevera account. Opens of the shared page and embeds count in analytics.
Show a video above the article
Under the link settings, Video above the article lets you "Play a video above the article on the shared page and in embeds." Click Add video and pick one: From the same recording comes first, then your recent videos, or search the workspace. Use Change or the remove button to update it. See Attach a companion article to a shared video for the same idea from the video's side.
Embed the article
Open the Embed tab
Click Share → Embed. A scaled preview shows how the embed will look.
Set the options
Option Choices Default Article theme Light, Dark Light Frame height 300–2,000 px 800 px Title and details On or off; shows over the video player, only when a video is above the article On Chapters On or off; chapter titles in the player's timeline, only when a video is above the article On Pick how to embed
Under Embed with, choose:
- HTML code: "Paste into any page, or a Custom HTML or Embed block in WordPress, Webflow or Framer."
- Link: "Paste into Notion, Confluence or any tool that turns a link into an embed."
Copy and paste
Click Copy code or Copy link and paste it into your site or tool.
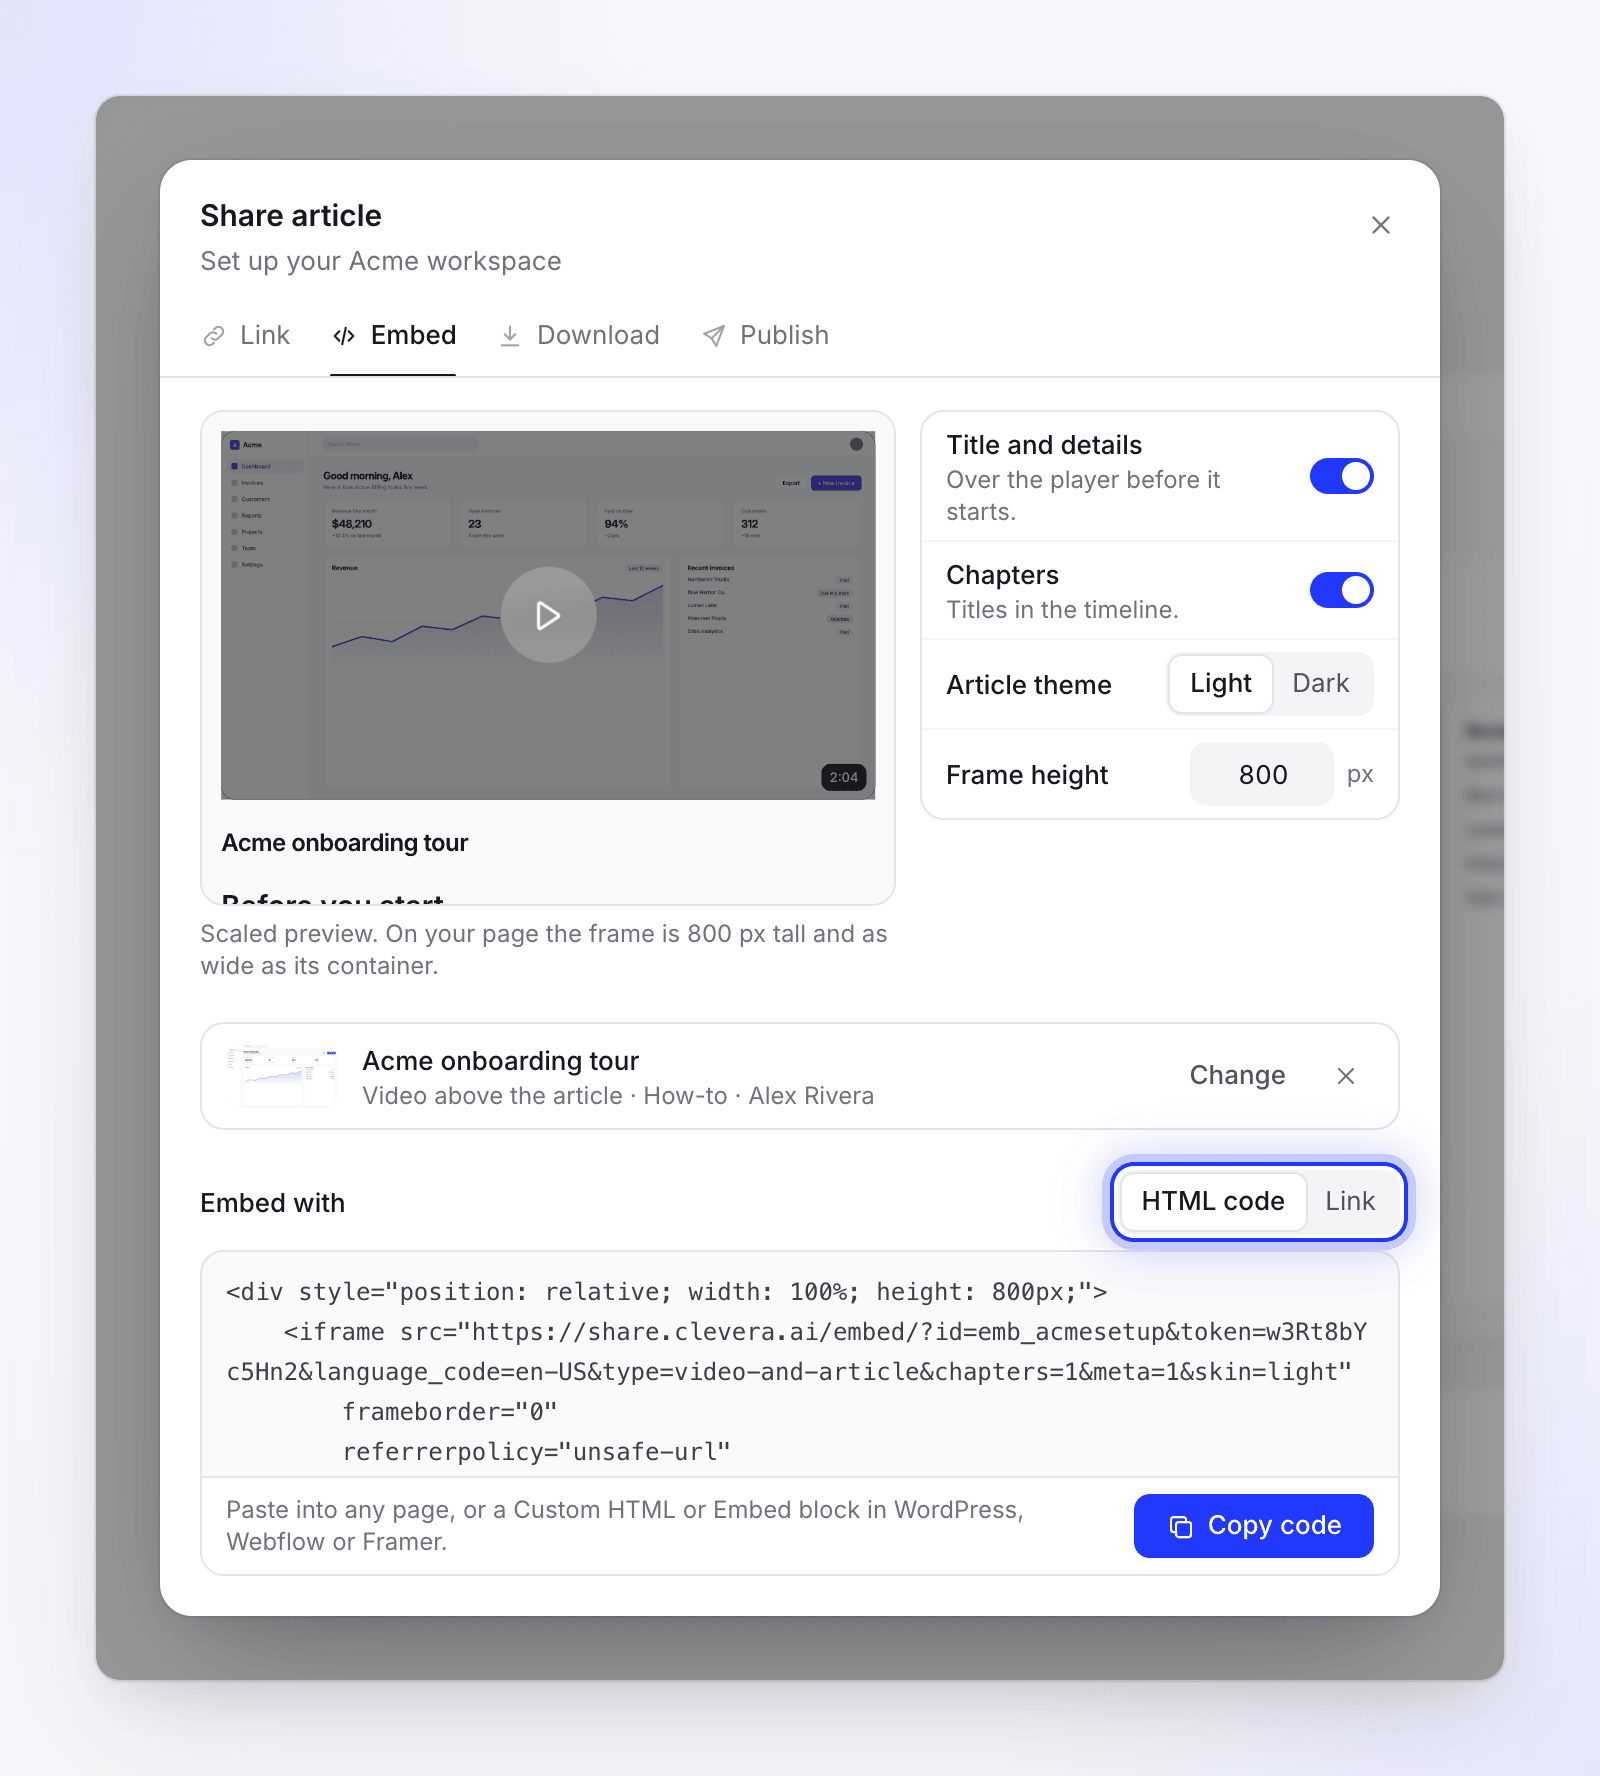
The HTML code includes a small script that grows the frame to the article's full height, so it reads as part of your page. Where a site removes scripts, the frame keeps the height you set and the article scrolls inside it.
Publish to your help center or docs
Publishing sends a copy of the article into another tool. Later edits in Clevera don't update it automatically; publish again to update.
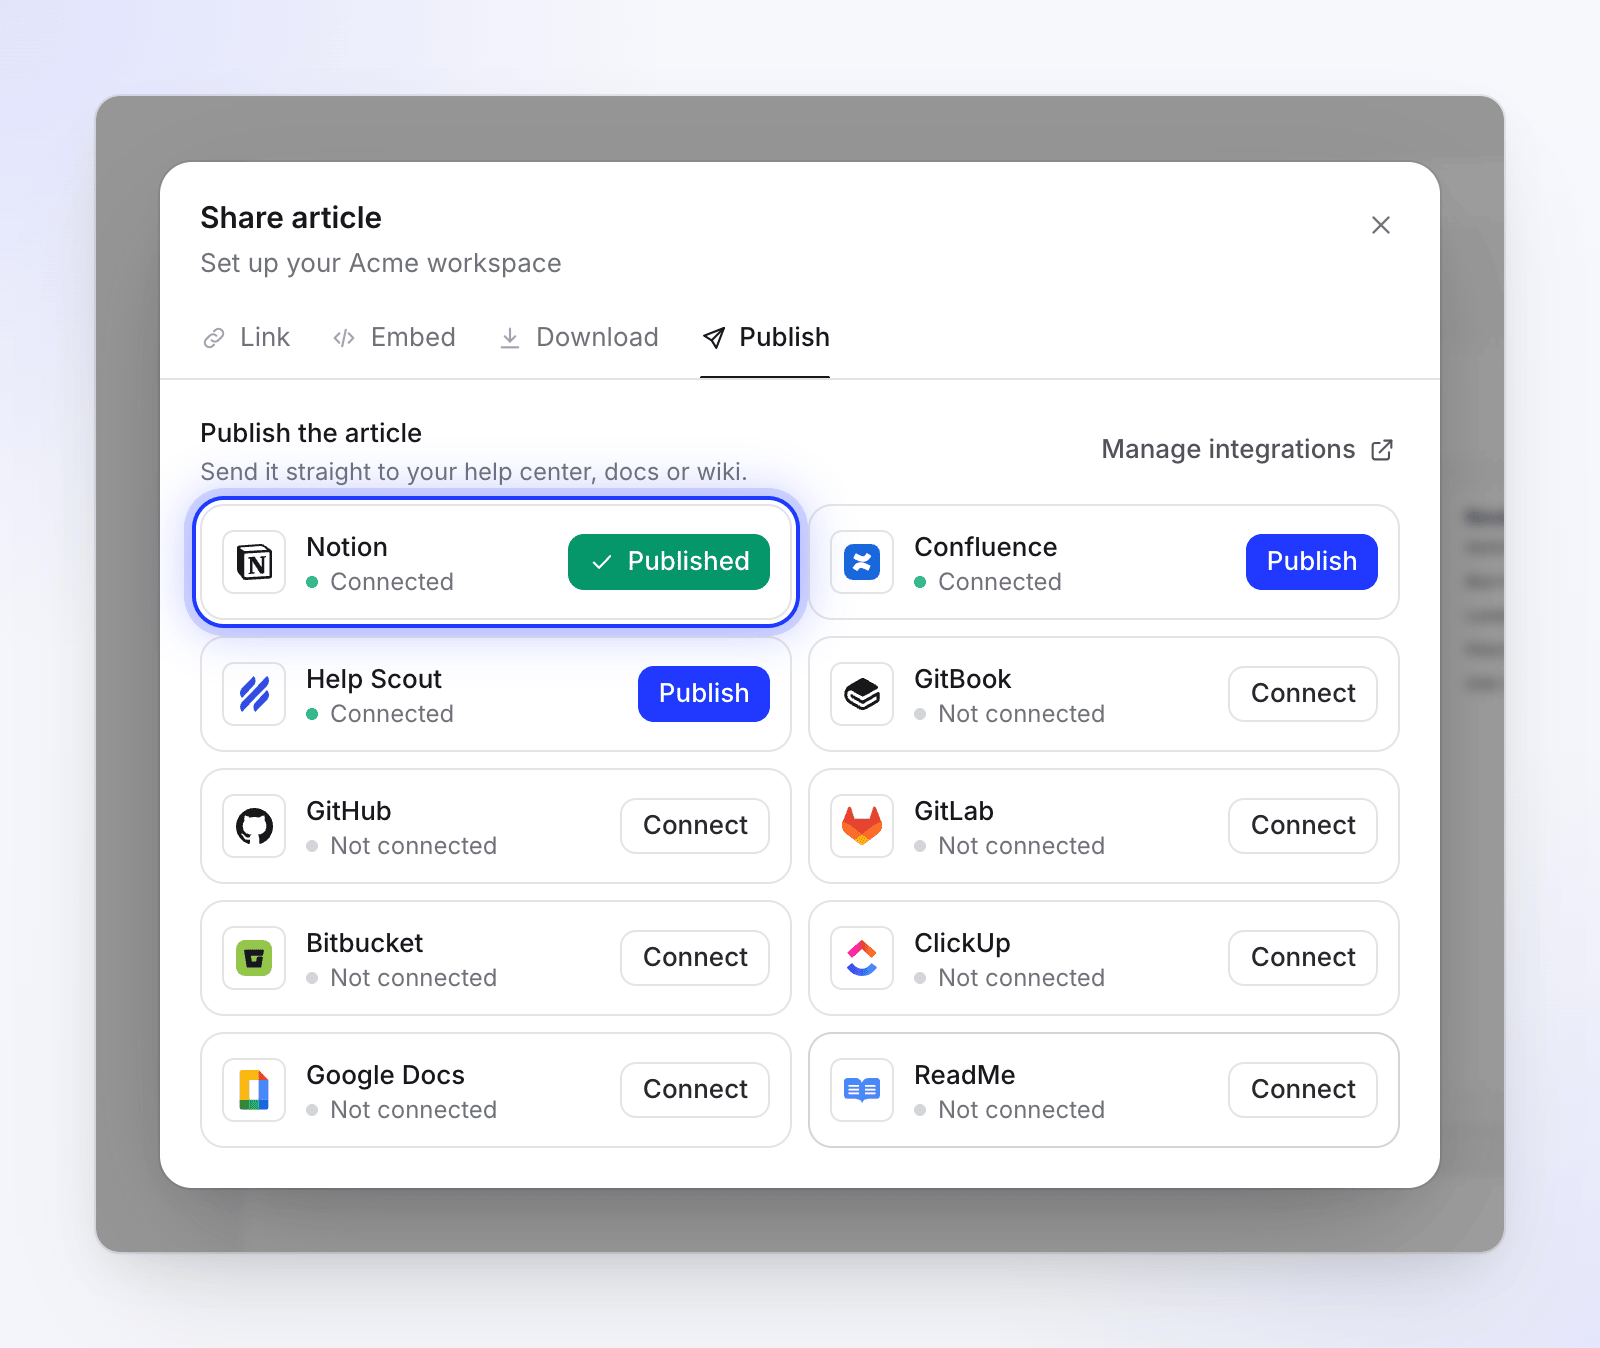
| Destination | Where it goes |
|---|---|
| Notion, Confluence, ClickUp, Google Docs, GitBook | A page or space you pick |
| Help Scout | A site, then a category |
| ReadMe | A project, then a guide category ("The article goes in the Guides section, under this category.") |
| GitHub, GitLab, Bitbucket | An account, then a repository |
Connect the tool
An owner or Administrator connects tools once for the workspace: open the workspace menu in the sidebar and choose Integrations. Other members see "Only team owners and admins can connect or disconnect integrations. You can still publish to connected ones from the editor."
Open the Publish tab
In the editor, click Share → Publish. Under Publish the article ("Send it straight to your help center, docs or wiki.") each tool shows Connect, Publish or Published. Manage integrations opens the workspace's integrations in a new tab.
Choose where it goes
Click Publish next to a tool, then "Choose where the article goes." Pick the site, category, page or repository and click Publish. You see "Checking for an existing article…" and then "Publishing…".
Decide about an existing article
If an article with the same title is already there you see "An article with this title already exists in Notion." (with the tool's name) and View it. Choose:
Option What happens Publish as a new article "Keep the existing one and add this under a new title." Enter a New title, then Publish copy. Replace the existing article "Update it with this version." Click Replace. 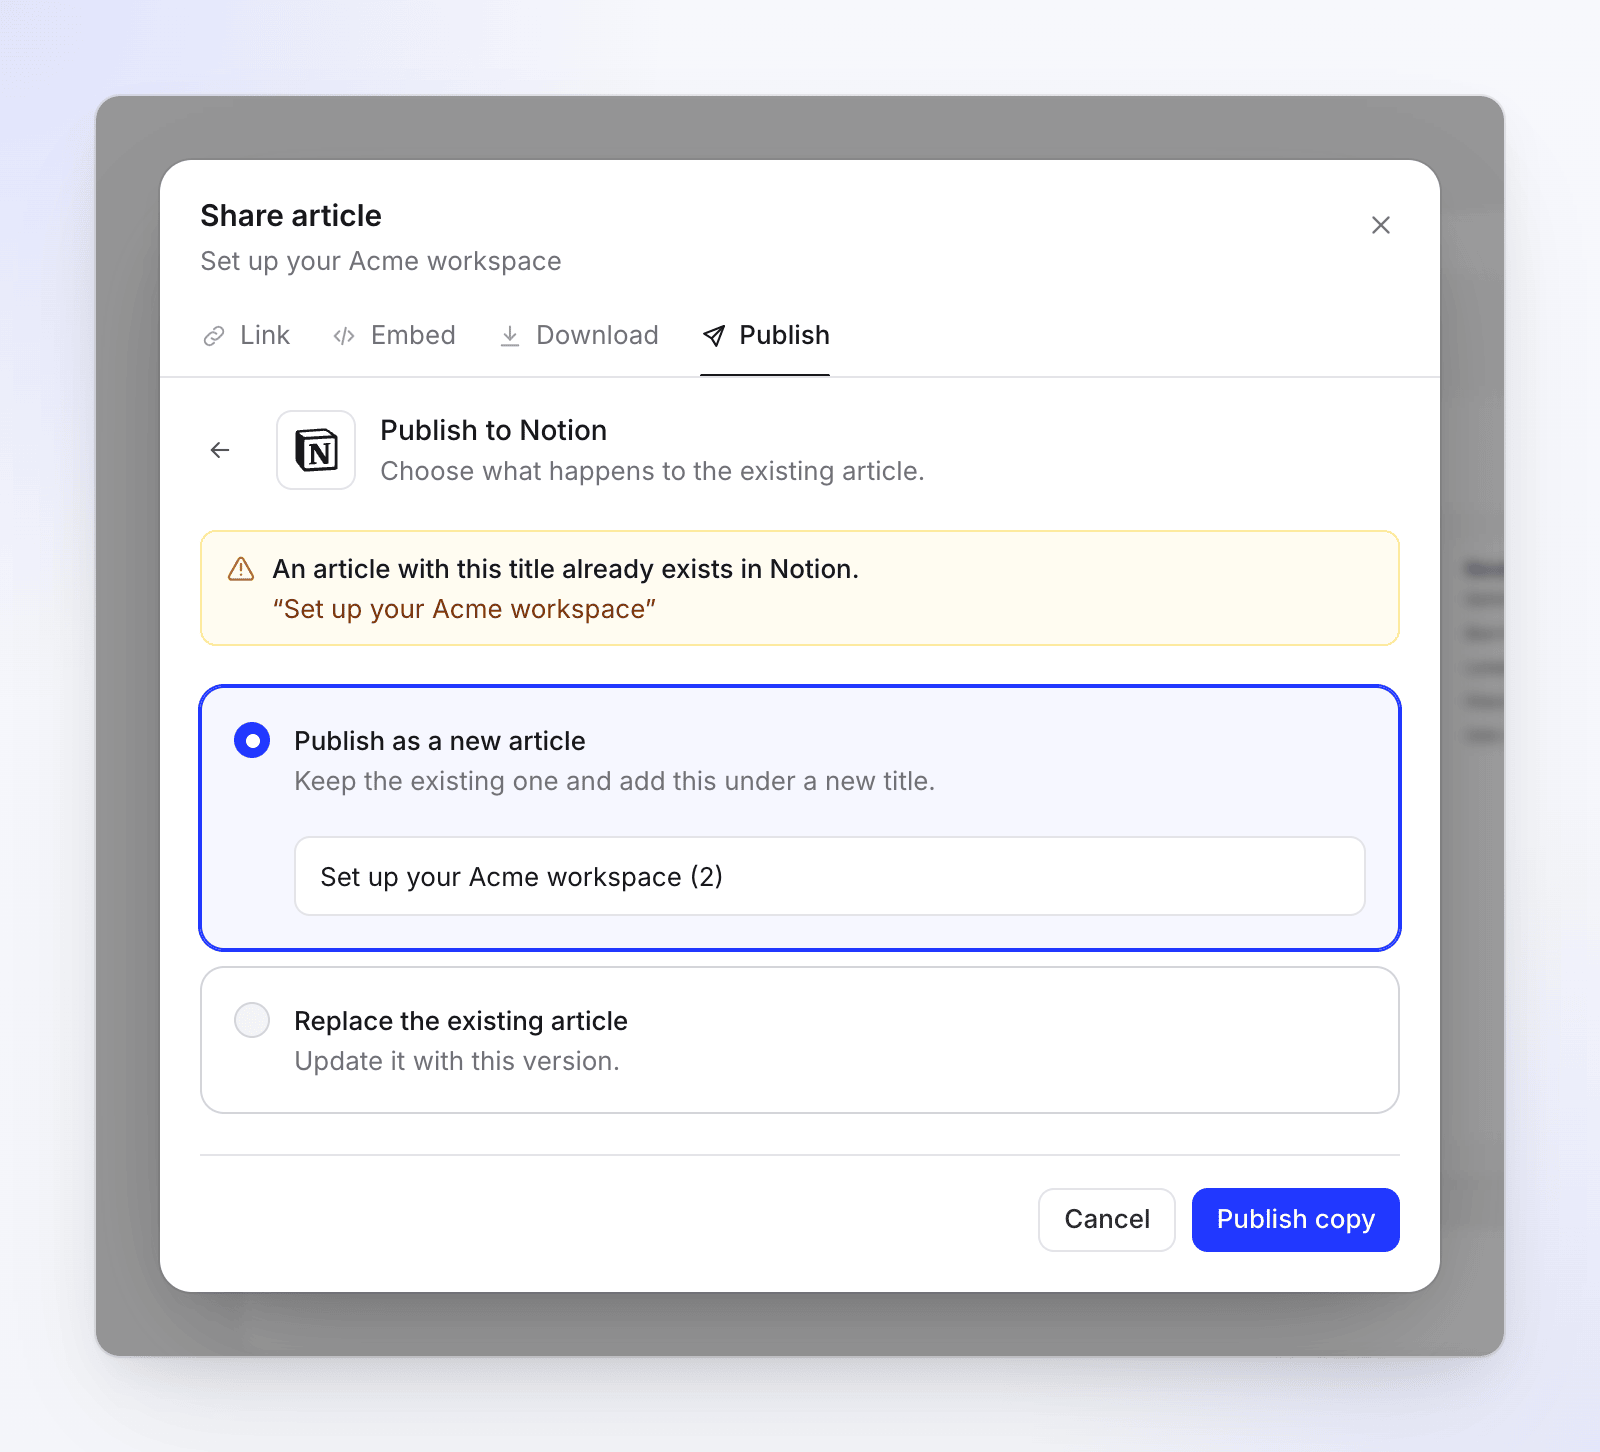
Troubleshooting
| You see | What to do |
|---|---|
| "Generate the article first, then download it here." | Wait for the article to finish, or generate it. |
| "Connect Notion first." (with your tool's name) | Ask an owner or Administrator to connect it under Integrations. |
| "Your Notion connection expired. Reconnect it to publish." | Reconnect the tool under Integrations. |
| "Couldn’t load your Notion locations" | Click Try again. Check that the connected account can see the place you want. |
| "Couldn’t publish to Notion. Try again." | Try again. If it keeps failing, reconnect the tool. |
| "Too many publish attempts. Please wait a moment before trying again." | Wait a minute, then publish again. |
| "Couldn’t copy. Select the link and copy it manually." | Your browser blocked the clipboard. Select the text and copy it yourself. |
| The embed is cut off | Raise Frame height, or use the HTML code with its script so the frame grows by itself. |