

Make your first social clip
Make a short, motion-designed social clip from your website: pick a type, research the site, write a short brief, check the settings and effort, then follow the AI director while it builds every scene.
A social clip is a short, motion-designed video that the AI director builds from scratch: it writes every scene, records the voice-over, picks music and sound effects, watches its own work and fixes it. This walkthrough makes one from your website, start to finish, so you know what each step does before you make your own.
Before you start
- A paid plan. Social clips are part of the paid plans. On the Free plan each social type shows a Paid plans tag and the section reads "Social clips are part of the paid plans. Upgrade to make them." See Choose a plan.
- Credits. A clip at the default High effort is typically 50–120 credits, plus what the website research uses. The range for your clip shows beside Generate before you start.
- A public website, such as your homepage or a pricing page. The AI can't sign in to a site. For pages behind a login, use Record with AI or upload screenshots instead.
You don't need a screen recording. A social clip can start from a link, pictures, a PDF, a short video or only a description. If you do add one, see When your clip uses a screen recording.
Make the clip
Pick a type in the Create gallery
Click Create and open Social & promo (it carries a Beta tag). Each card is one kind of clip and plays a muted preview when you hover it. For a first clip, Feature spotlight ("Name one capability, show the proof, ask for the click.") or Product tour ("Hero hook, three feature beats, call to action.") are good choices.
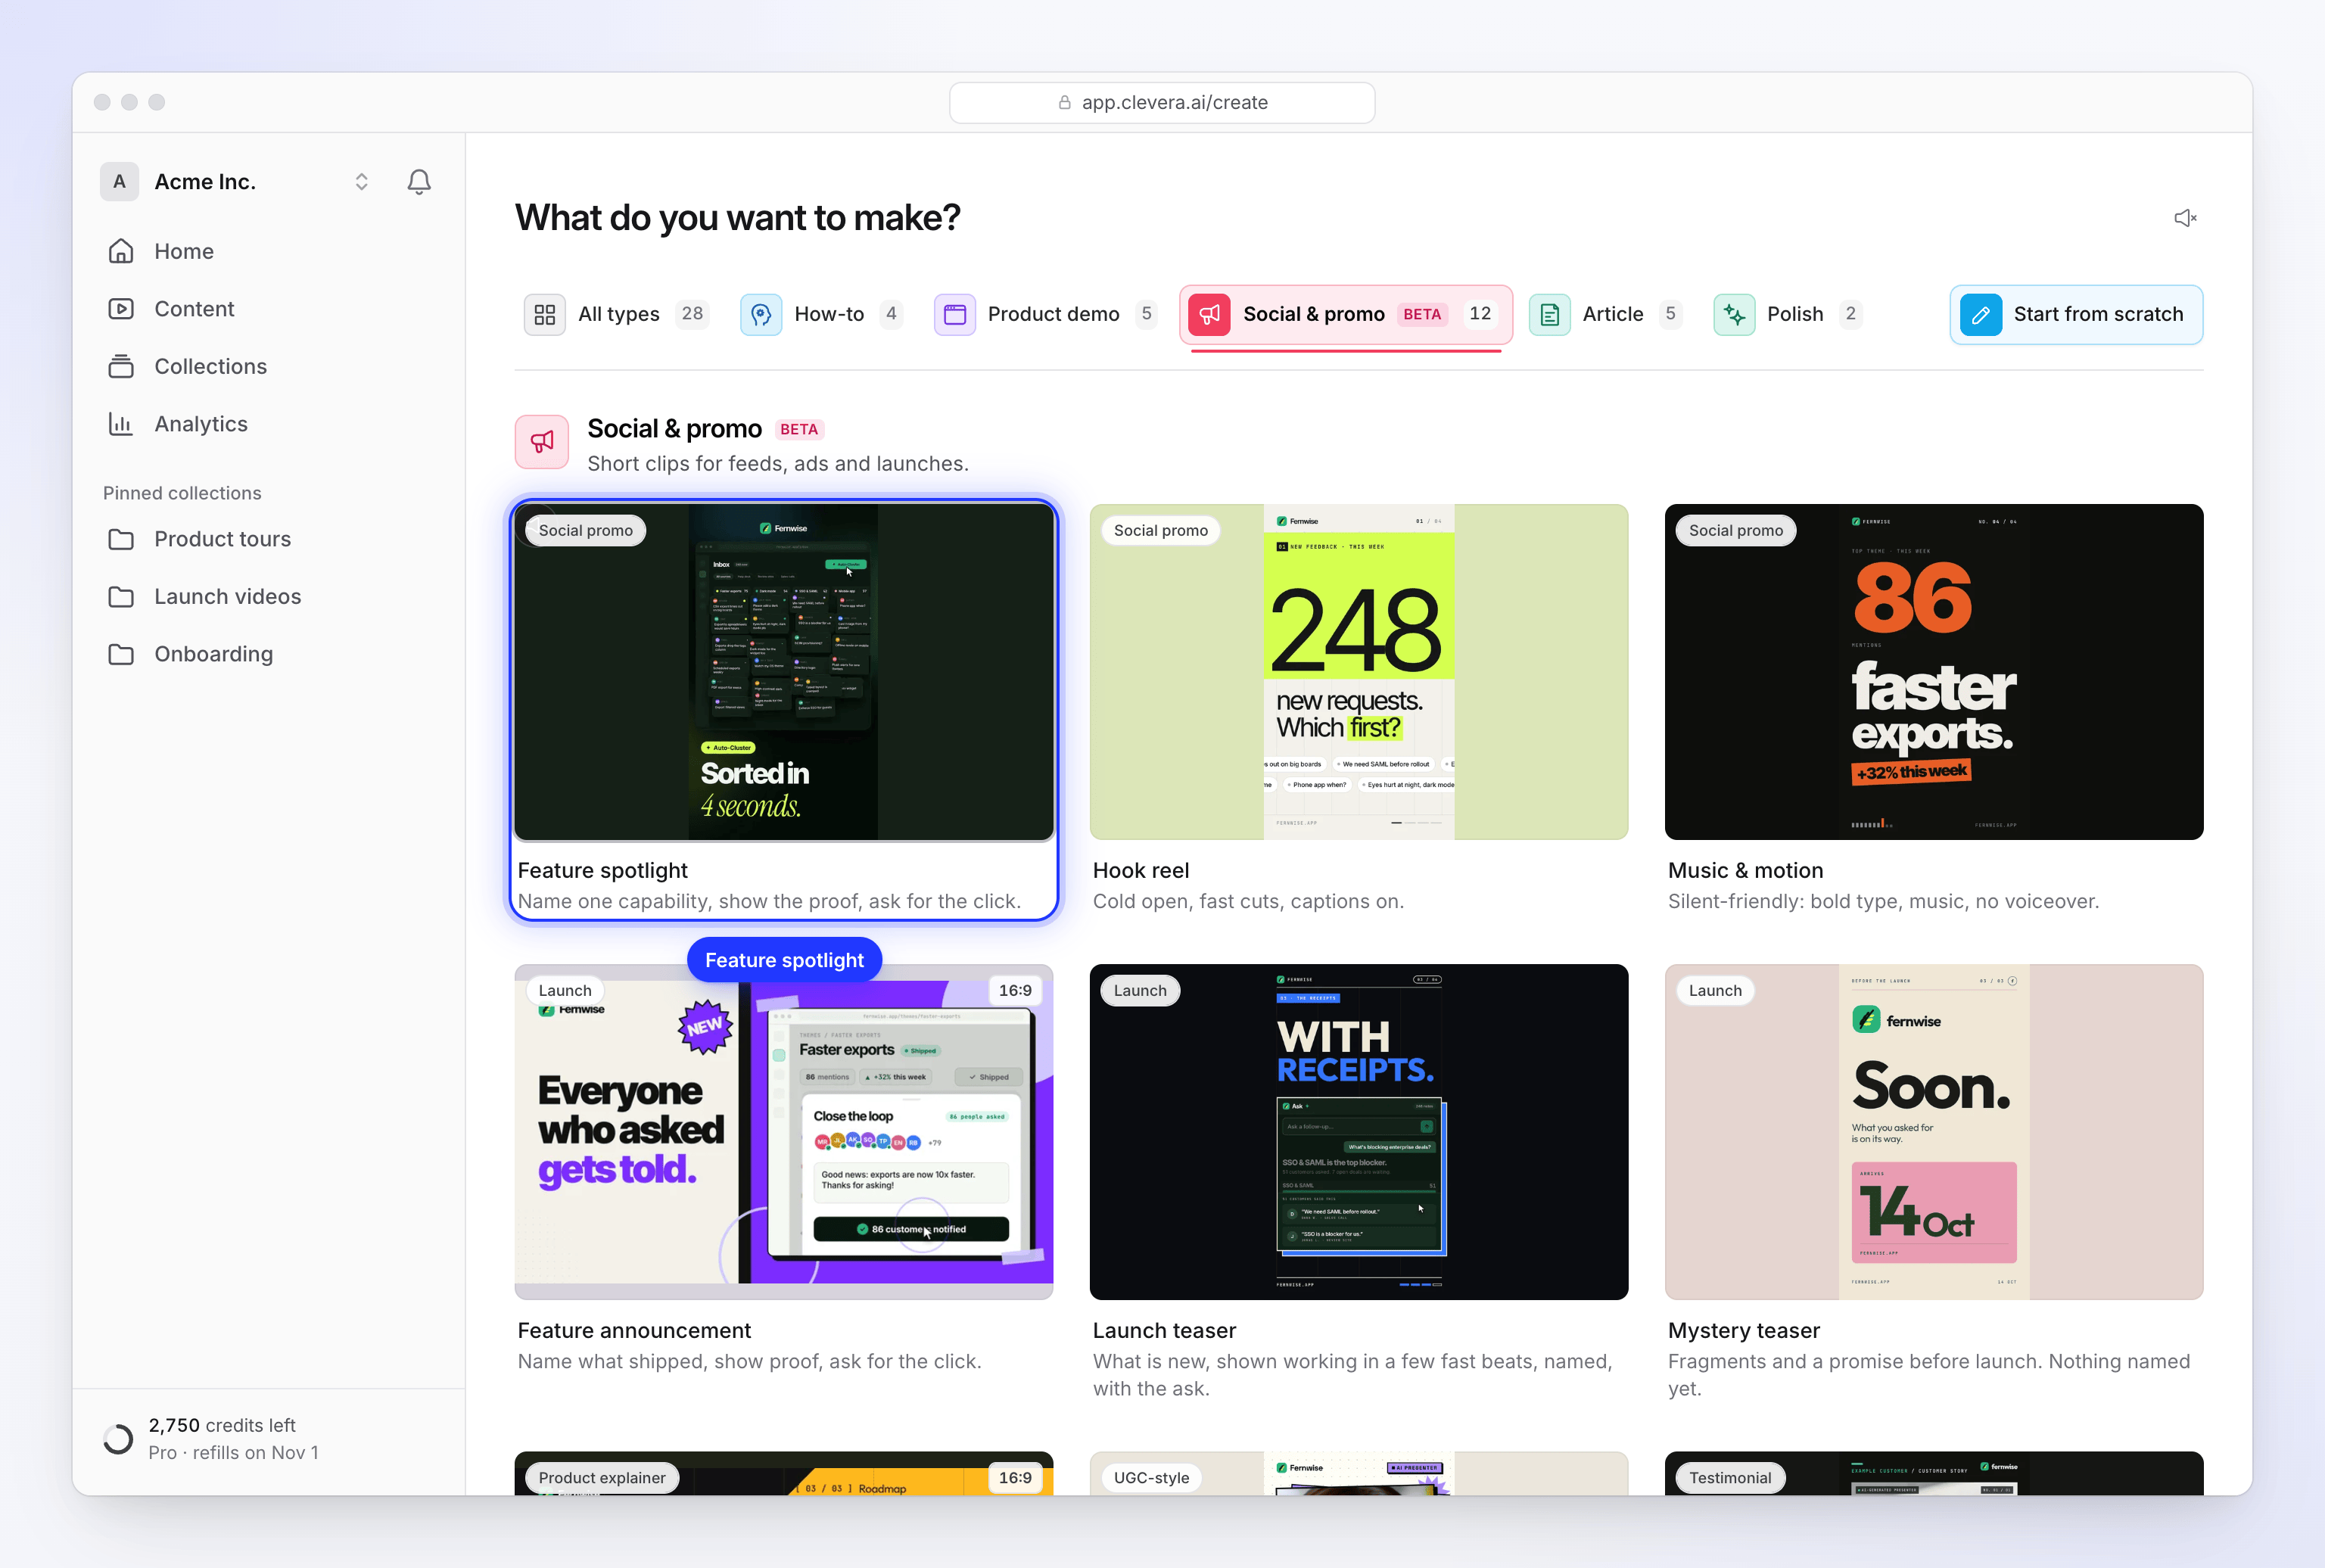
Each card is one kind of clip. Hover to preview it. Clicking a card opens the Compose page with that type's defaults already set: the shape, the length, whether it has a voice-over and whether captions are on. Not sure which type fits? See Choose a social clip type.
Research your website
Click + under the brief box and choose Research a website (in the With AI group, marked "AI · credits"). Enter the address, for example
example.com/pricing. A bareexample.comis fine; Clevera addshttps://for you.In What should we look at? (optional, up to 600 characters) tell the AI where to look, for example "Open the Pricing page and the reviews tab". Leave it empty and the AI looks for what the product is, its features, its pricing or offer, and customer proof.
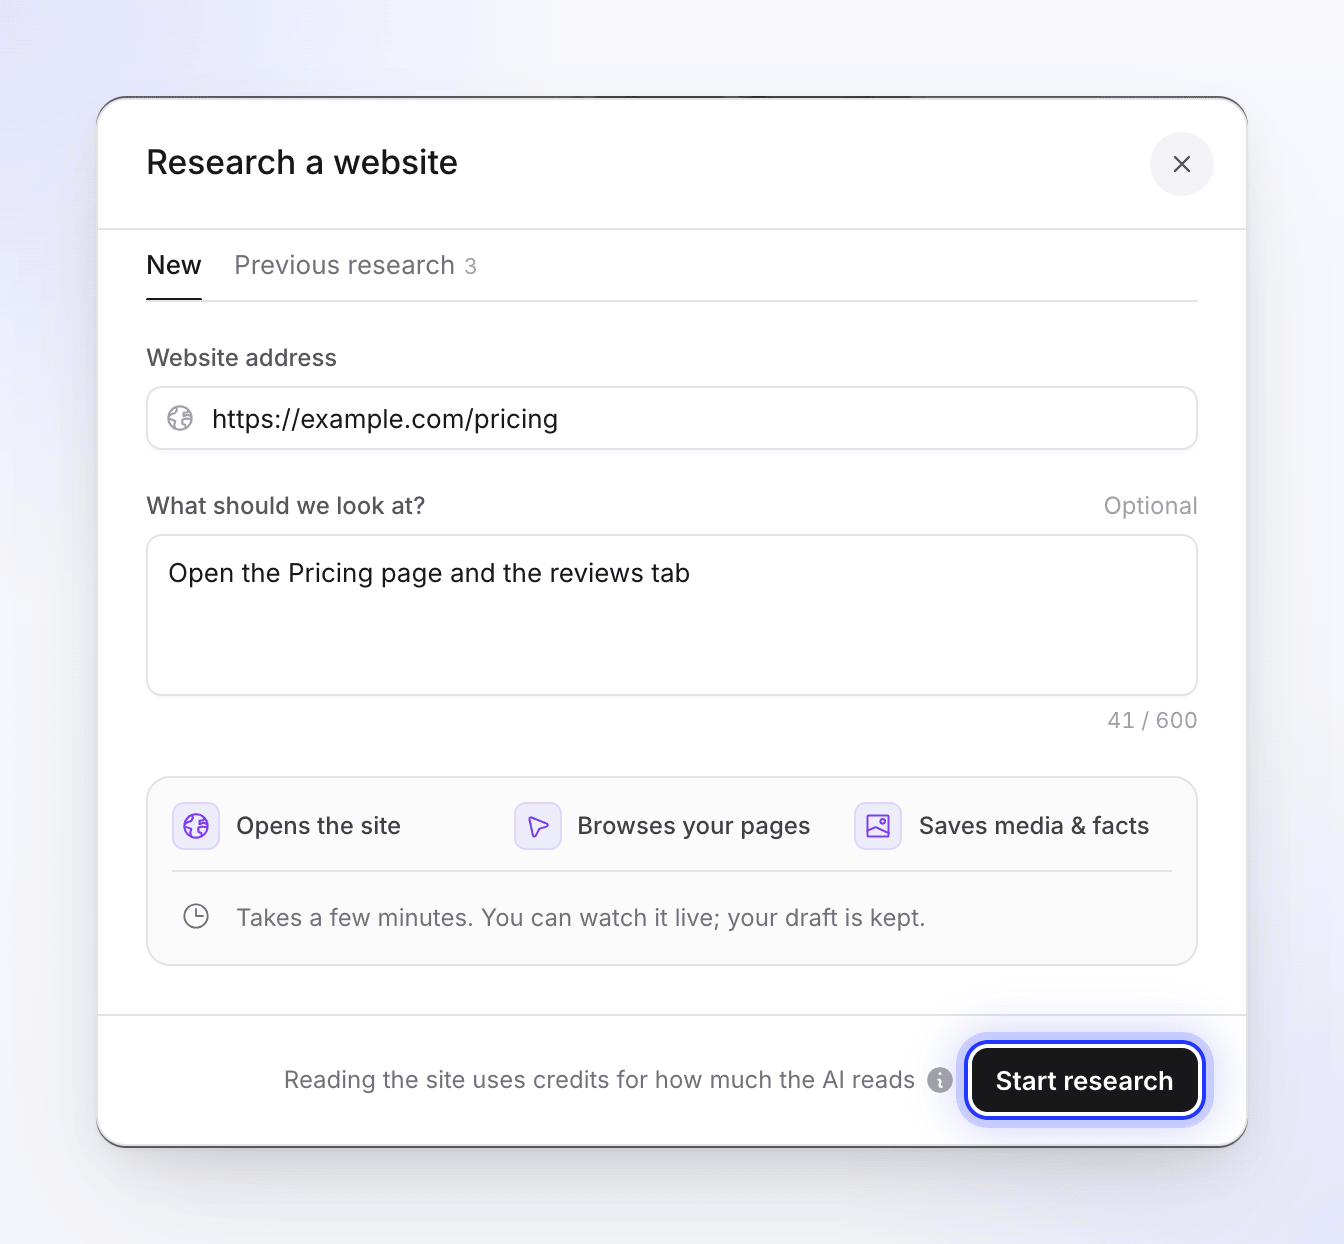
Point the AI at the pages that matter, then start the research. Click Start research. The AI opens the site in a cloud browser, browses your pages and saves the pictures, videos and facts it finds. It takes a few minutes, you can watch it live, and your draft is kept. See Research a website for a social clip.
Write a short brief
In the brief box, say what the clip is for, who it's for and what viewers should do at the end. Two or three sentences is enough when you've attached a website:
Show how Acme's bulk-edit tool saves a support team an hour a day. Aim it at support leads who live in spreadsheets. End with "Start free at example.com".
With nothing attached, the brief has to carry every fact, so it needs at least 100 characters. See Write a brief for a social clip.
Check the settings
The pills under the brief show what the clip will be. Each one starts on the type's default, and you only change what you care about:
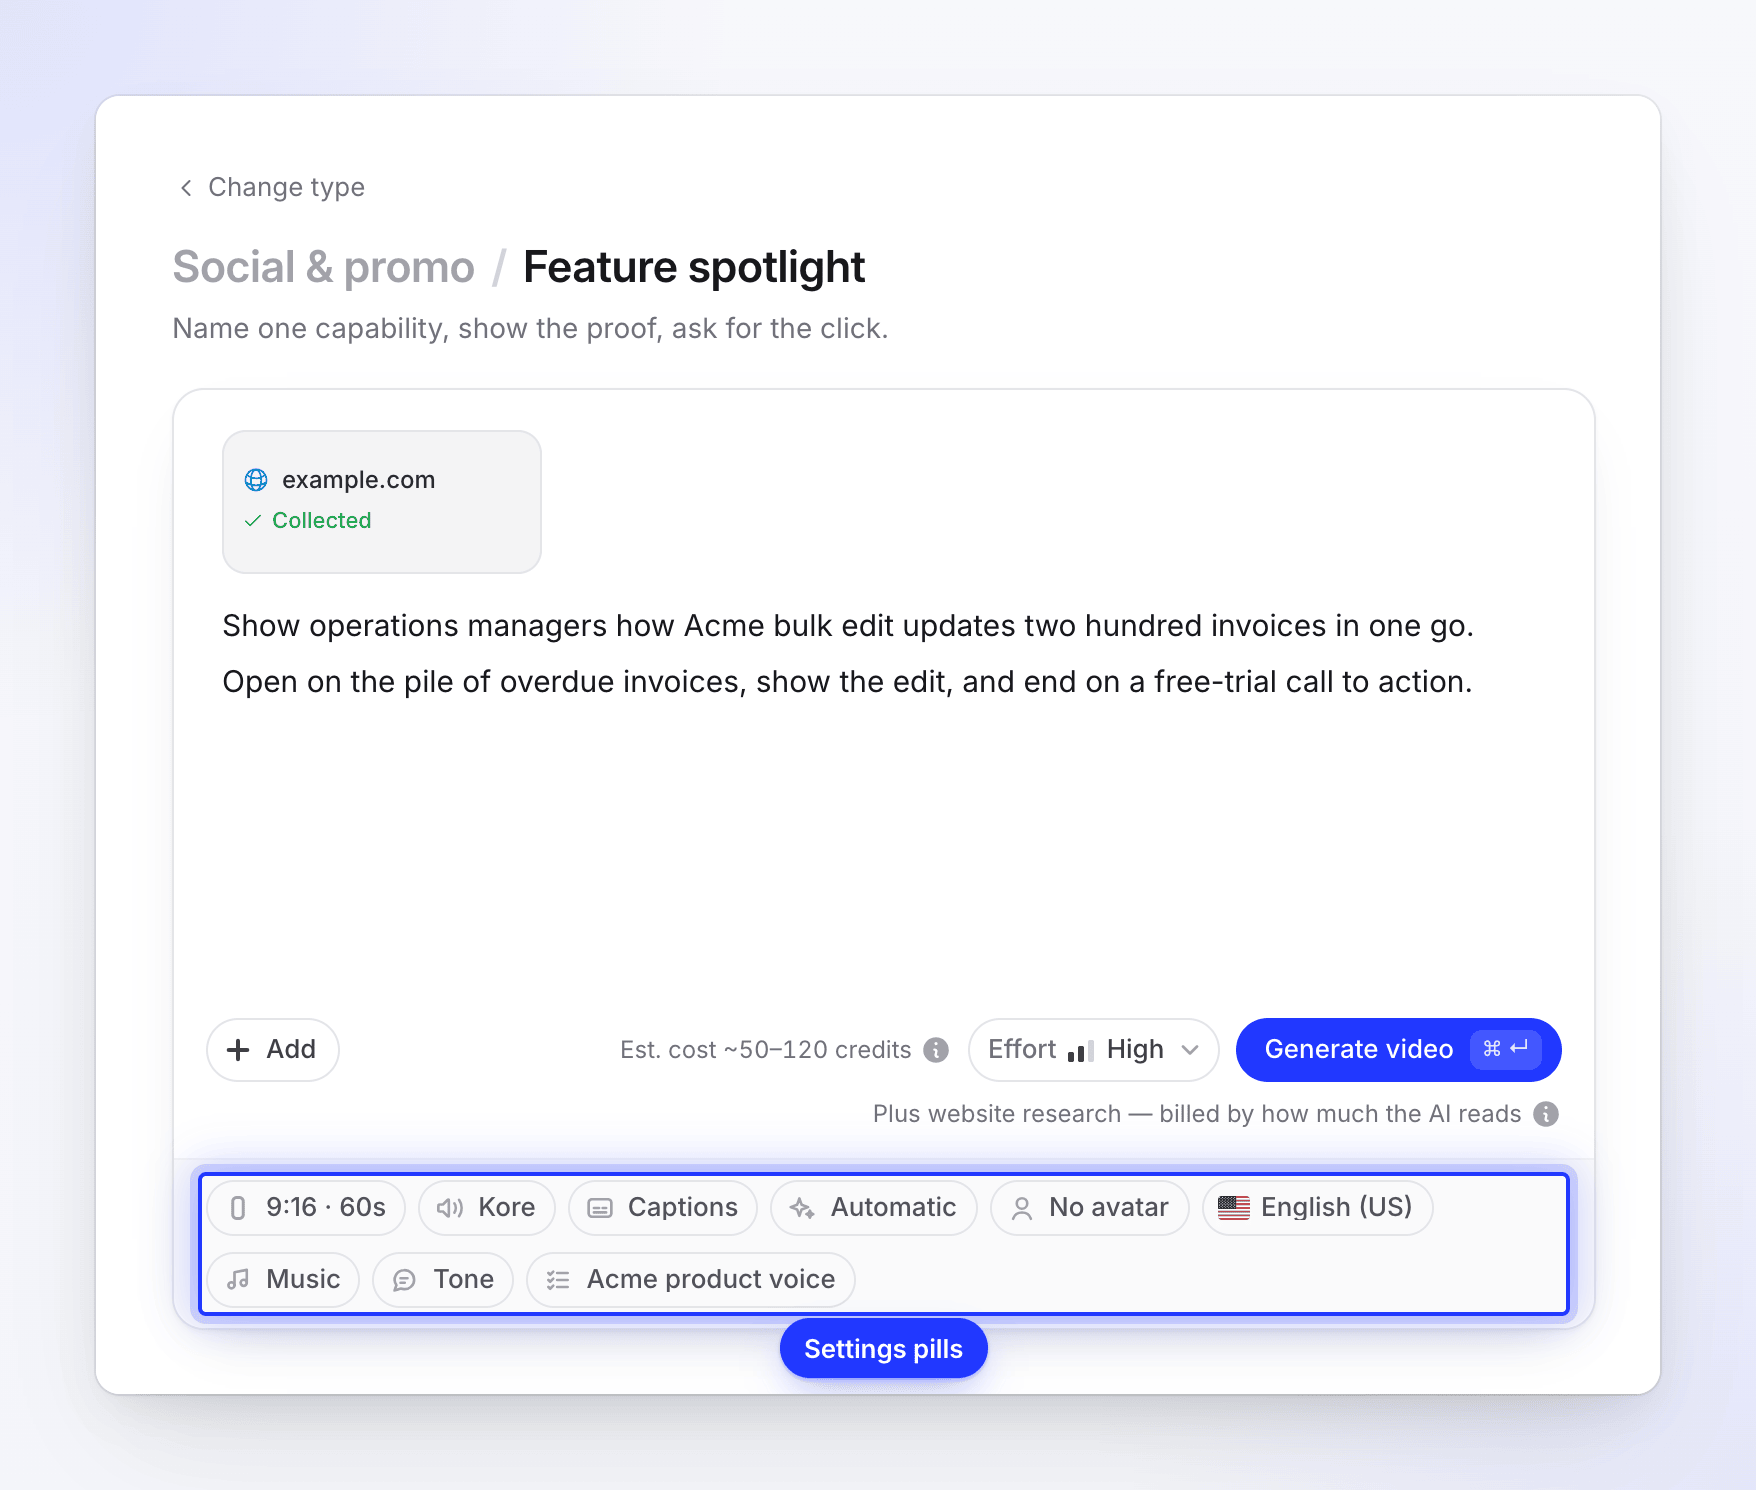
Each pill starts on the type's default. Pill What it sets Default Format Shape and rough length, e.g. "9:16 · 60s" Set by the type Voice Who reads the script A voice that fits the language Captions The spoken words on screen On for most types Look The visual style and colors Automatic AI avatar A presenter on camera No avatar Language Script, voice and on-screen text Your last language Music Pick a track for me or No music Pick a track for me Tone How the script sounds Auto AI rules Rule sets the AI follows Your workspace's default rule set, if it has one (the pill shows its name) A pill you changed shows as set by you, with an ✕ to put it back on automatic. See Set the video's options with the pills.
Choose the effort
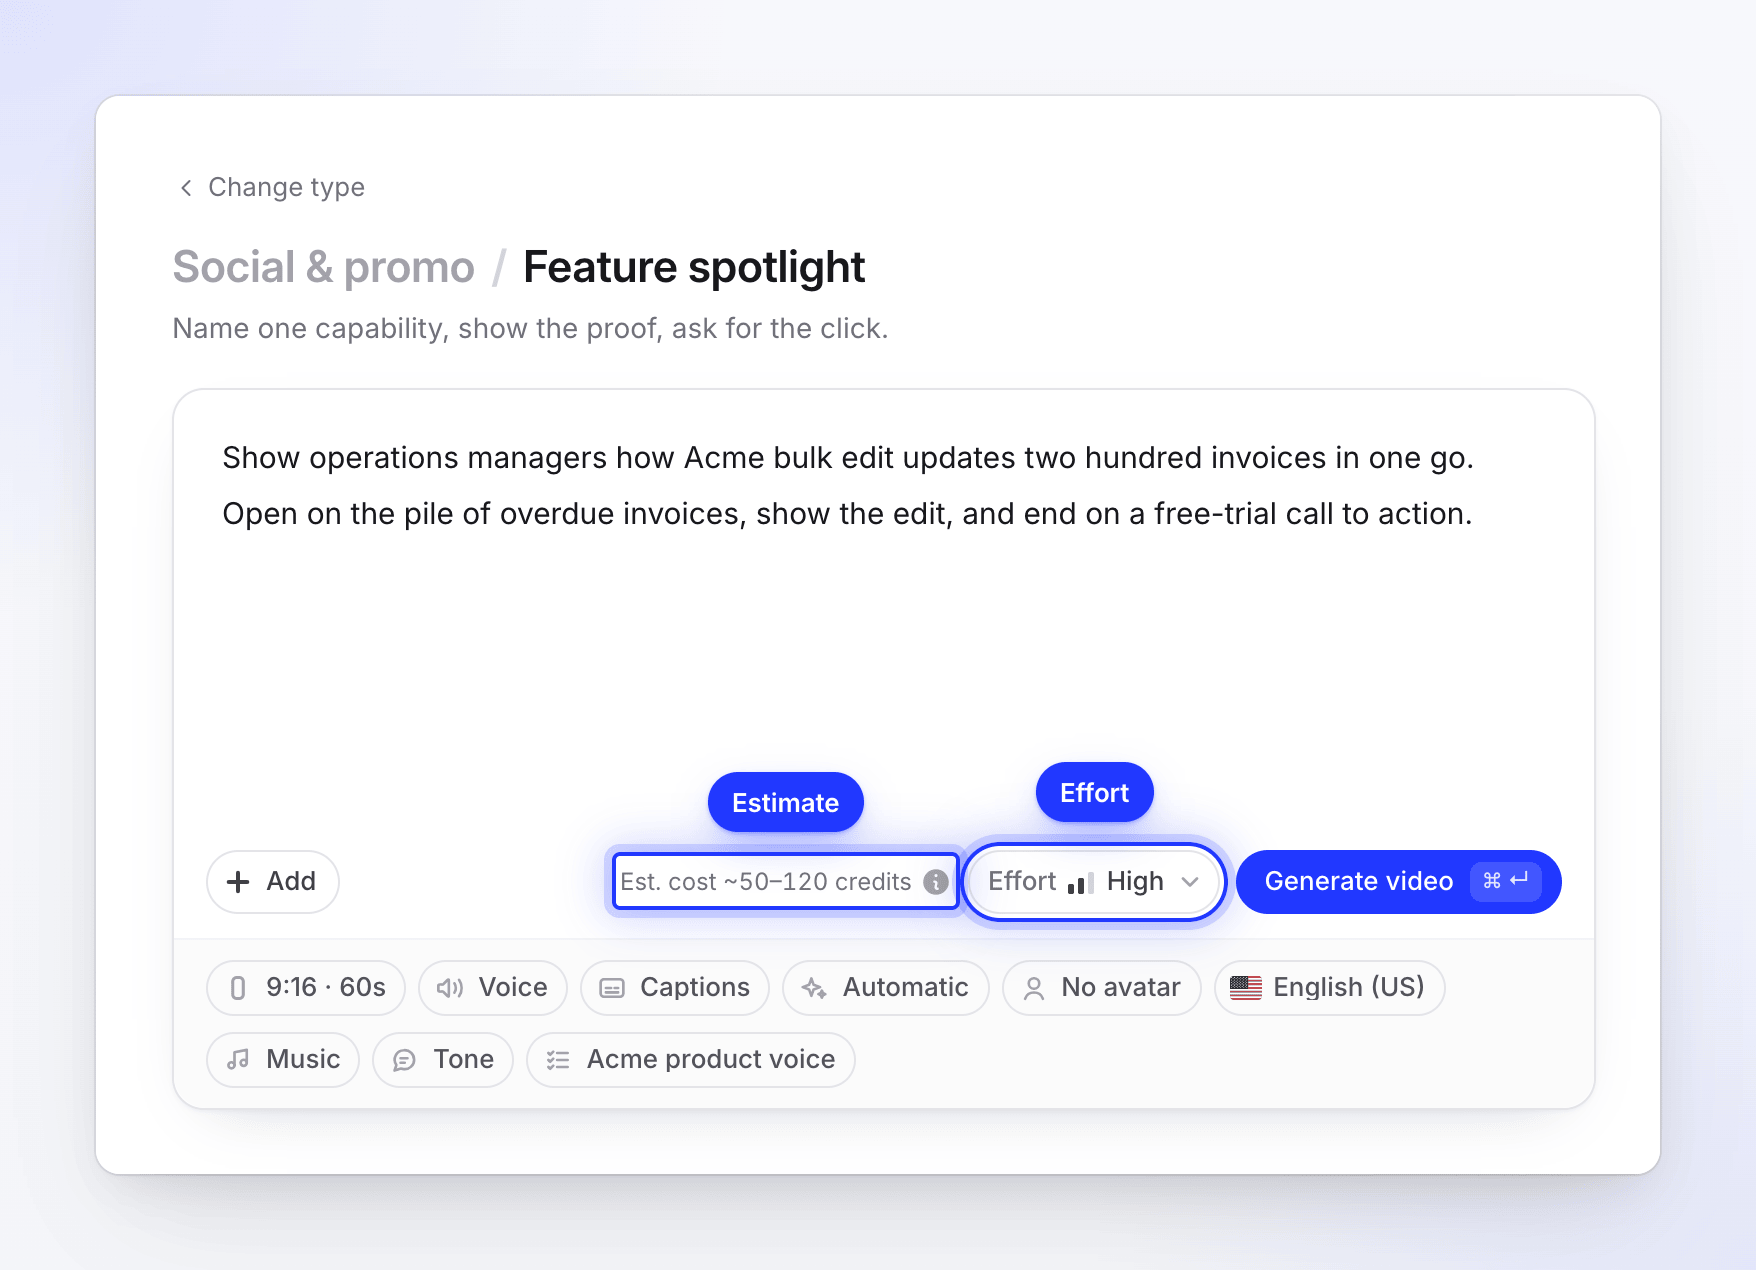
Beside Generate, the Effort button sets how much care goes into the clip: Medium, High (the default) or Extra. Higher effort means more review of each scene, a longer wait and more credits. The estimate updates as you switch. See Choose an effort level.
Generate
Check the estimate ("Est. cost ~50–120 credits" at High), then click Generate video or press ⌘ ↵ (Mac) / Ctrl ↵ (Windows). If something is missing, Generate doesn't start; it points at the control that needs attention instead, for example "Still collecting from example.com… you can generate when it's done."
Watch it being made
Generate opens the generation page, "We're making your video — you can close this tab." You don't have to wait there: the clip keeps building, appears on Home under your active generations, and the browser tab shows "✓ Your video is ready" when it's done.
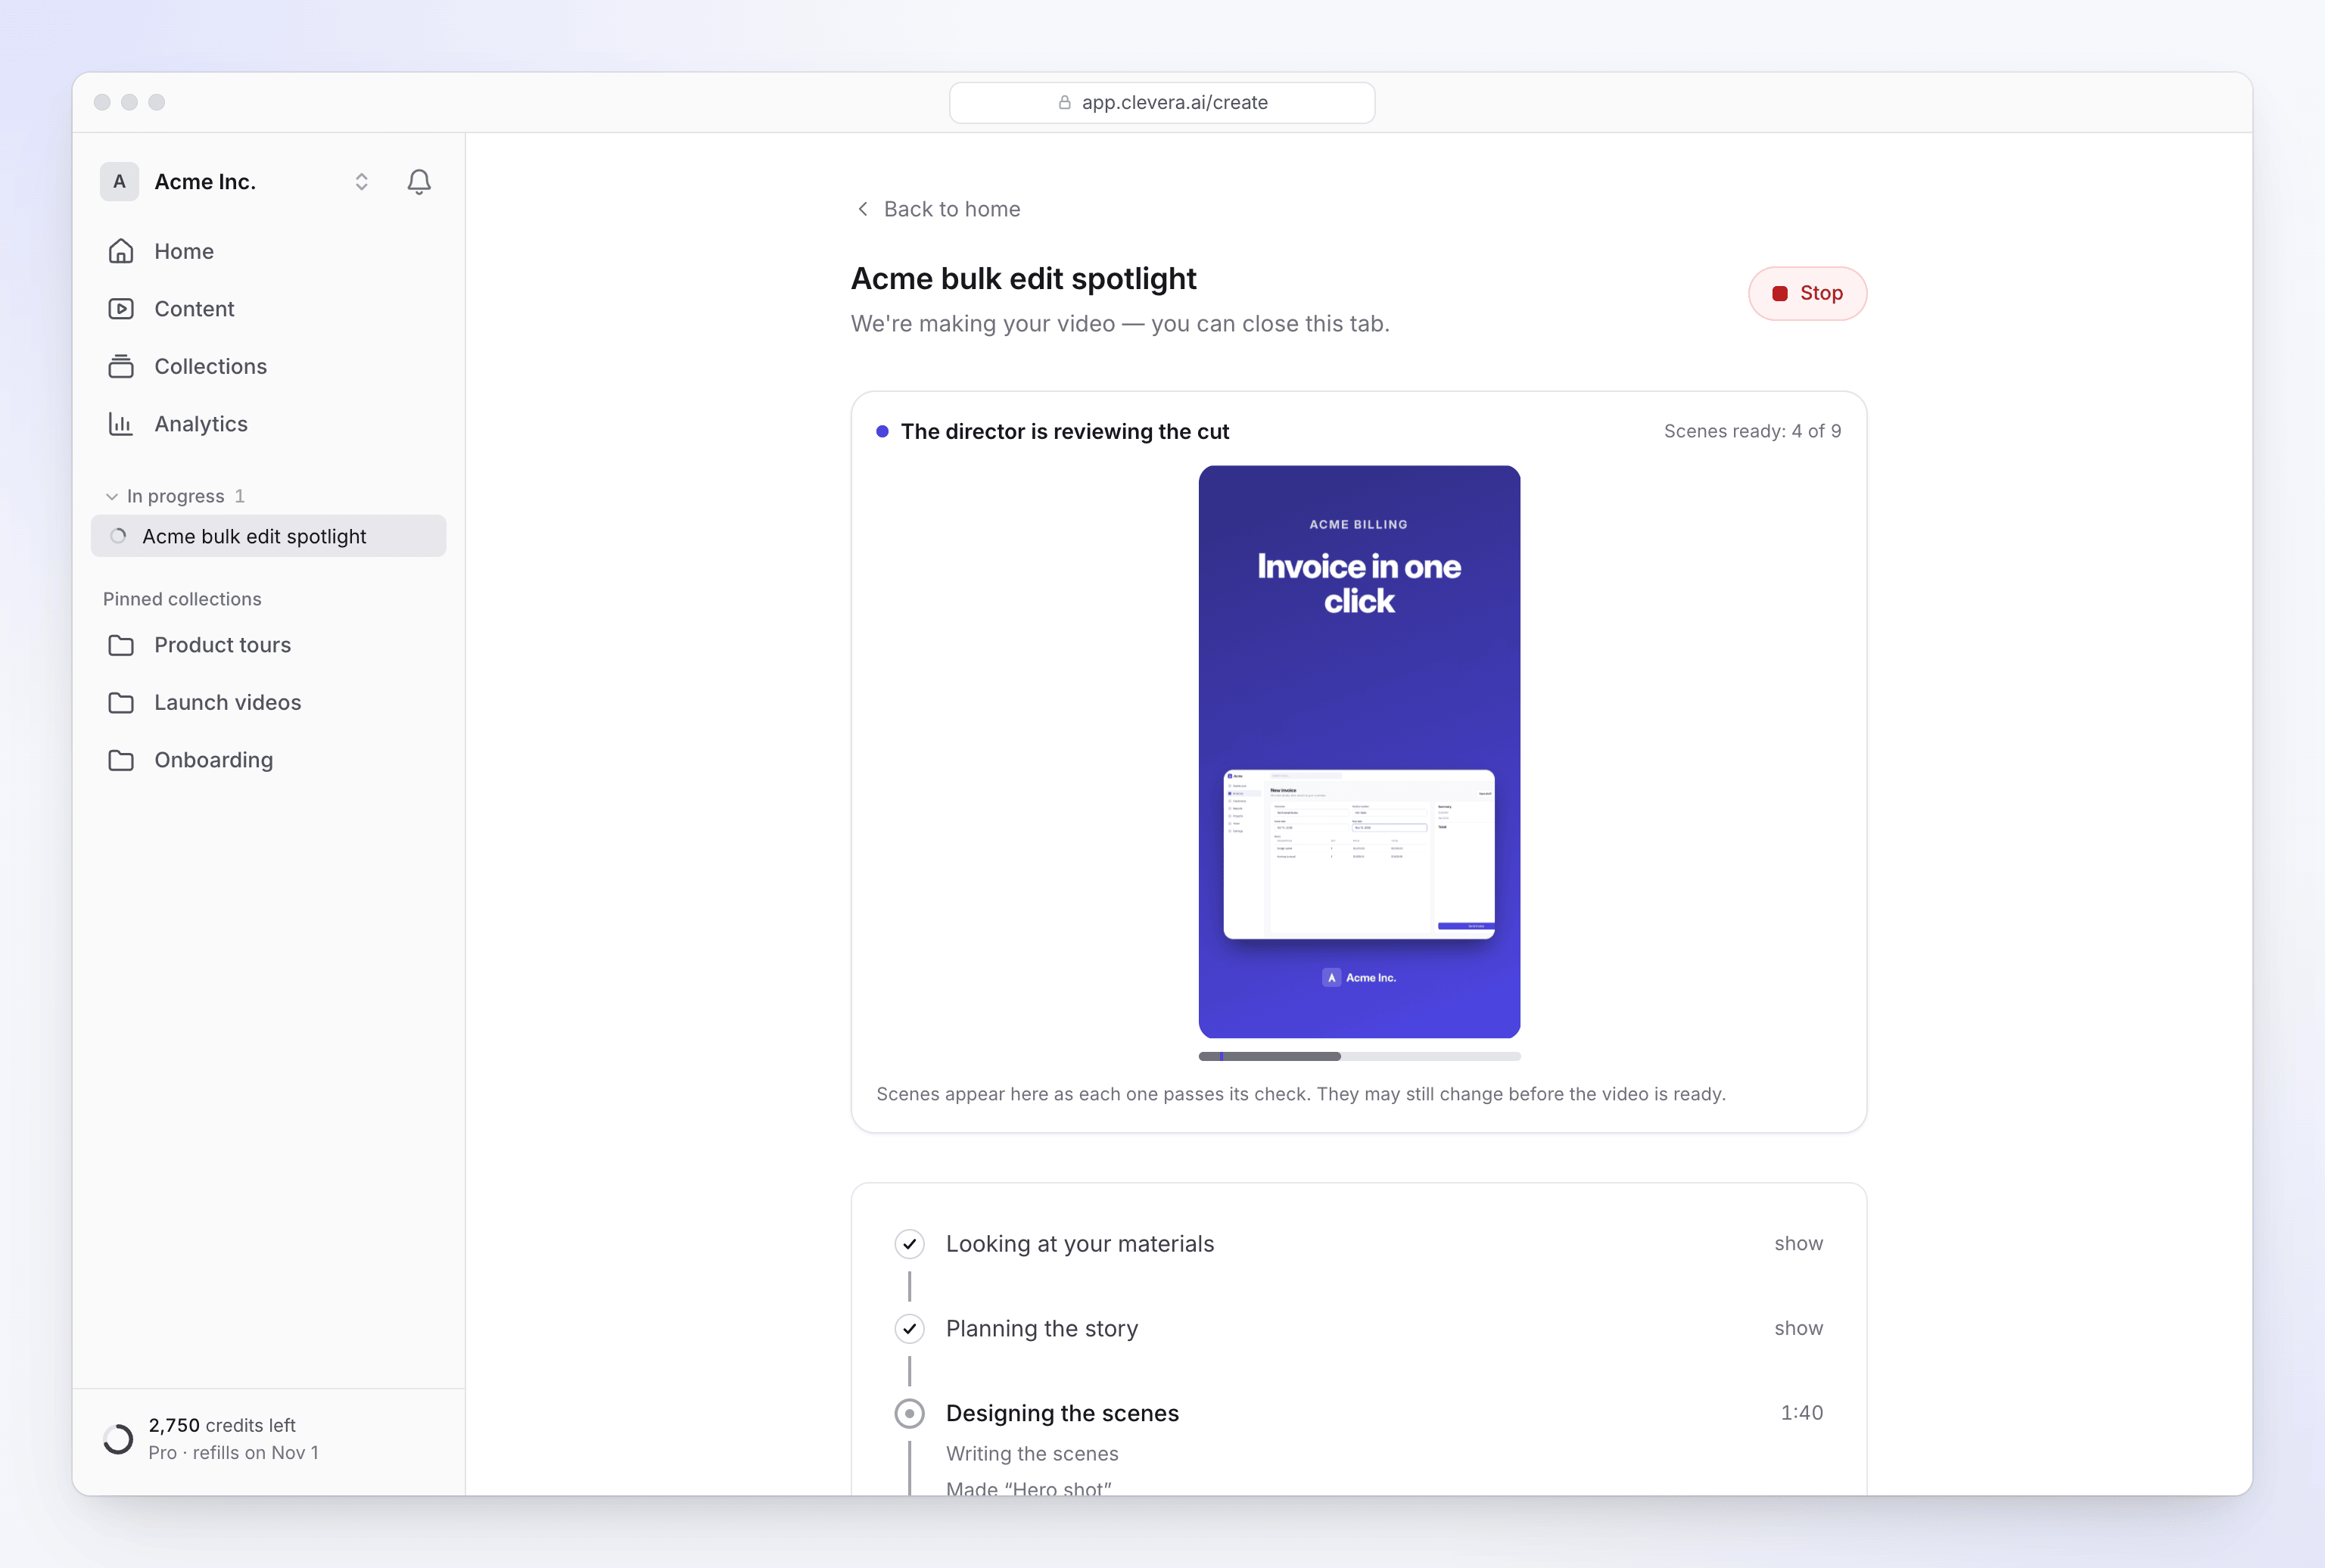
The page moves through five stages:
| Stage | What the AI is doing |
|---|---|
| Looking at your materials | Reading the website research, your pictures, PDFs and brief. |
| Planning the story | Deciding the scenes, the order and what each one proves. |
| Designing the scenes | Writing each scene as motion design, recording the voice-over and placing sound effects. |
| Adding music & polish | Fitting the music to the cut and checking the joins. |
| Finishing up | Putting the clip together and giving it a title. |
Under each stage, short lines say what the AI is doing in plain words, such as "Writing the voice-over", "Watching the scenes back" and "Checking my fixes". Above the stages, a live preview shows each scene as it passes its check ("Scenes ready: 4 of 9"). Scenes may still change before the clip is ready.
If the AI needs something from you, for example the offer on an Offer promo, a question card appears and the page chimes. See Answer the AI's questions during generation.
When it's ready
The page says "Your video is ready." Click Open your video to open it in the clip editor, or Make another to start a new one. From the editor you can:
- Change words, timing, pictures, music and sound effects, by hand or by asking the assistant. See Edit a social clip.
- Translate the clip into other languages. See Translate a finished video.
- Export an MP4 at 60 fps, up to 4K depending on your plan. Exports never use credits. See Export a video as MP4.
When your clip uses a screen recording
You can give a social clip screen footage too: a recording from the desktop app, a Record with AI recording or an uploaded video. The AI director picks the moments that prove your point and places each one in a scene: full frame, in a card, or on a phone, tablet or laptop screen. Clevera then plans a camera for every moment, so viewers see the click and what it does without squinting at a whole desktop.
What the camera does
| Move | What you see |
|---|---|
| Opens wide | The moment starts on the whole page. If the footage shows a browser, its tabs and address bar are cropped off. In a vertical clip, a desktop recording opens on a crop that fits the shape. |
| Pushes in on the click | The camera moves in on the button or field just before the pointer clicks it, so the viewer sees the click land. |
| Moves to the result | It then pans to where the result appears, such as a new row, a panel or a message. When the control and the result fit in one view, it frames both at once. |
| Holds briefly on typing | Typing gets a short zoom of up to about 3.5 seconds, then the camera eases back. |
| Follows the pointer | With footage from the desktop app or Record with AI, when the pointer travels a long way between actions, the camera follows it there instead of cutting. |
| Drifts while it holds | While nothing moves, the picture usually drifts in very slightly, so the scene doesn't look frozen. |
Every move takes 0.7 to 1.4 seconds, so the camera never whips. A push goes 1.5 to 1.8 times closer than the opening view, closer for small buttons and less for large panels. It never goes past 2 times, and goes less far on low-resolution or heavily compressed footage, so text stays sharp.
The camera also avoids centering on private details it spots on screen, such as an email address or a customer's row. See Understand how Clevera protects what's on your screen.
Where the pointer comes from
| Footage | Pointer | Camera |
|---|---|---|
| Desktop app or Record with AI | The recorded pointer, redrawn smoothly in the clip | Planned from the exact clicks and pointer path. Best result. |
| Uploaded video | Part of the picture, as it was filmed | Planned from where Clevera estimates the pointer and the changes on screen are, so it's less precise. |
Change the camera
The camera is planned when the clip is made. To change it, ask the assistant in the clip editor:
| Ask for | Example |
|---|---|
| Closer or wider | "Zoom in closer on the click in scene 3", or "Keep scene 3 wide, no zoom" |
| The click or the result | "In scene 2, focus on the result, not the button" |
| More time on it | "Stay longer on the dashboard in scene 4" |
| Another moment | "Show the export step instead in scene 5" |
The assistant plans the camera again from the recording. To change the footage and its camera moves by hand, select the recording and open Segments in its options. See Edit a social clip.
Troubleshooting
| What you see | What to do |
|---|---|
| "A little more — a couple of sentences is enough." | Your brief is under the minimum. Add a sentence, or attach a link or file. |
| "We couldn't read example.com." on the website tile | Click Try again, or check the address. Sites behind a login or a bot check can't be read. See Fix a website the AI couldn't read. |
| "We couldn't finish this one" | Click Try again; a social clip picks up from the step that failed. See My video couldn't be finished. |
| The Social & promo types show Paid plans | Upgrade to a paid plan. See Know what the Free plan includes. |