

Set up SSO with OpenID Connect
Connect Clevera to your identity provider with OpenID Connect: the redirect URI, scopes and client authentication your IdP needs, the claims Clevera reads, every setup field, testing and turning SSO on.
Connect Clevera to your identity provider (IdP) with OpenID Connect (OIDC) so your team signs in with their company account. This article covers the app to create in your IdP, every field in Clevera's setup dialog, the claims Clevera reads, and how to test and switch it on.
For what SSO changes for your members, read Understand single sign-on first. Provider-specific screens are in the guides for Okta, Microsoft Entra ID and Google Workspace.
Before you start
- You're the owner of a workspace on a Custom plan.
- You can create an OIDC (web) app in your IdP, or you're working with someone who can.
- You know every email domain your team uses.
Create the app in your IdP
Create a web application (a confidential client with a client secret) and set it up like this:
| IdP setting | Value |
|---|---|
| Redirect URI (sign-in redirect URI, callback URL) | https://app.clevera.ai/sso/oidc/callback |
| Grant type | Authorization code |
| Client authentication | Client secret. Clevera sends the secret in the body of the token request (client_secret_post). |
| Scopes | openid, email, profile |
| Sign-out redirect URI, initiate login URI | Leave empty. Sign-in must start on the Clevera sign-in page. |
You don't have to type the redirect URI. In Clevera's setup dialog, choose OpenID Connect on the first step: the grey box "For the person setting up your identity provider" shows Redirect URI (callback URL) with a copy button.
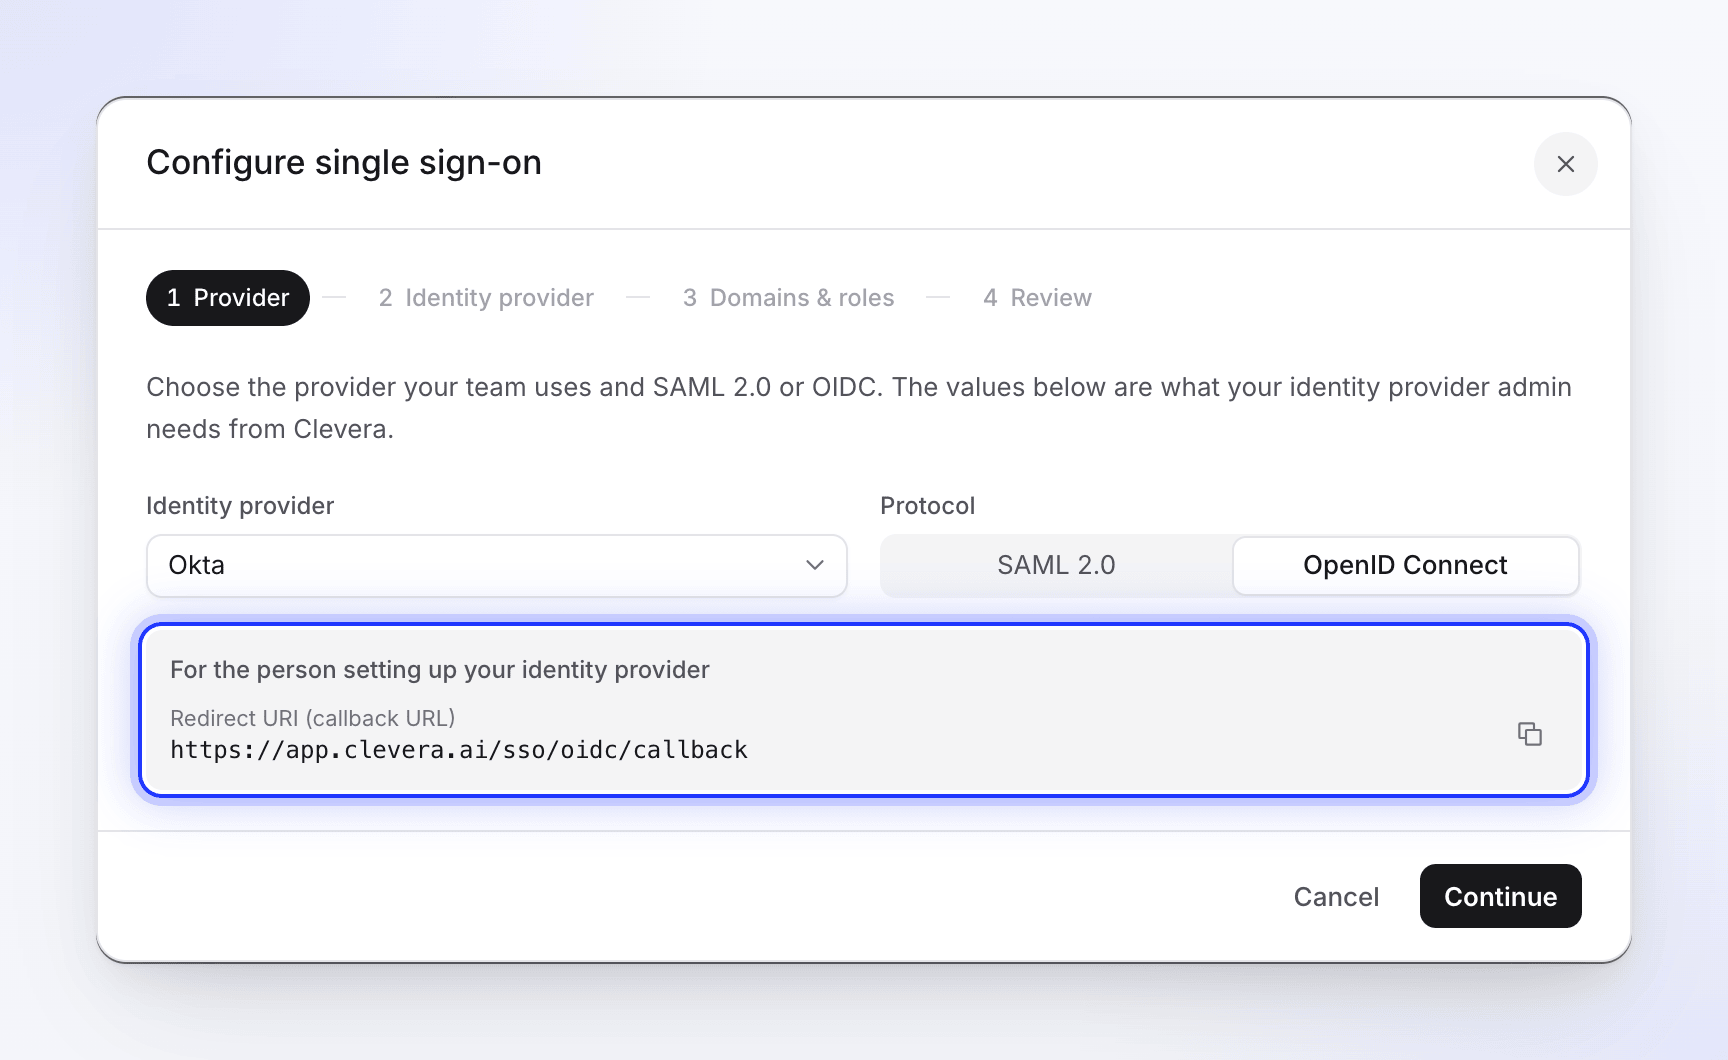
When the app is created, copy its client ID, client secret and discovery URL (also called the OpenID configuration URL or well-known URL, ending in /.well-known/openid-configuration).
Claims Clevera reads
Clevera reads the ID token and, when the IdP has a UserInfo endpoint, the UserInfo response on top of it.
| Purpose | Claims, in order | Notes |
|---|---|---|
email, then preferred_username, then upn |
The first one that's a valid email address is used. Without one, sign-in fails. | |
| Name | name, then given_name + family_name, then preferred_username |
Only used when Clevera creates a new account. Falls back to the part of the email before the @. |
Clevera reads no group or role claims: everyone created by SSO gets the default role you choose in Clevera.
Connect your IdP in Clevera
Open the Security tab
Open the workspace menu at the top of the sidebar, choose Team settings, then Security. Under Single sign-on, click Set up SSO.
Provider
Choose your Identity provider and set Protocol to OpenID Connect. Copy the Redirect URI (callback URL) into your IdP if you haven't yet, then click Continue. (JumpCloud supports SAML only in Clevera.)
The provider's name is what members see on the sign-in button, for example Continue with Okta. With Custom SAML/OIDC Provider, the button reads Continue with SSO.
Identity provider
Fill in the fields below. Click Continue.
Domains & roles
Add each email domain under Allowed email domains, choose whether to Create accounts on first sign-in, and pick the Default role for new SSO members. These work the same as for SAML: see Domains and roles.
Review
Check the summary and click Save configuration. You see "SSO configuration saved. Run a test, then turn it on." Saving doesn't turn SSO on.
Identity provider fields
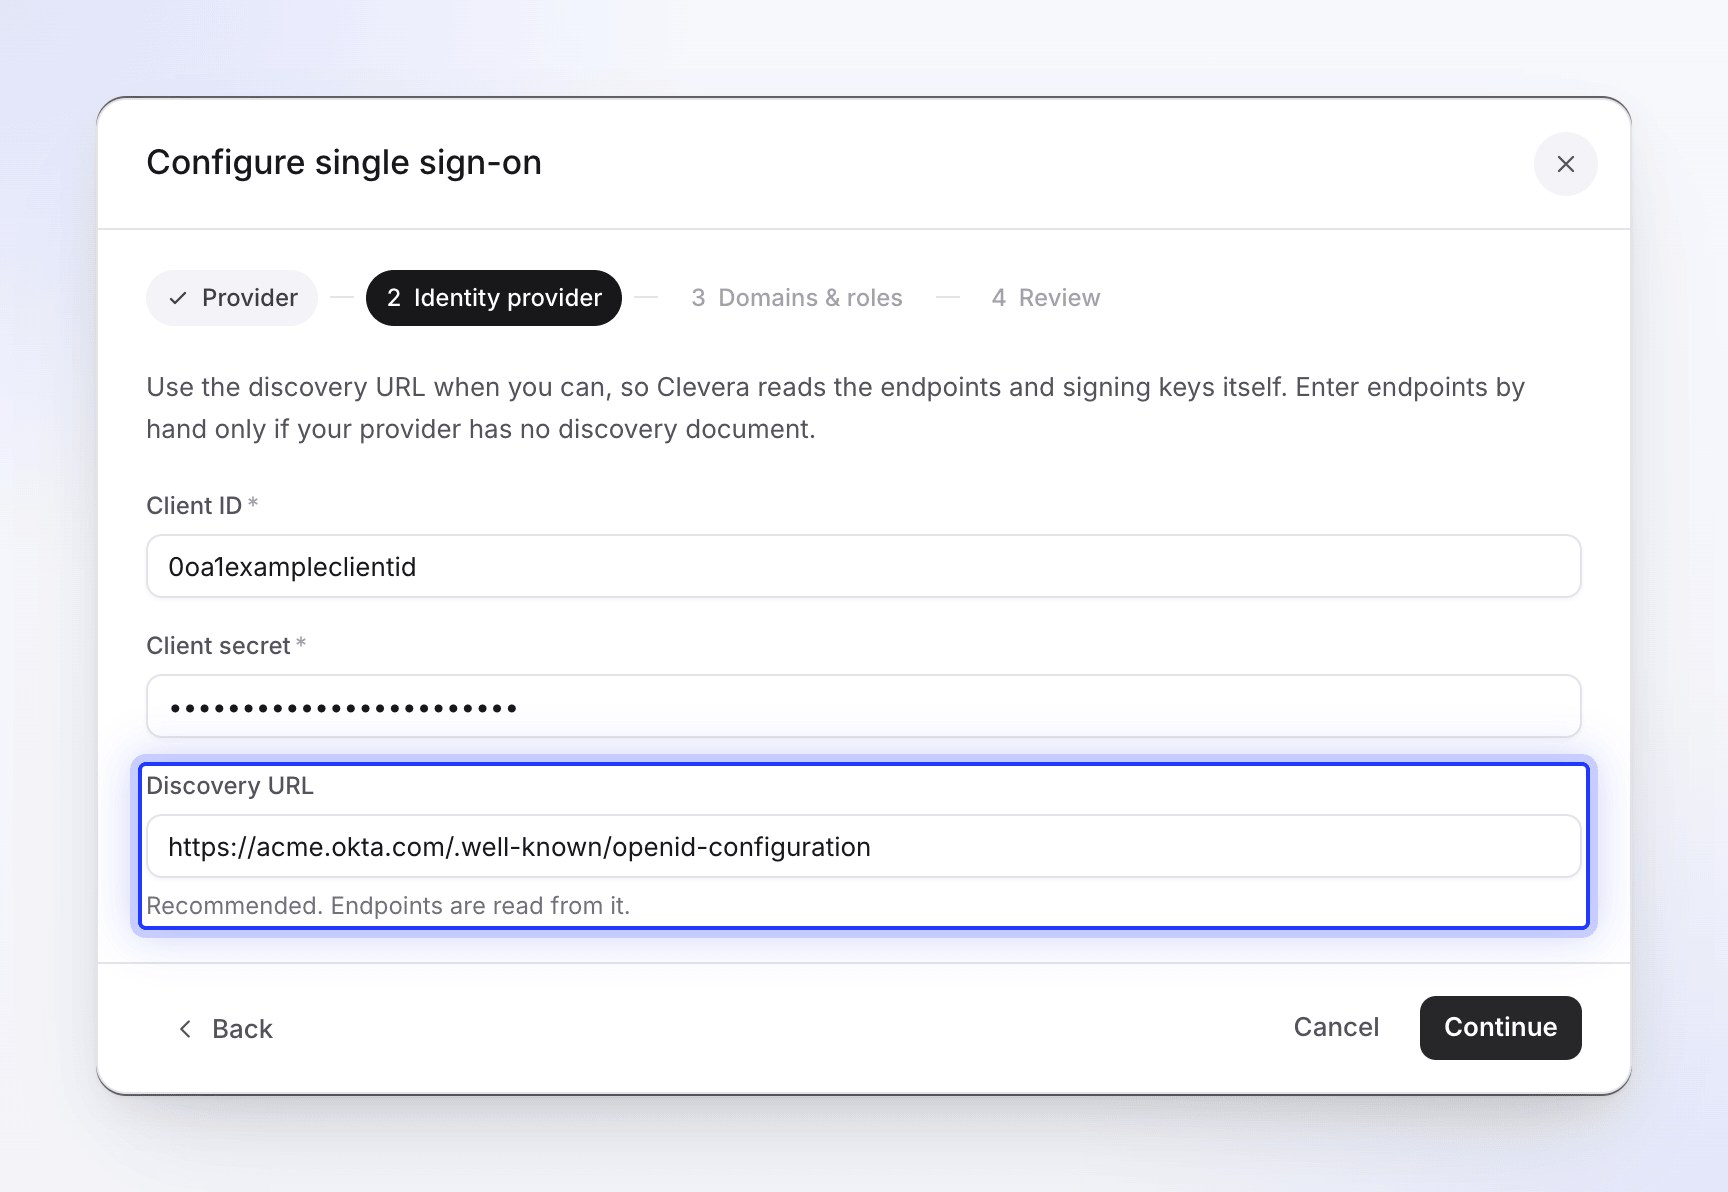
| Field | Required | What to enter |
|---|---|---|
| Client ID | Yes | Your OIDC application's client ID. |
| Client secret | Yes | Your OIDC application's client secret. Stored encrypted and never shown again; when you edit later, "A secret is stored. Leave blank to keep it." |
| Discovery URL | Recommended | "Recommended. Endpoints are read from it." For example https://idp.example.com/.well-known/openid-configuration. |
| Authorization URL | Only without a discovery URL | Your IdP's authorization endpoint. |
| Token URL | Only without a discovery URL | Your IdP's token endpoint. |
| UserInfo URL | No | Your IdP's UserInfo endpoint. Shown only without a discovery URL. |
The three endpoint fields appear only while Discovery URL is empty.
Why the discovery URL is better
With a discovery URL, Clevera reads the endpoints itself and checks each sign-in against your IdP's published signing keys and issuer. Enter endpoints by hand only if your IdP has no discovery document.
- The discovery URL must be the IdP's issuer plus
/.well-known/openid-configuration, and theissuerinside it must match the tokens your IdP issues. Multi-tenant URLs whose issuer contains a placeholder (such as Microsoft'scommonendpoint) don't work; use your tenant's own URL. - Every URL must be a public
https://(orhttp://) address that Clevera's servers can reach. Addresses on a private network, such as an IdP only reachable over your VPN, are refused. Any port is fine. - Clevera keeps the discovery document and signing keys for up to an hour. If your IdP rotates its signing keys in that time, Clevera fetches the new keys once before refusing a sign-in, so key rotation doesn't lock people out.
Test the connection
Run the check
On the Security tab, click Run test. It checks that the client ID and secret are saved and, with a discovery URL, that the document loads and contains an authorization endpoint. You see "SSO configuration is valid and ready to use." or a list of issues. See Fix SSO sign-in problems.
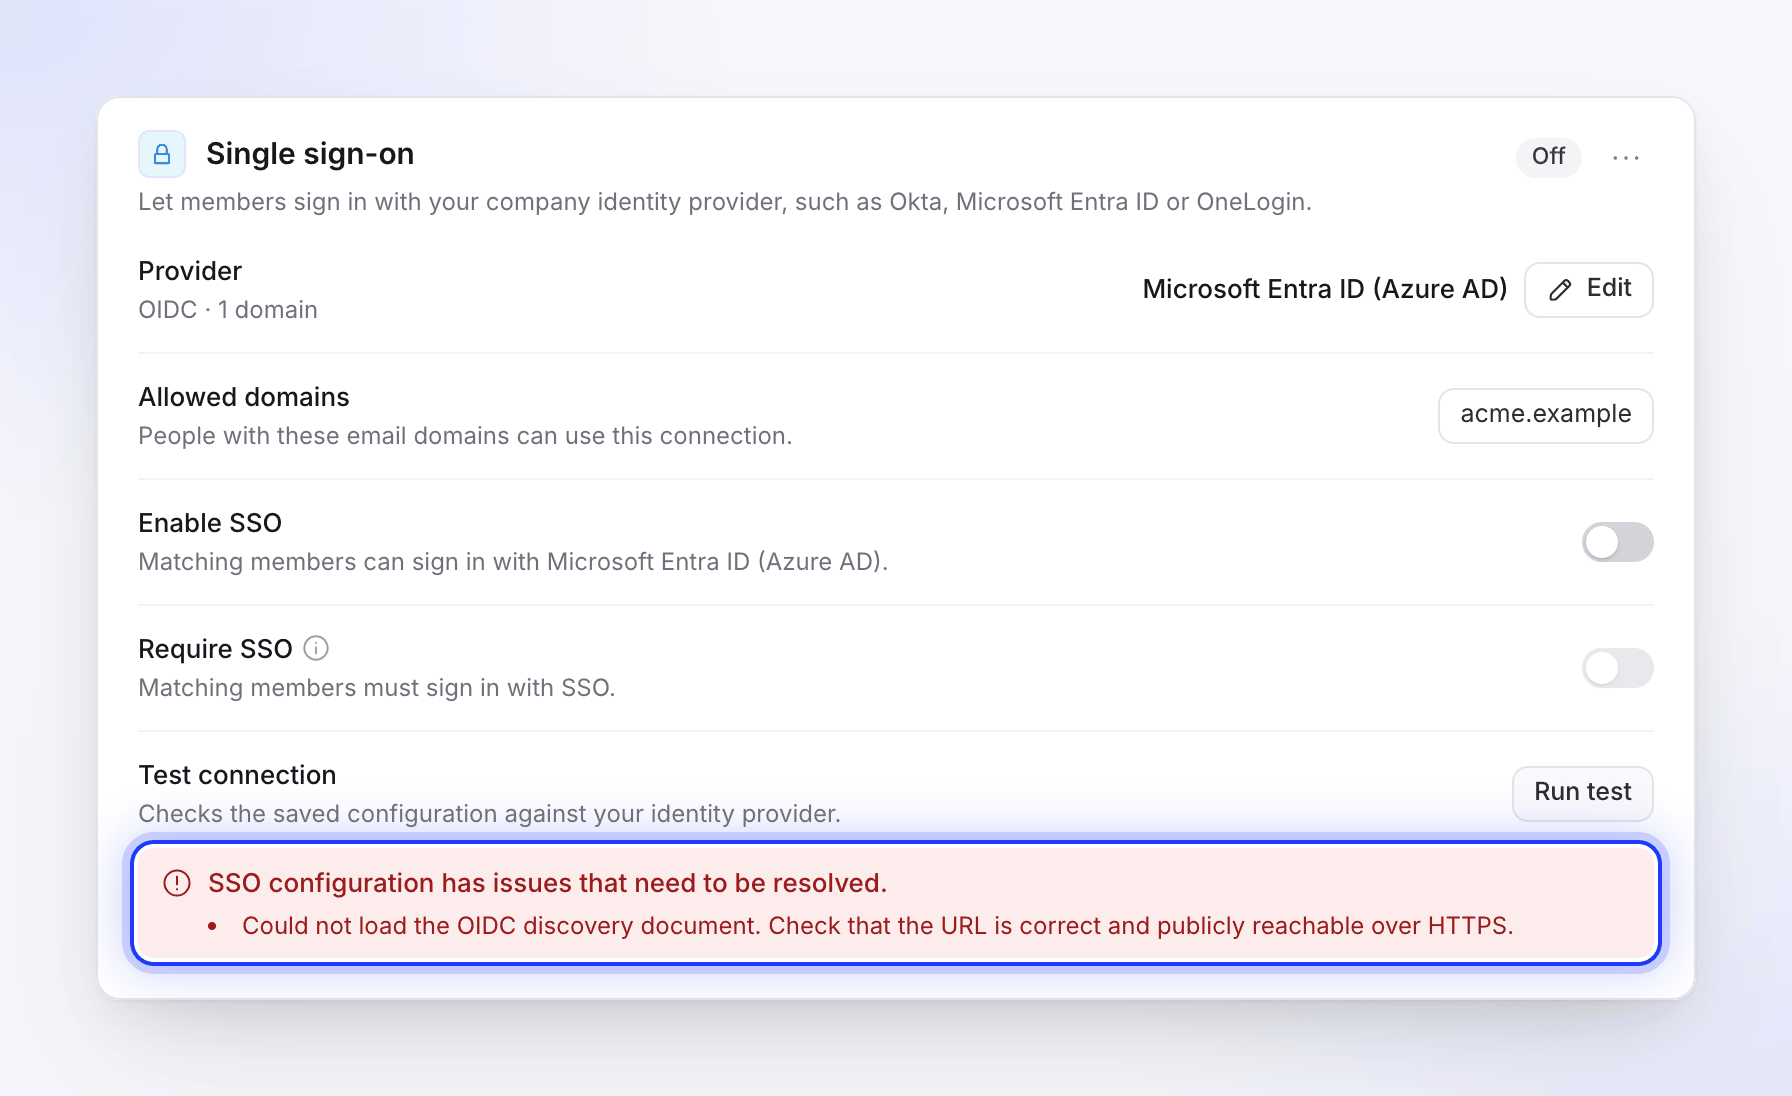
Each issue tells you what to fix. Turn SSO on
Switch on Enable SSO. You see "SSO turned on." and the badge reads Active.
Sign in as a test member
In a private browser window, go to the Clevera sign-in page, type a member's email, click Continue with your provider and sign in. You should land on their Clevera home page in your workspace. As the owner, you can always sign in with your password, so this can't lock you out.
Run test doesn't check the client secret or a real sign-in; only step 3 does.
Require SSO, change or remove
These work the same as for SAML:
- Switch on Require SSO when everyone can sign in. Members on your domains then can't use a password or Google.
- Edit changes the connection. Leave Client secret blank to keep the stored one. When you rotate the secret in your IdP, paste the new one and save.
- Remove SSO configuration (in the menu next to the status badge) deletes it. Members created by SSO use Forgot password? to set a password.
See Set up SSO with SAML for the details. OIDC has no single logout: signing out of your IdP doesn't sign people out of Clevera.