

Turn a recording into an article
Turn one screen recording into a how-to article, troubleshooting page, SOP, blog post or product update, with screenshots taken from the recording. Covers every setting, how screenshots are picked, cost and what to do when it fails.
Clevera can turn one screen recording into a written article: a how-to guide, a troubleshooting page, an SOP, a blog post or a product update, with screenshots taken from the recording. This article covers how to start one, what each setting does and what happens while the AI writes it.
Before you start
- A recording. An article is written from one video and nothing else. It can be a recording from the desktop app, a video you upload, a video already in your library, or a finished Record with AI session.
- The recording must be ready. While it is still processing you see "This recording is still processing. Please wait until it is ready."
- Permission to create. Owners, Administrators and Content Creators can make new articles. Editors can only change existing ones. See roles and creator seats.
- Credits. An article usually costs 5–15 credits. See what it costs.
Make an article
Pick the article type
Click Create and open the Article tab ("Written guides and posts made from a recording."). On Home you can also click the Help article card under the prompt box.
The tab lists the five kinds of writing as cards. Click the one you want; each is described in Choose the kind of article.
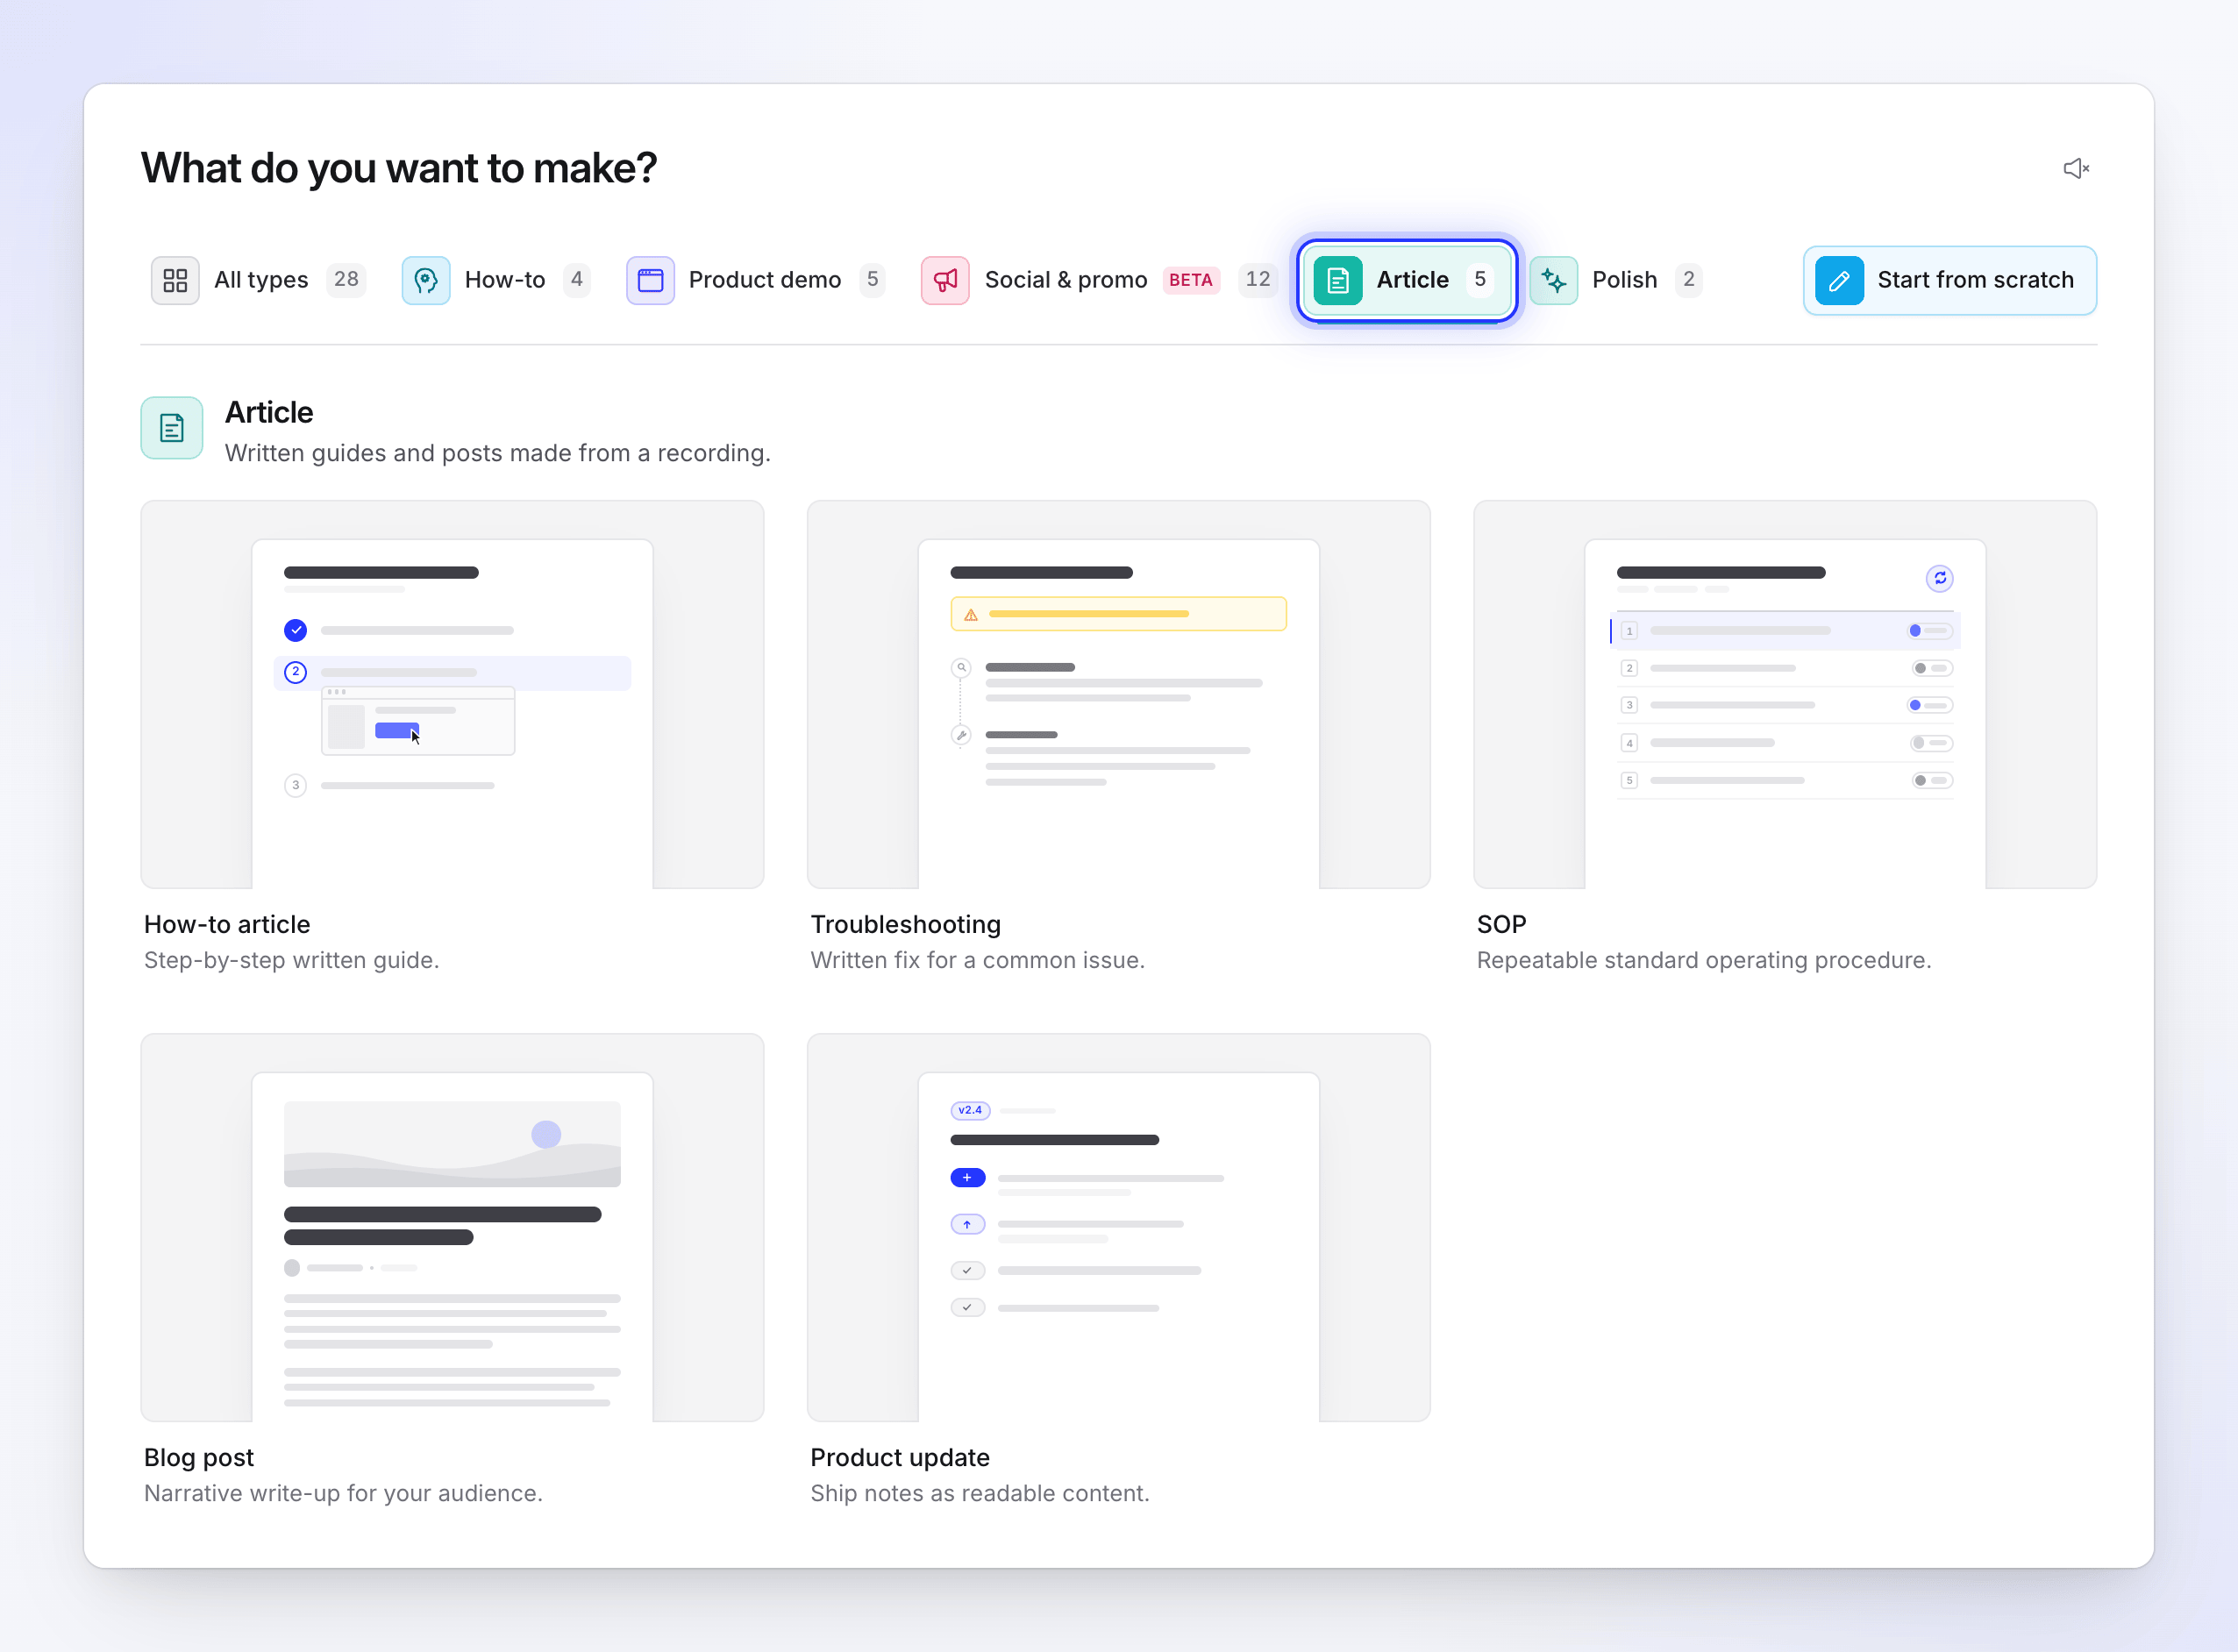
All five kinds are written from one recording. Add the recording
Click + next to the brief box and choose one of:
- Record your screen – record now with the Clevera desktop app.
- Record with AI – let the AI record your site or app in the cloud.
- Upload a video – upload a screen recording you already made.
- Choose from library – pick a video you've already recorded or uploaded.
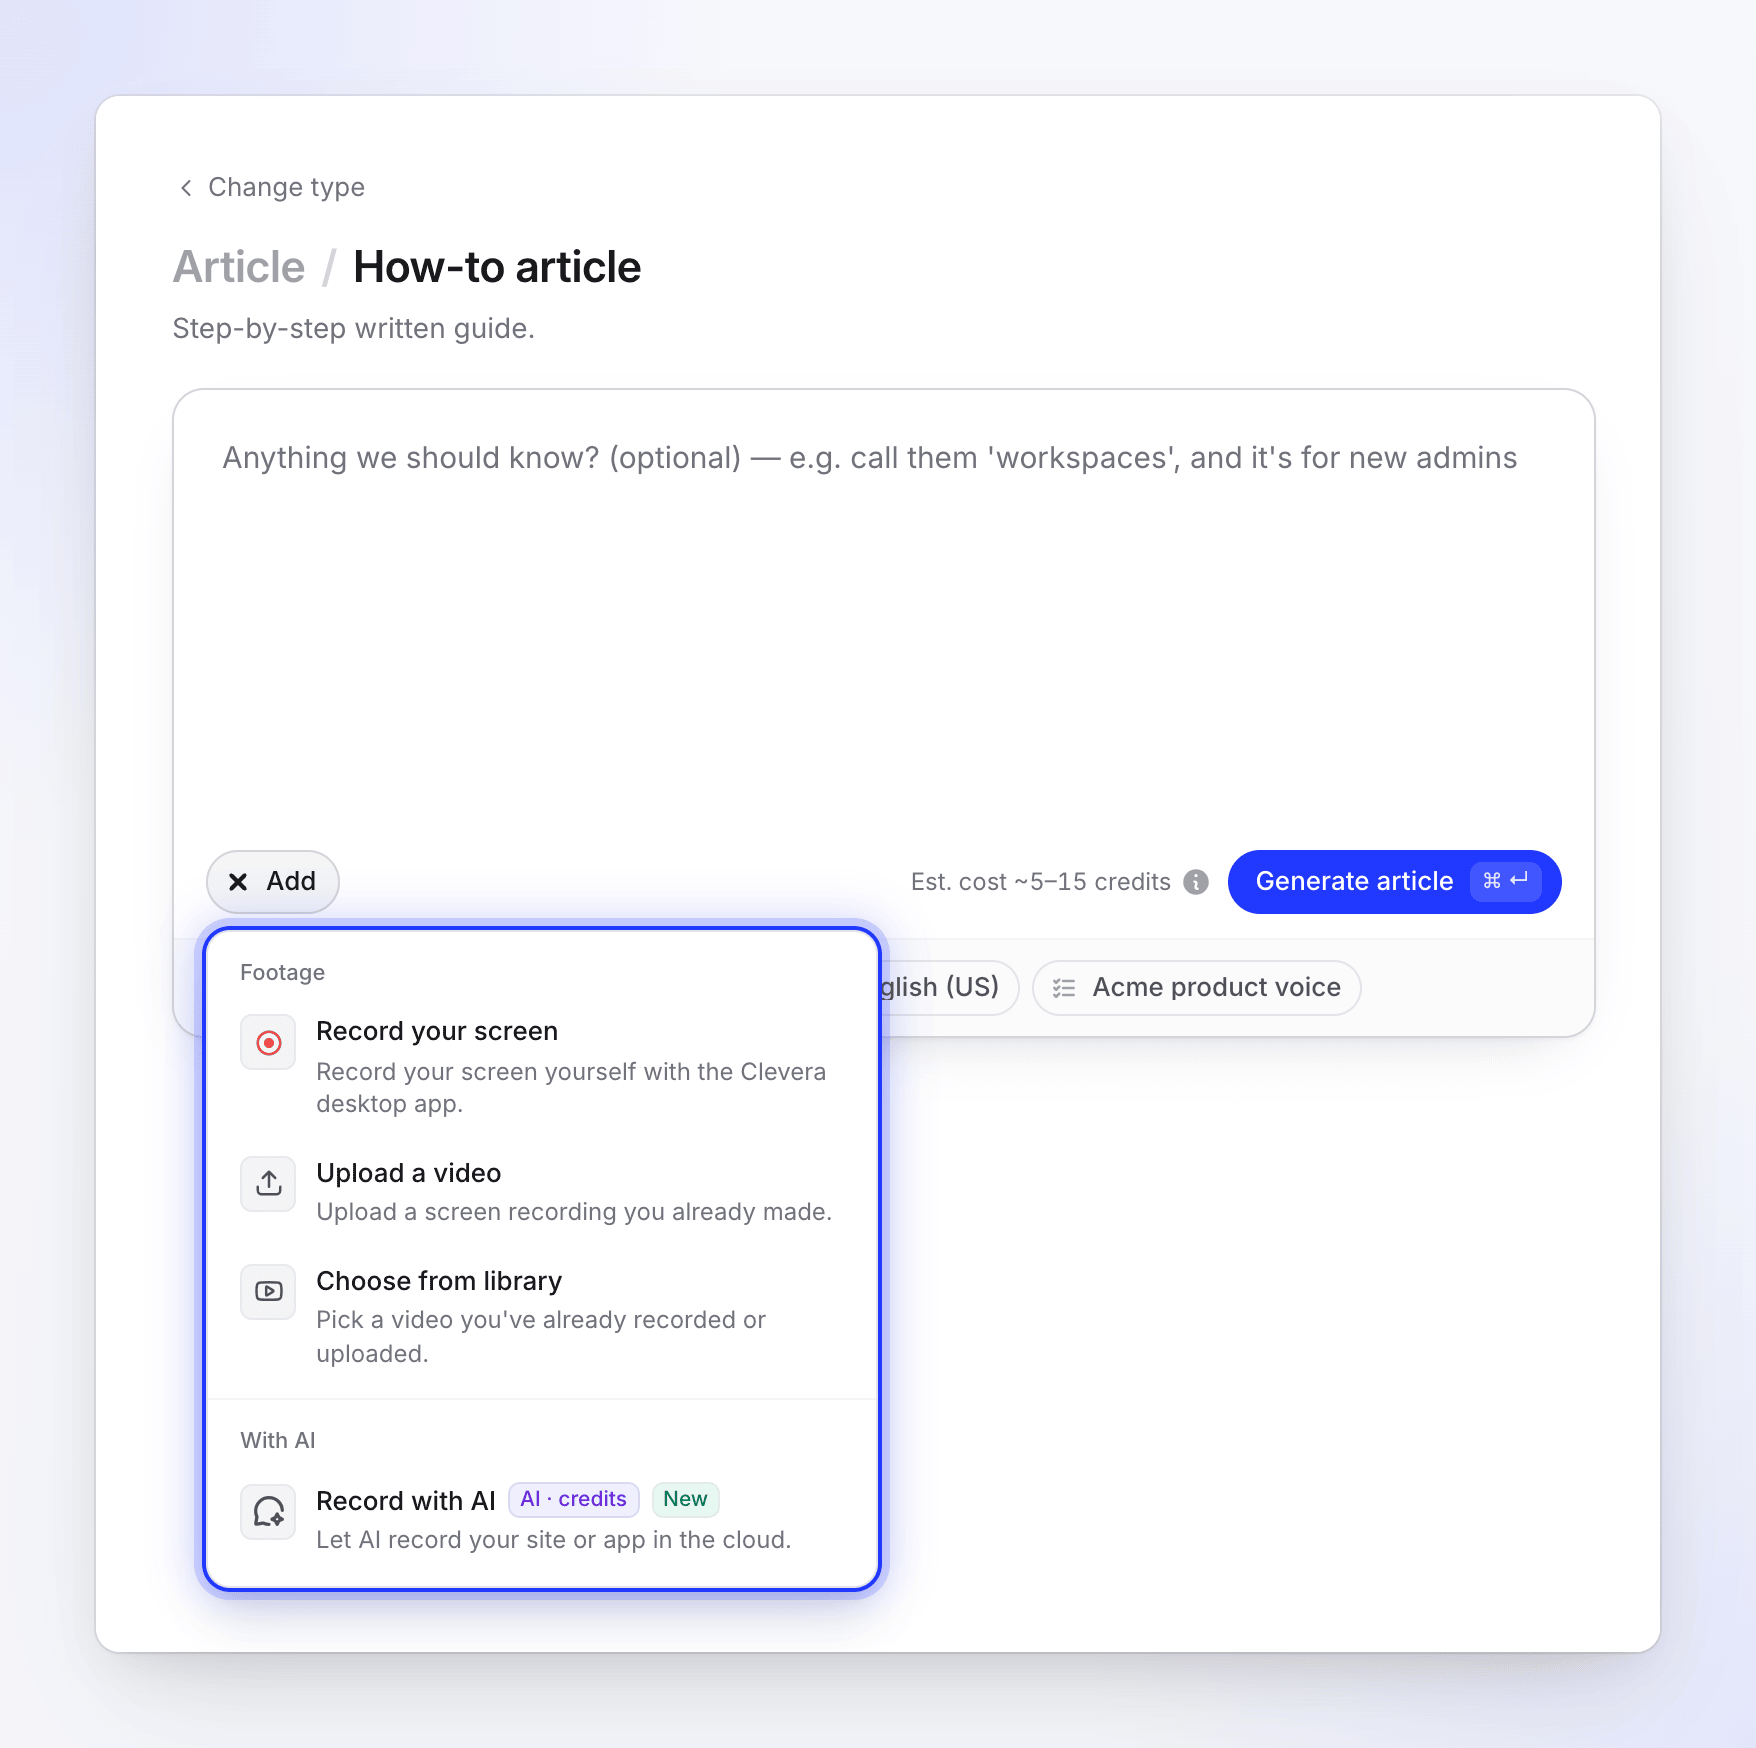
An article is written from one video. You can attach one video. Pictures, PDFs and website links aren't used for articles; if you had some attached when you switched to this type, Clevera removes them and says "Pictures and PDFs were removed — an article is written from your video alone."
Tell the AI anything it should know
The brief box is optional. Use it for names, audience and focus, for example: "call them 'workspaces', and it's for new admins". The AI already reads your recording and what you said in it.
Set the options
Use the pills under the box: Tone, Depth, Screenshot marker (it shows the color, for example Green marker), Language and AI rules (it shows the rule set in use). Each one is explained in Article settings. Leaving them on Auto is fine for most recordings.
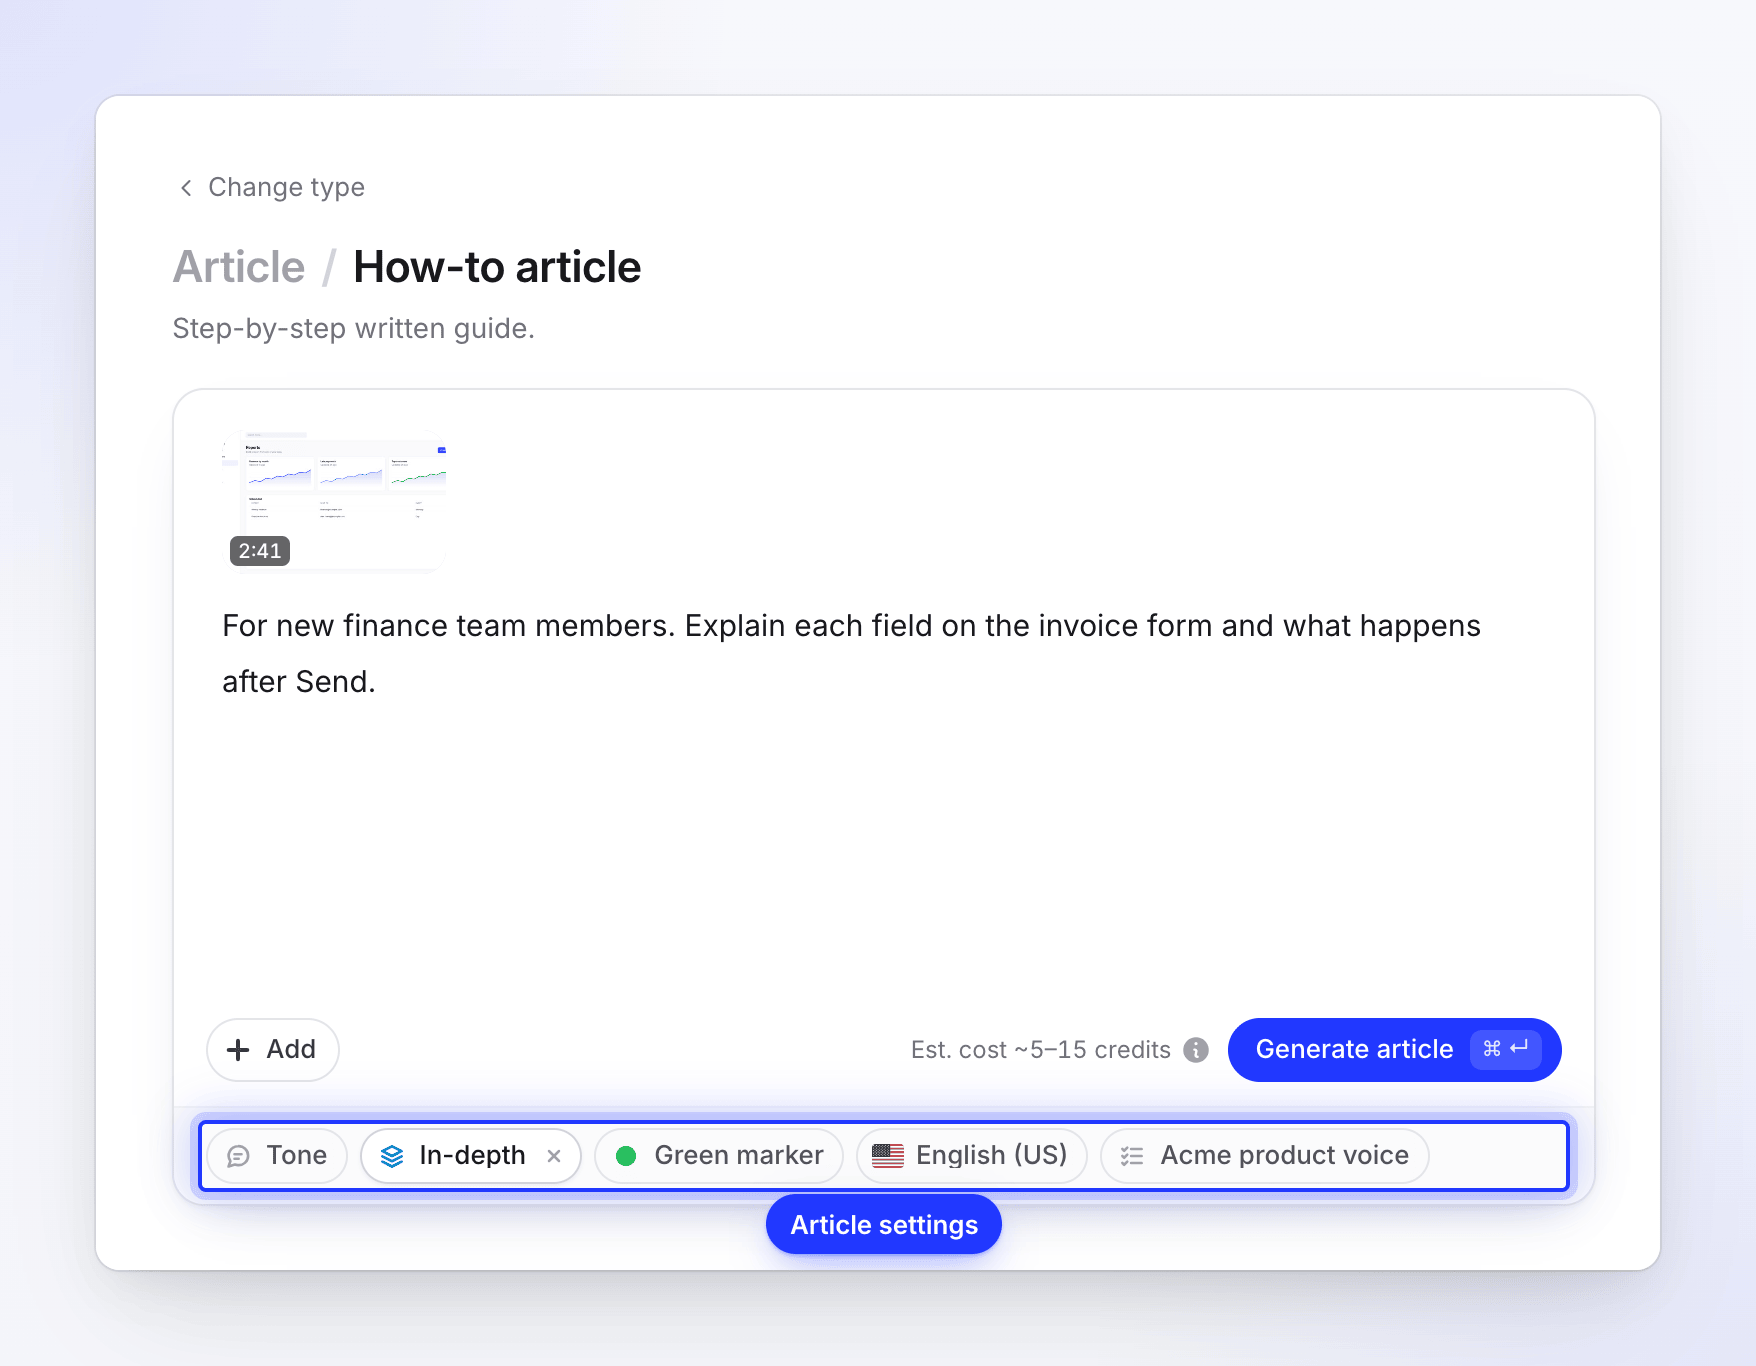
Auto is fine for most recordings. Generate
Check the estimate beside the button, then click Generate article. Clevera opens the progress page. You can close the tab; the article keeps being written.
Choose the kind of article
The kind decides which sections the article has. All five are written from the same recording.
| Kind | What you get | Good for |
|---|---|---|
| How-to article | "Step-by-step written guide." | Help-center guides, onboarding docs |
| Troubleshooting | "Written fix for a common issue." | Known problems and their fixes |
| SOP | "Repeatable standard operating procedure." | Internal processes your team repeats |
| Blog post | "Narrative write-up for your audience." | Feature write-ups, tutorials for a blog |
| Product update | "Ship notes as readable content." | Release notes, changelog posts |
Article settings
| Pill | What it changes | Options | Default |
|---|---|---|---|
| Tone | How the article reads | Auto ("We choose from the recording and the depth."), Professional, Friendly, Technical, Conversational | Auto |
| Depth | "How much detail the article covers." | Auto, Brief, Standard, In-depth | Auto |
| Screenshot marker | The ring "drawn where the recording clicked" on screenshots | Green, Red, Blue, Yellow, Purple, Orange, Pink | Green |
| Language | The language the article is written in | 74 languages, searchable, with your recent ones on top | English |
| AI rules | "Rules the AI follows." Your workspace's saved rules, tick as many as you like | Your rules | None |
What each tone means:
| Tone | Description |
|---|---|
| Professional | "Clear and neutral, like business documentation." |
| Friendly | "Warm and plain-spoken, talking to the reader." |
| Technical | "Precise and terse, for a technical reader." |
| Conversational | "Relaxed, like a blog post." |
How long the article is
| Depth | What it covers |
|---|---|
| Auto | "We choose from how long and how involved the recording is." A short single task becomes Brief, a typical workflow Standard, a long or dense recording In-depth. |
| Brief | "A quick reference: the steps and the key screens, little else." |
| Standard | "A full guide: every step, why it matters, and the main screens." |
| In-depth | "Everything: context, prerequisites, every screen, troubleshooting and FAQ." |
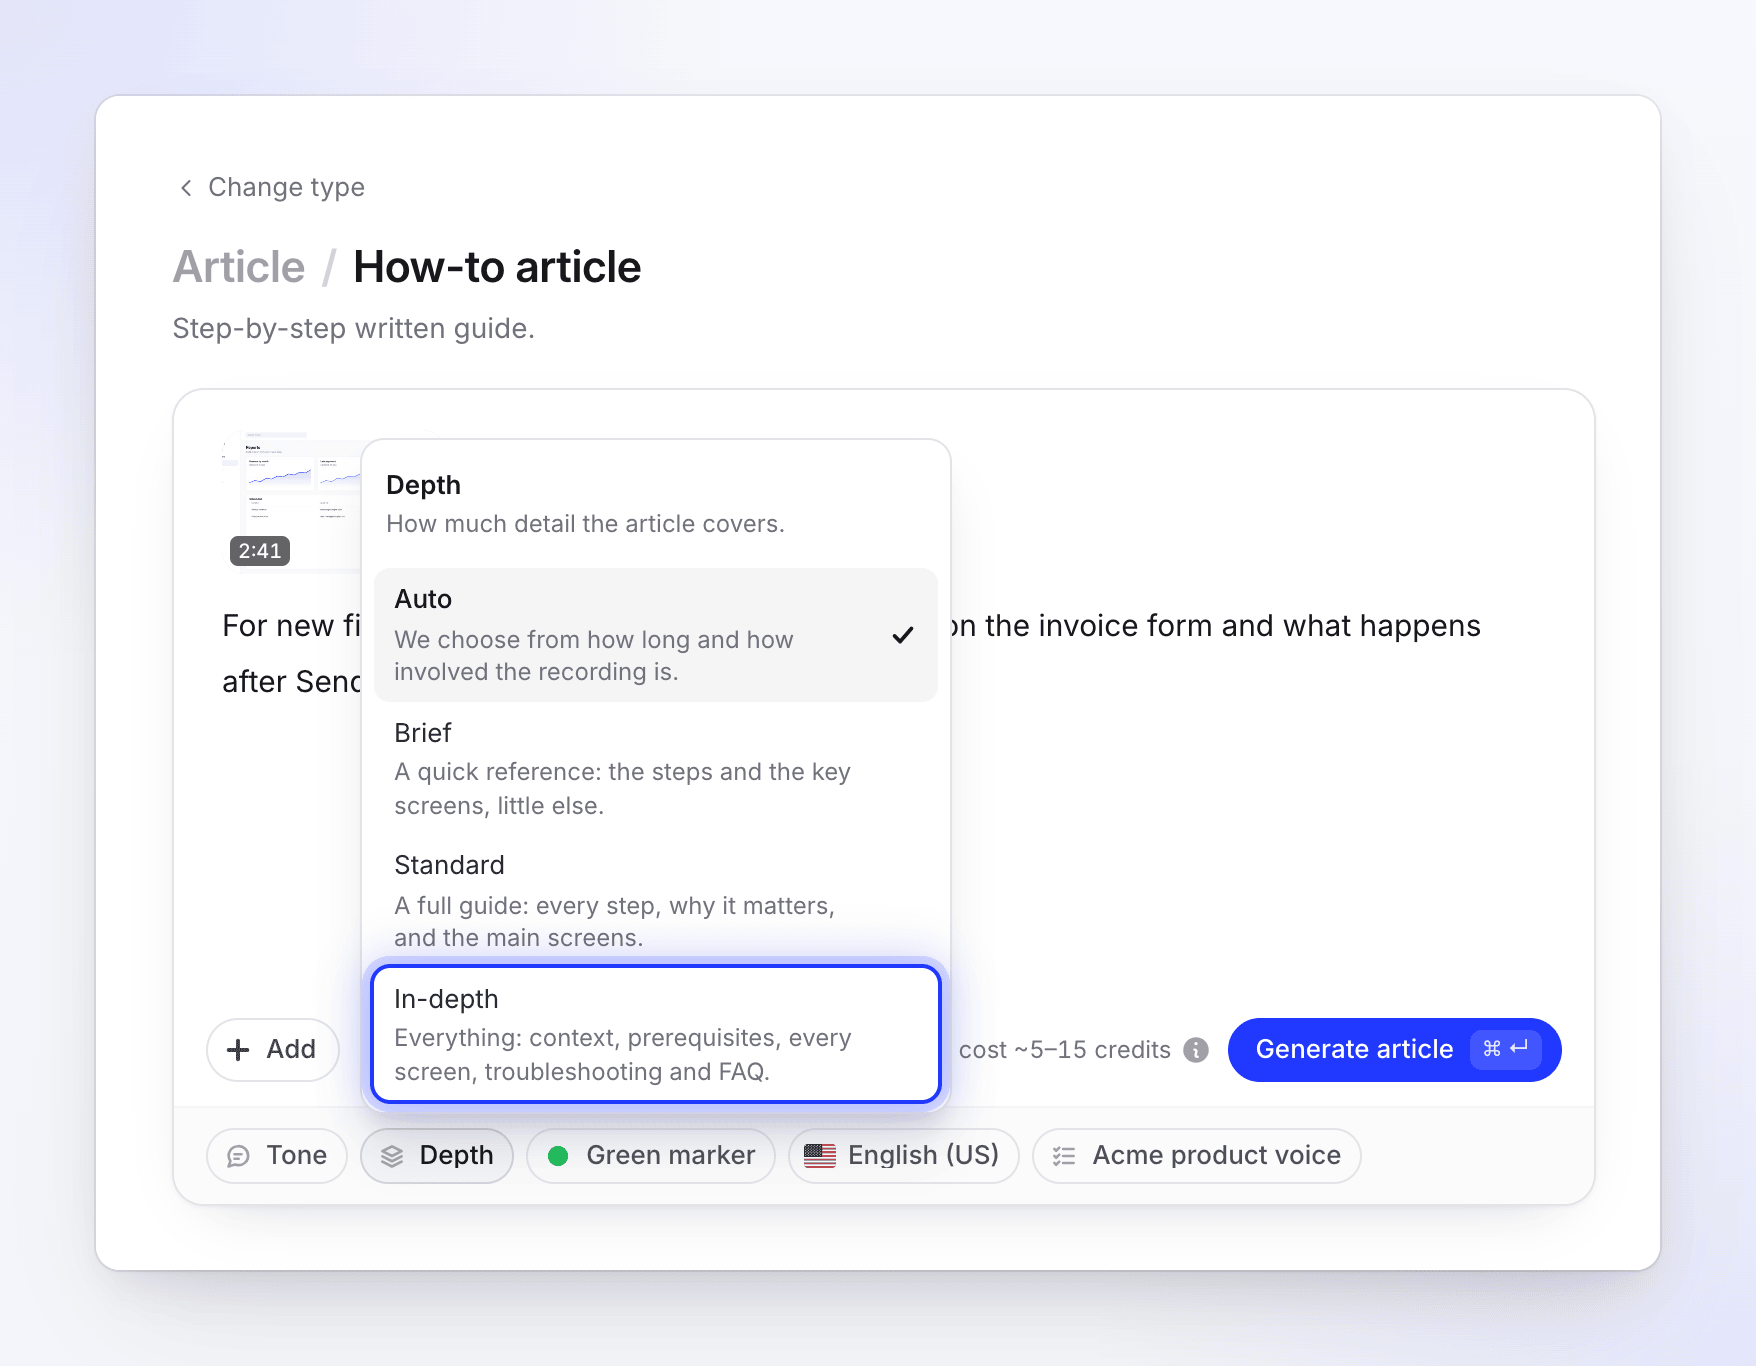
The AI aims for these ranges. They are targets, not limits: a short recording can't fill an In-depth article, and word counts vary by language.
| Kind | Brief | Standard | In-depth (when you pick it) |
|---|---|---|---|
| How-to article | 400–800 words, 4–6 screenshots | 1,000–2,000 words, 7–12 screenshots | 3,000–5,500 words, 14–24 screenshots |
| Troubleshooting | 350–700 words, 3–4 screenshots | 900–1,800 words, 4–8 screenshots | 2,500–4,500 words, 10–18 screenshots |
| SOP | 400–800 words, 2–3 screenshots | 900–1,700 words, 3–5 screenshots | 2,500–4,000 words, 8–14 screenshots |
| Blog post | 400–700 words, 0–1 screenshots | 700–1,400 words, 0–2 screenshots | 2,000–3,500 words, 3–8 screenshots |
| Product update | 250–500 words, 1–2 screenshots | 600–1,200 words, 2–3 screenshots | 1,800–3,000 words, 5–9 screenshots |
When you choose In-depth yourself, the AI writes section by section and checks that every part of the recording is covered, so it takes longer than the other levels.
How screenshots are picked
Every picture in the article is a frame from your recording. How Clevera finds the frames depends on where the recording came from.
| Recording | How screenshots are taken | Click marker |
|---|---|---|
| Desktop app (with click data) | A frame just before each click, after you finish typing or scrolling, and at pauses where you explain something. The AI then picks the right frame for each picture. | Drawn where you clicked, in your marker color |
| Uploaded video, or a recording without click data | The AI watches the video and picks the moments to capture. | None, because the video has no click positions |
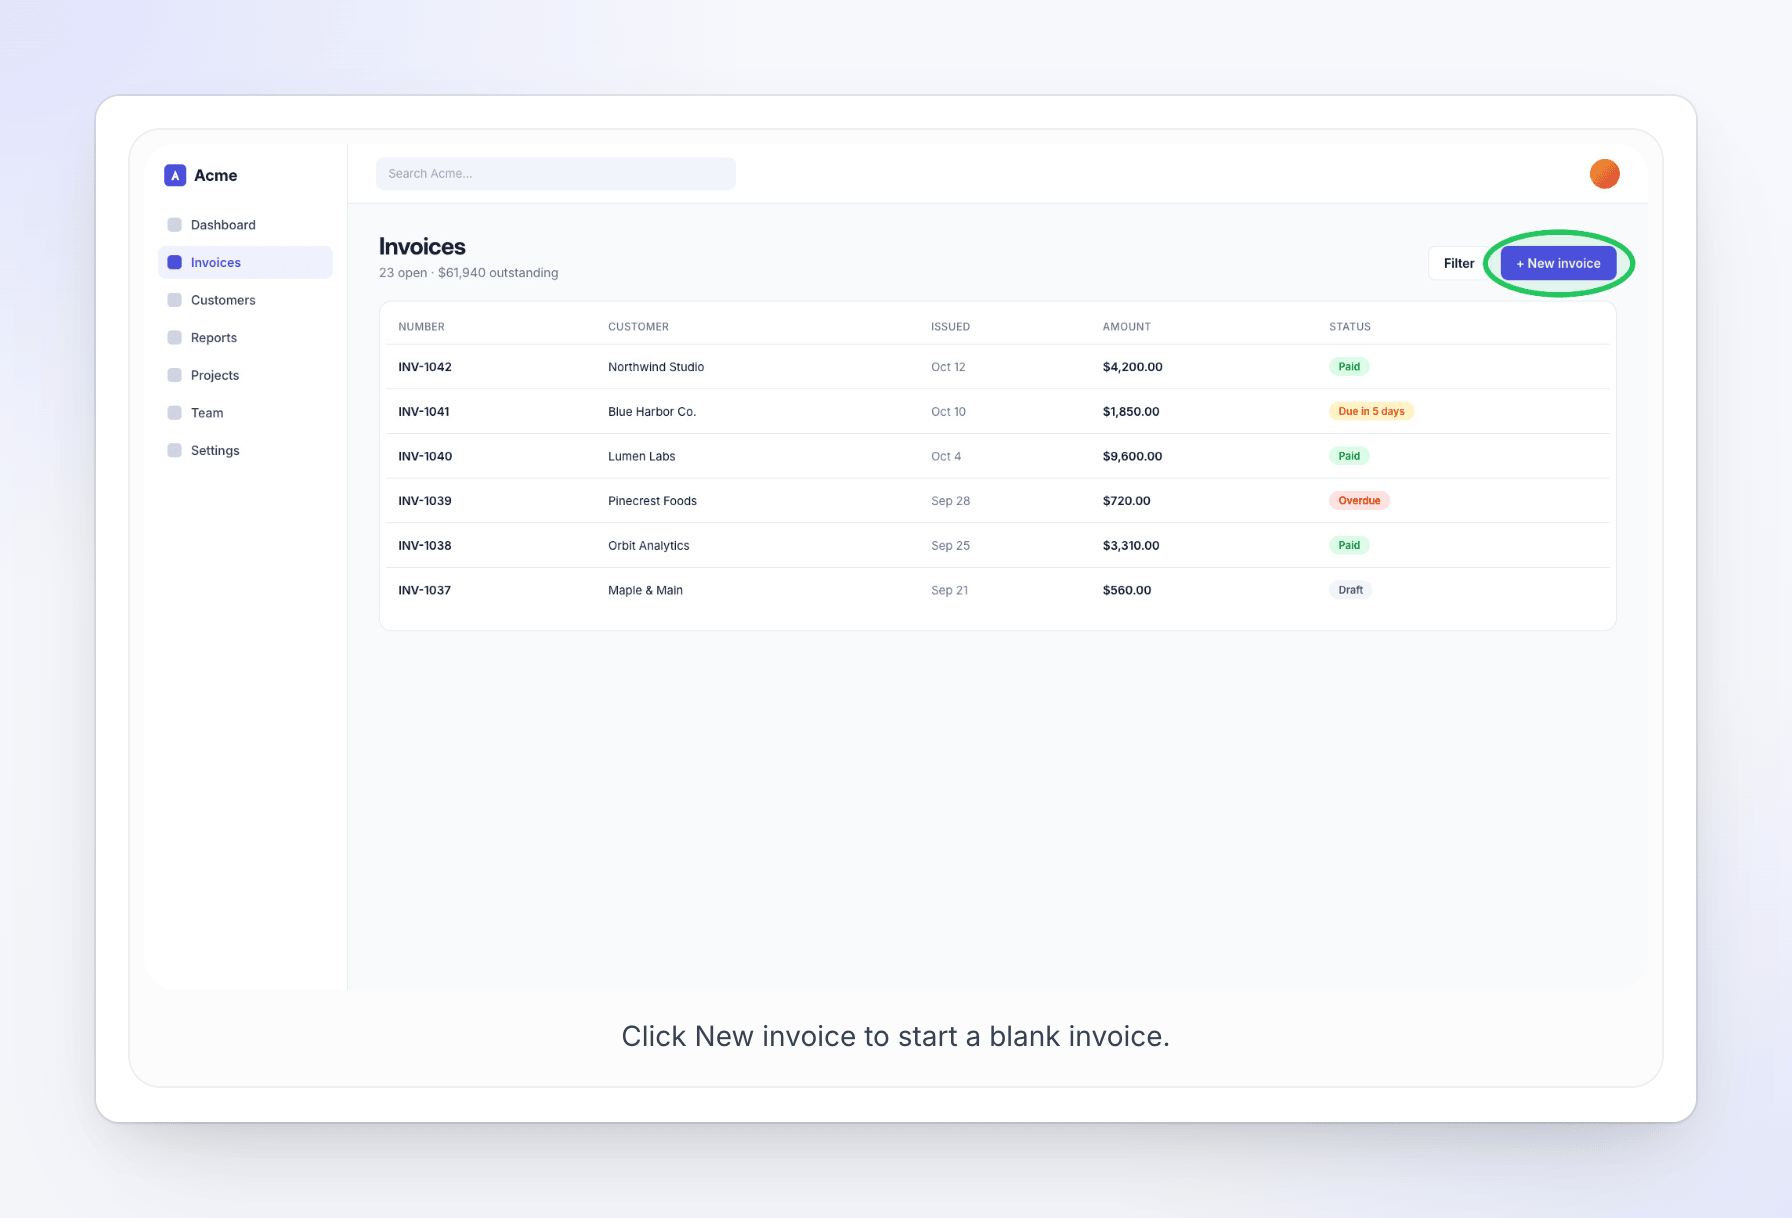
The desktop app records your clicks separately from the video, which is why it can put a ring exactly where you clicked. See what the desktop app captures.
You can swap any screenshot afterwards, capture a new frame or draw your own markers. See Edit an article and its screenshots.
What happens while it's written
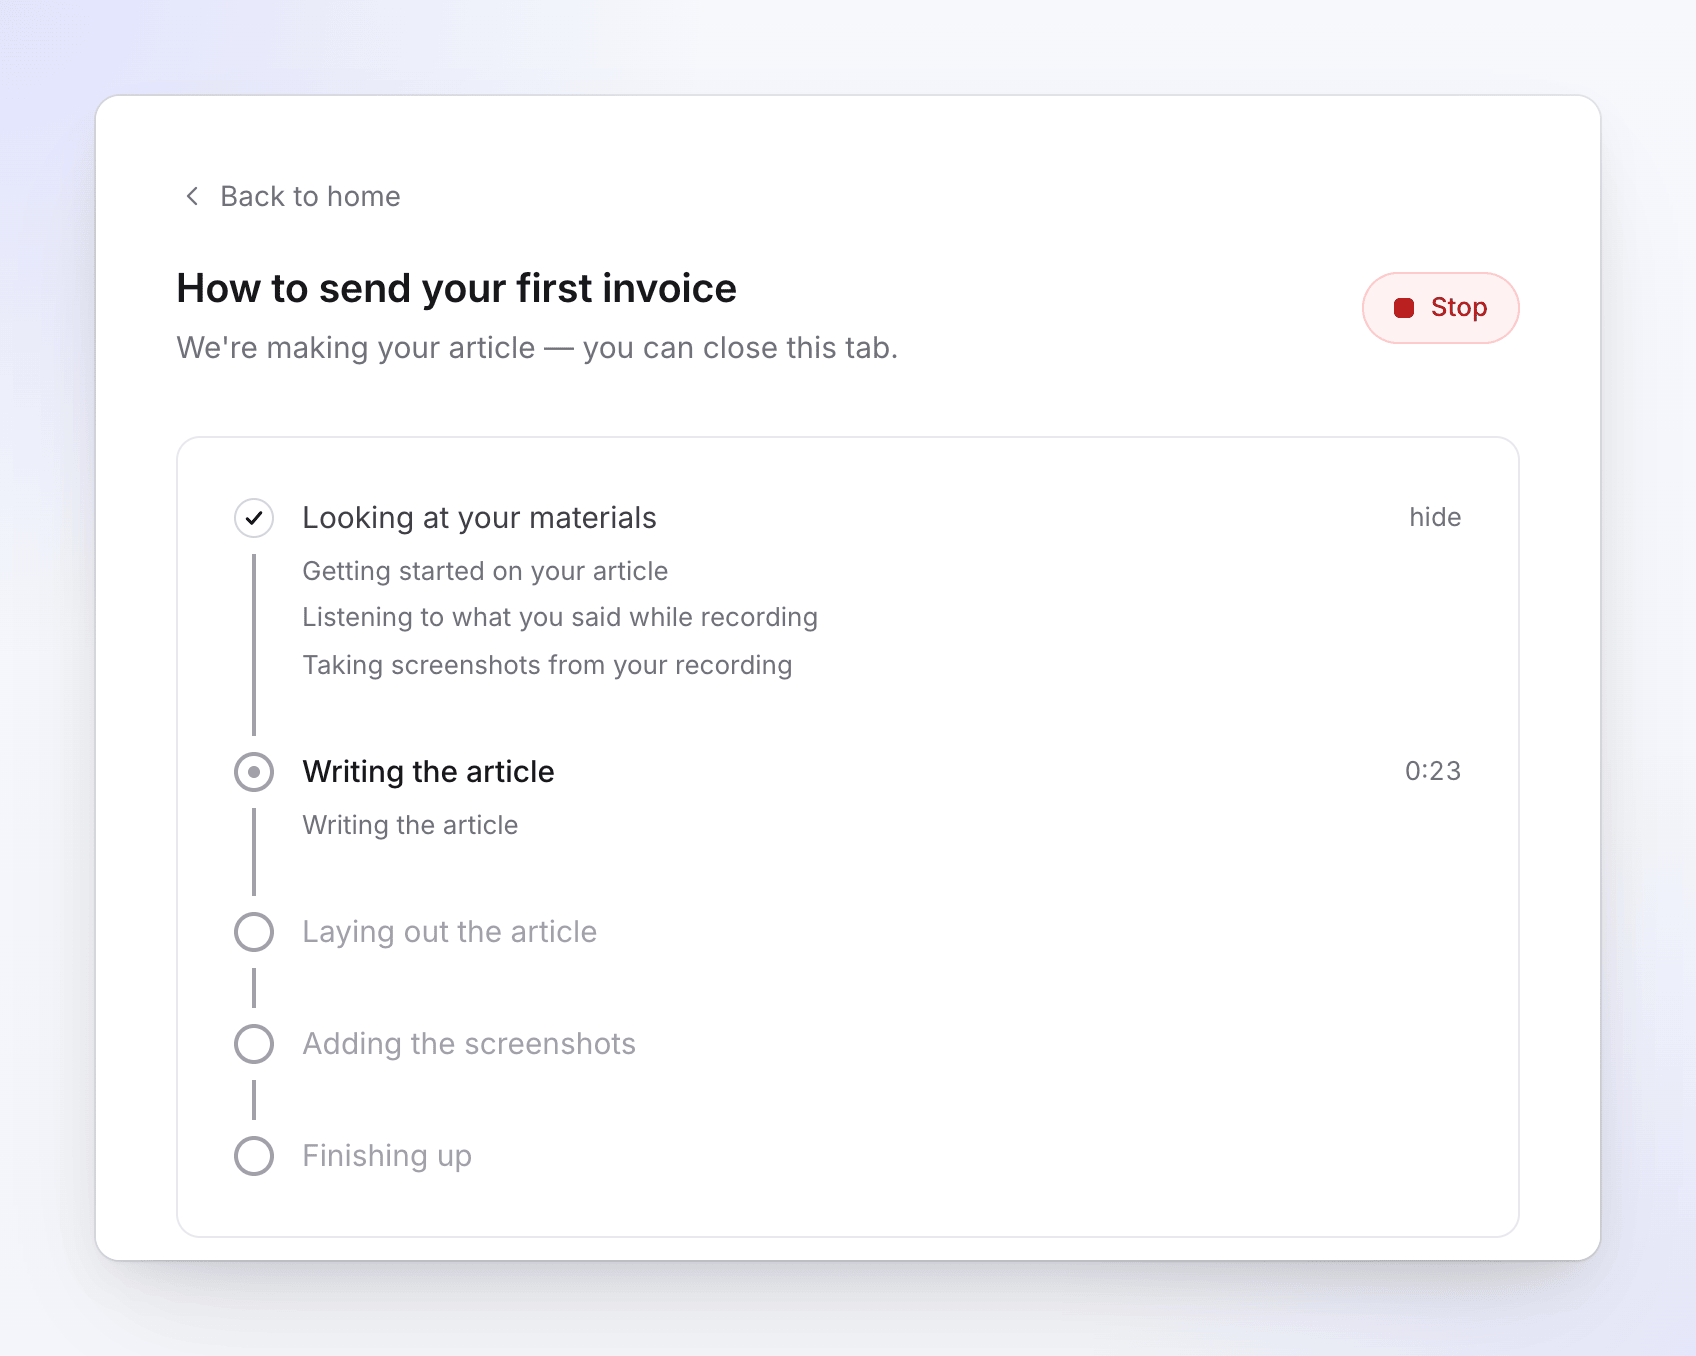
The progress page shows "We're making your article — you can close this tab." and five stages:
- Looking at your materials – Clevera gets the recording ready, listens to what you said and takes screenshots from it.
- Writing the article
- Laying out the article
- Adding the screenshots
- Finishing up – a final read-through.
Each stage lists what is happening under it, for example "Listening to what you said while recording" or "Taking screenshots from your recording", and the running stage shows how long it has taken. Click hide or show beside a finished stage to fold or open its lines.
When it's done you see "Your article is ready." and Open your article. You also get a notification, so you can leave and come back. See Follow your video while it generates for the alerts and the inbox.
To stop a run, click Stop. A stopped article can't be picked up again; make a new one instead. See Stop, retry or clear a generation.
What it costs
An article usually costs 5–15 credits. The estimate beside Generate article shows the range for your recording. "What moves it: how long the article is and how much material it is written from." Longer or more complex articles can cost more than the usual range.
You are charged the credits the job actually uses, which can be more or less than the estimate. Later changes with the article assistant and translations use credits as they happen. Downloading or sharing the article is free.
Languages
The article is written in the language you pick on the Language pill, whatever language you speak in the recording. To add more languages later, open the language menu in the editor's top bar and choose Translate…. Each translation is its own copy you can edit and usually costs 3–10 credits per language. See Translate a finished video for the translate dialog.
A video and an article from the same recording
An article is its own item in your library. To get a narrated video as well, make a how-to or demo from the same recording: open the recording, choose What do you want to make from this recording? and pick a video type. In the editor, ⋯ → Related content lists everything made from the same recording, and you can show the video above the article when you share it (see Export or publish an article).
Troubleshooting
| You see | What to do |
|---|---|
| "This recording is still processing. Please wait until it is ready." | Wait until the recording's status is ready, then generate again. |
| "Pictures and PDFs were removed — an article is written from your video alone." | Nothing to fix. Put any facts from those files in the brief instead. |
| "The Free plan makes videos up to 3 minutes. Trim the recording or upgrade to make longer videos." | Trim the recording or upgrade. This limit applies to articles too. |
| "The Free plan runs one generation at a time. Wait for the current one to finish, or upgrade to run more at once." | Wait for the running video or article to finish. |
| "Please verify your email address before your first generation. Check your inbox for the verification link." | Click the link in the verification email. |
| "We couldn't finish this one" / "Something went wrong on our side. Your materials are safe." | Click Try again. An article is written fresh from the start. Contact support if an article failed on our side. |
| The article has few screenshots or no click markers | The recording was uploaded or has no click data. Add screenshots in the editor with Capture from Video. |