

Publish articles to your other tools
Connect Notion, Confluence, Google Docs, ClickUp, GitBook, ReadMe and more to your workspace, then publish any Clevera article to them. What each tool receives, who can connect, how re-publishing works and how images and videos are carried.
Integrations send a finished Clevera article into the tools your team already reads: a wiki, a docs site, a help center or a code repository. Connect a tool once for the workspace, then publish any article to it from the editor's Share button.
Before you start
- Plan: integrations are part of the Pro and Custom plans. On Free and Starter the Integrations page shows "Integrations are included in Pro" with Upgrade to Pro, and the editor's Publish tab shows "Publishing to your tools is included in Pro".
- Role: only workspace owners and admins can connect or disconnect a tool. Everyone else sees "Only team owners and admins can connect or disconnect integrations. You can still publish to connected ones from the editor."
- Content: what you publish is an article. A video reaches the other tool only as a player inside that article (see How videos are carried).
What you can connect
| Tool | What Clevera creates there | You choose | How you connect |
|---|---|---|---|
| Notion | A page | The workspace top level, a page or a database | Sign in with Notion |
| Confluence | A page at the top of a space | A space | Sign in with Confluence |
| Google Docs | A new Google Doc in My Drive | Nothing (always My Drive) | Sign in with Google Docs |
| ClickUp | A Doc | A Workspace | Sign in with ClickUp |
| GitBook | A page at the top of a space | A space | Access key |
| ReadMe | A guide | A guide category | API key |
| Help Scout | A Docs article | A Docs site, then a collection | Docs API key |
| GitHub, GitLab, Bitbucket | A Markdown file | An account, a repository and a folder | Sign in |
| WordPress | Nothing is pushed: you place Clevera videos and articles in posts with blocks or widgets | Set up from the WordPress plugin | WordPress plugin |
Every connection belongs to the workspace, not to the person who made it. Each tool can have one connection per workspace (WordPress can have one per site). Connecting again with a different account replaces the old connection.
Connect a tool
Open Integrations
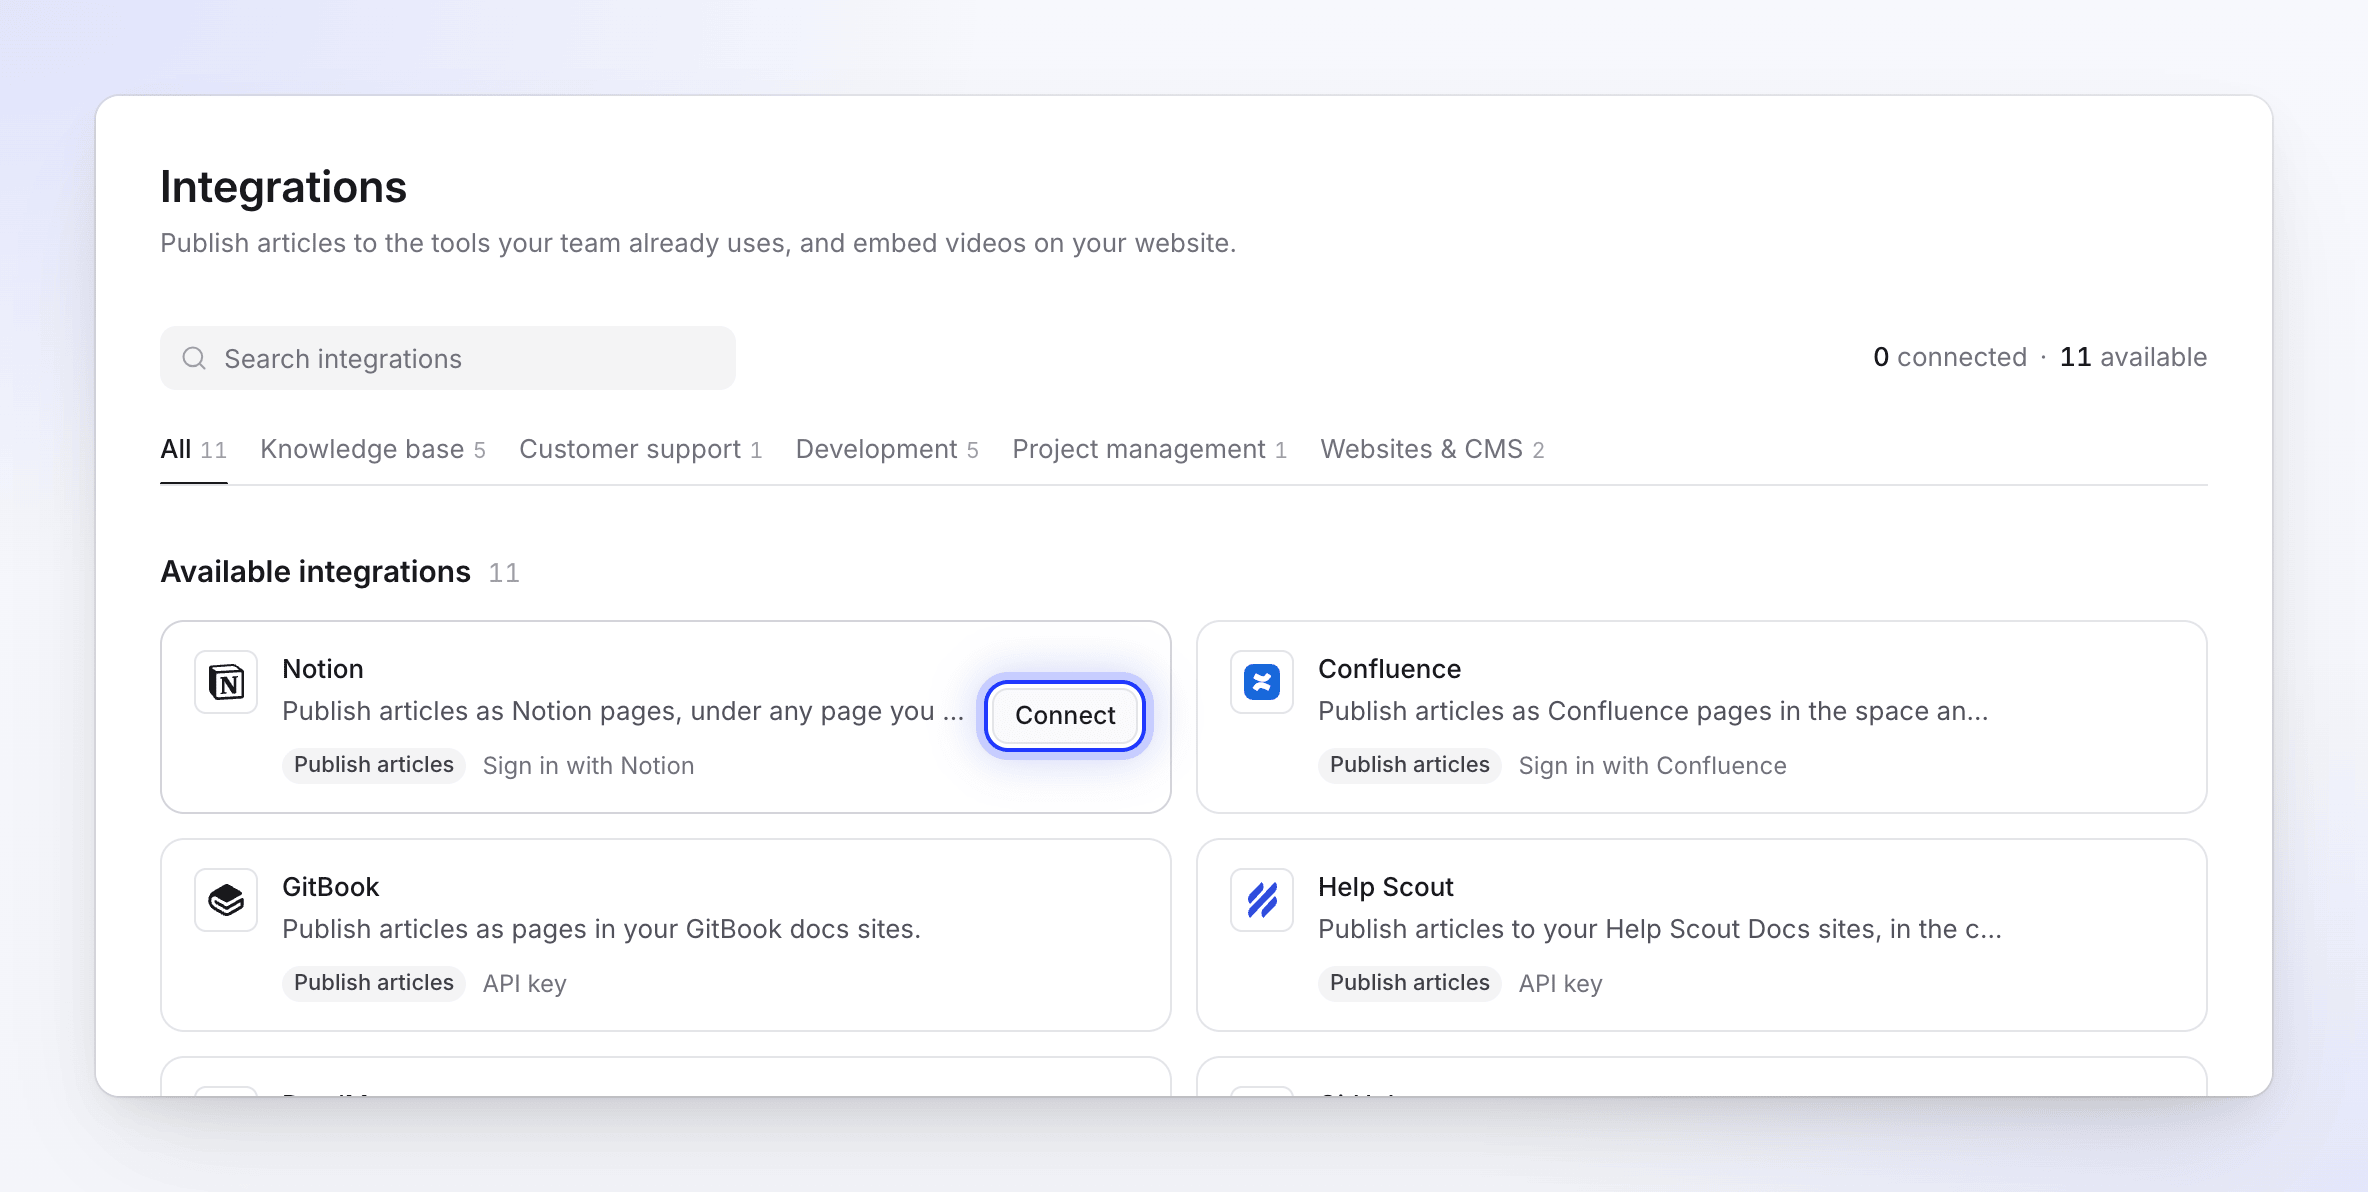
Click your workspace name at the top of the sidebar and choose Integrations. The page lists Connected tools first, then Available integrations. Search or filter by category (Knowledge base, Customer support, Development, Project management, Websites & CMS).
Click Connect
Each card shows what the tool does (Publish articles, Embed videos, Embed articles) and how it connects: Sign in with …, API key or … plugin. The Connect button appears when you point at a card.
- Sign in tools send you to the tool's own permission screen, where the app is named Clevera. Approve it and you come back to Integrations with "Notion connected successfully to Acme Inc.!" (with your tool and account).
- API key tools open Connect …: paste the key, click Check key, pick the sites to publish to, then click Connect. You see, for example, "Help Scout connected."
- WordPress shows Set up with the steps to follow inside WordPress.
Check the connection
The tool moves to Connected with its account name, a status badge and a line such as "Nothing published yet" or "Published 2 hours ago · 4 articles".
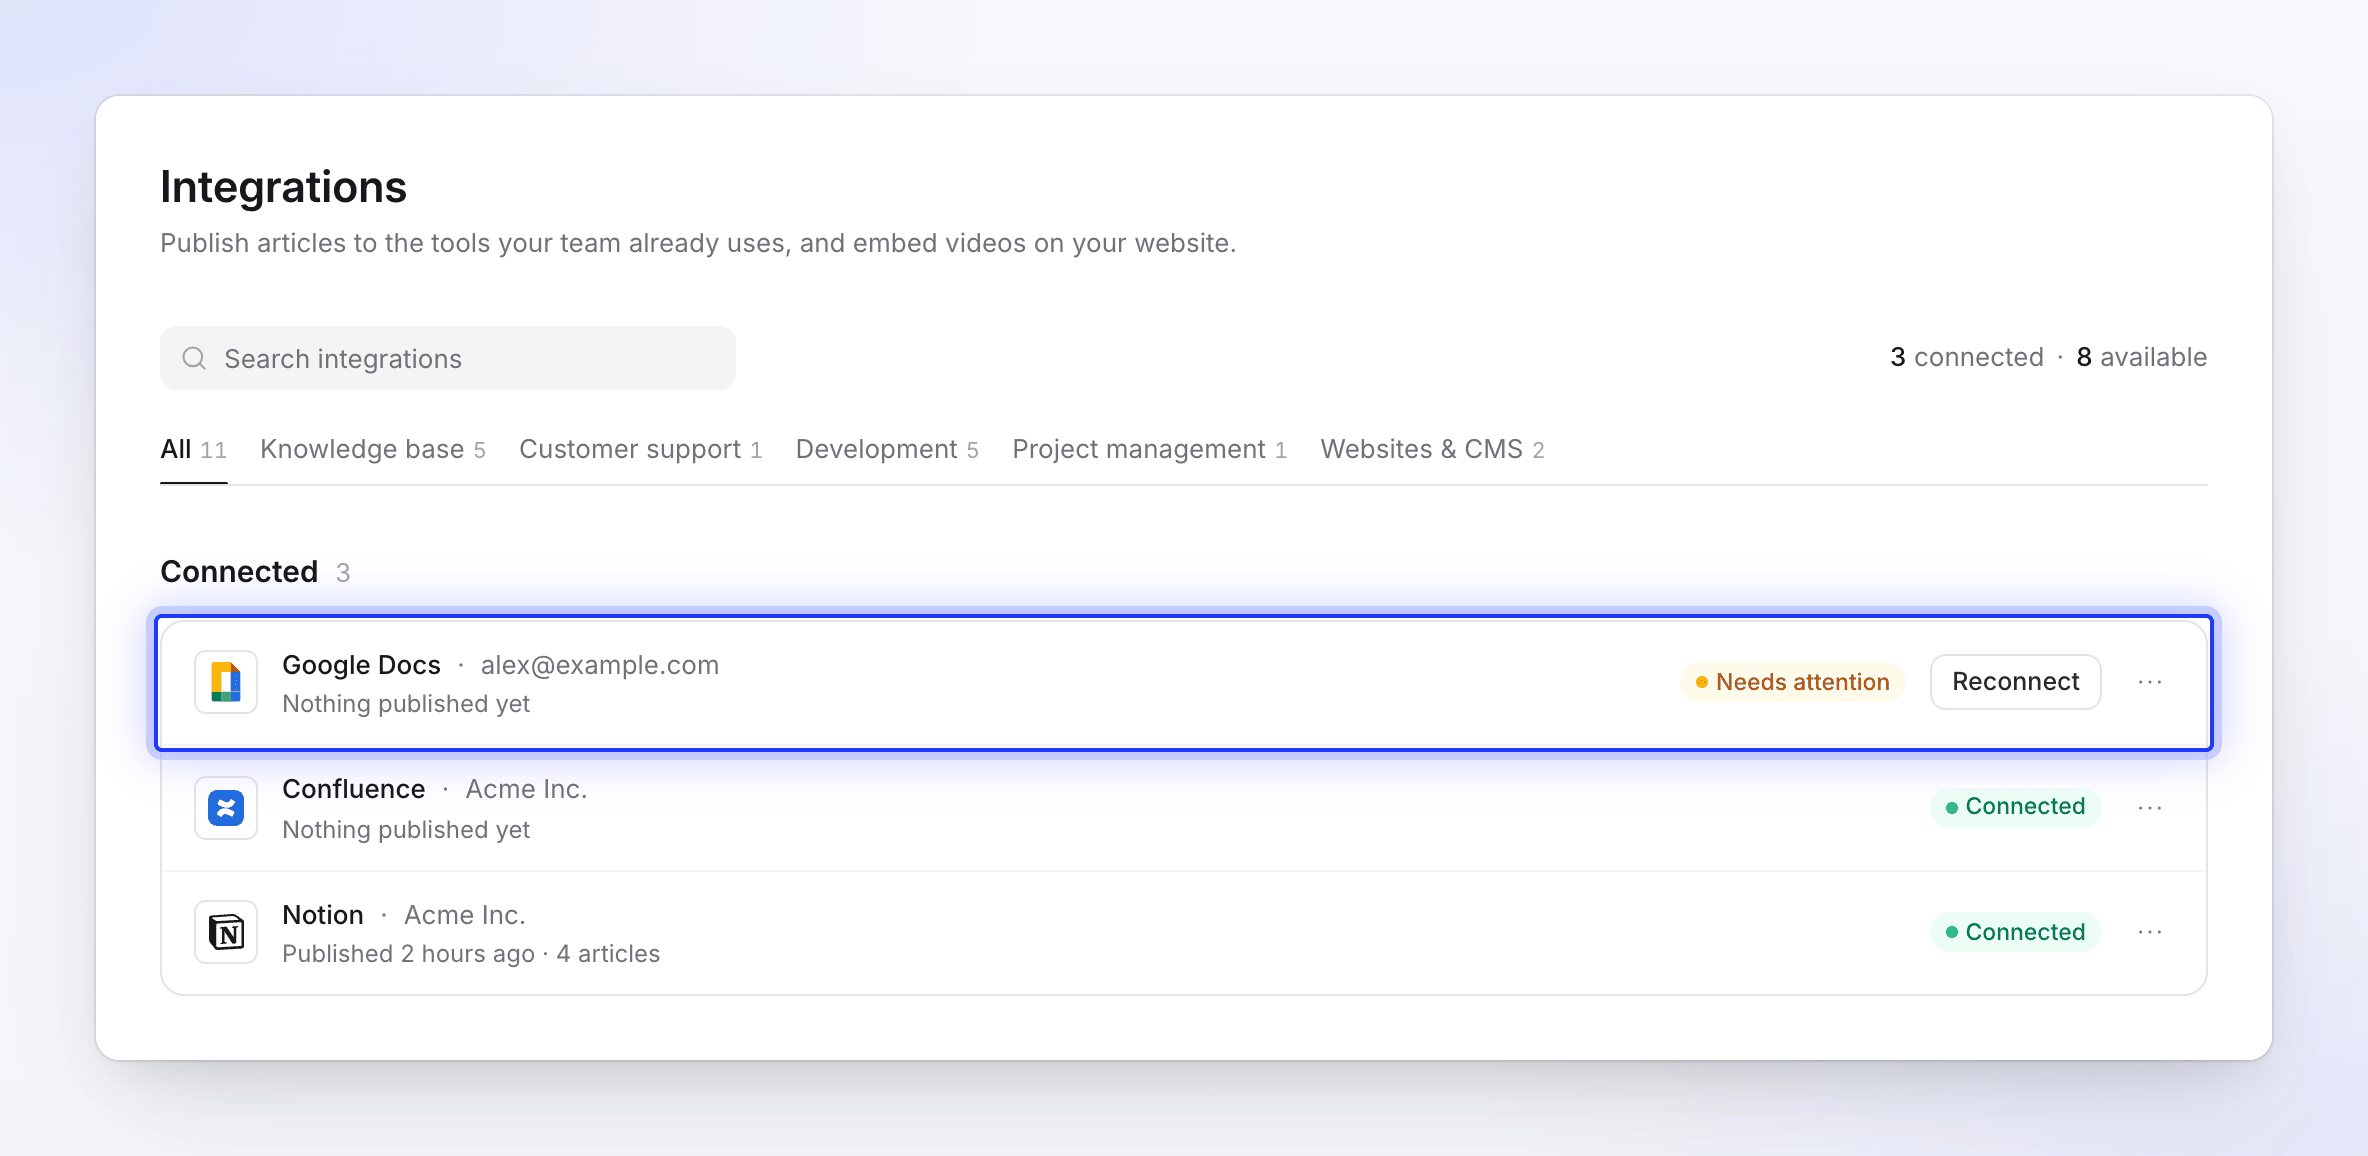
A connection that needs attention shows Reconnect on its row.
Publish an article
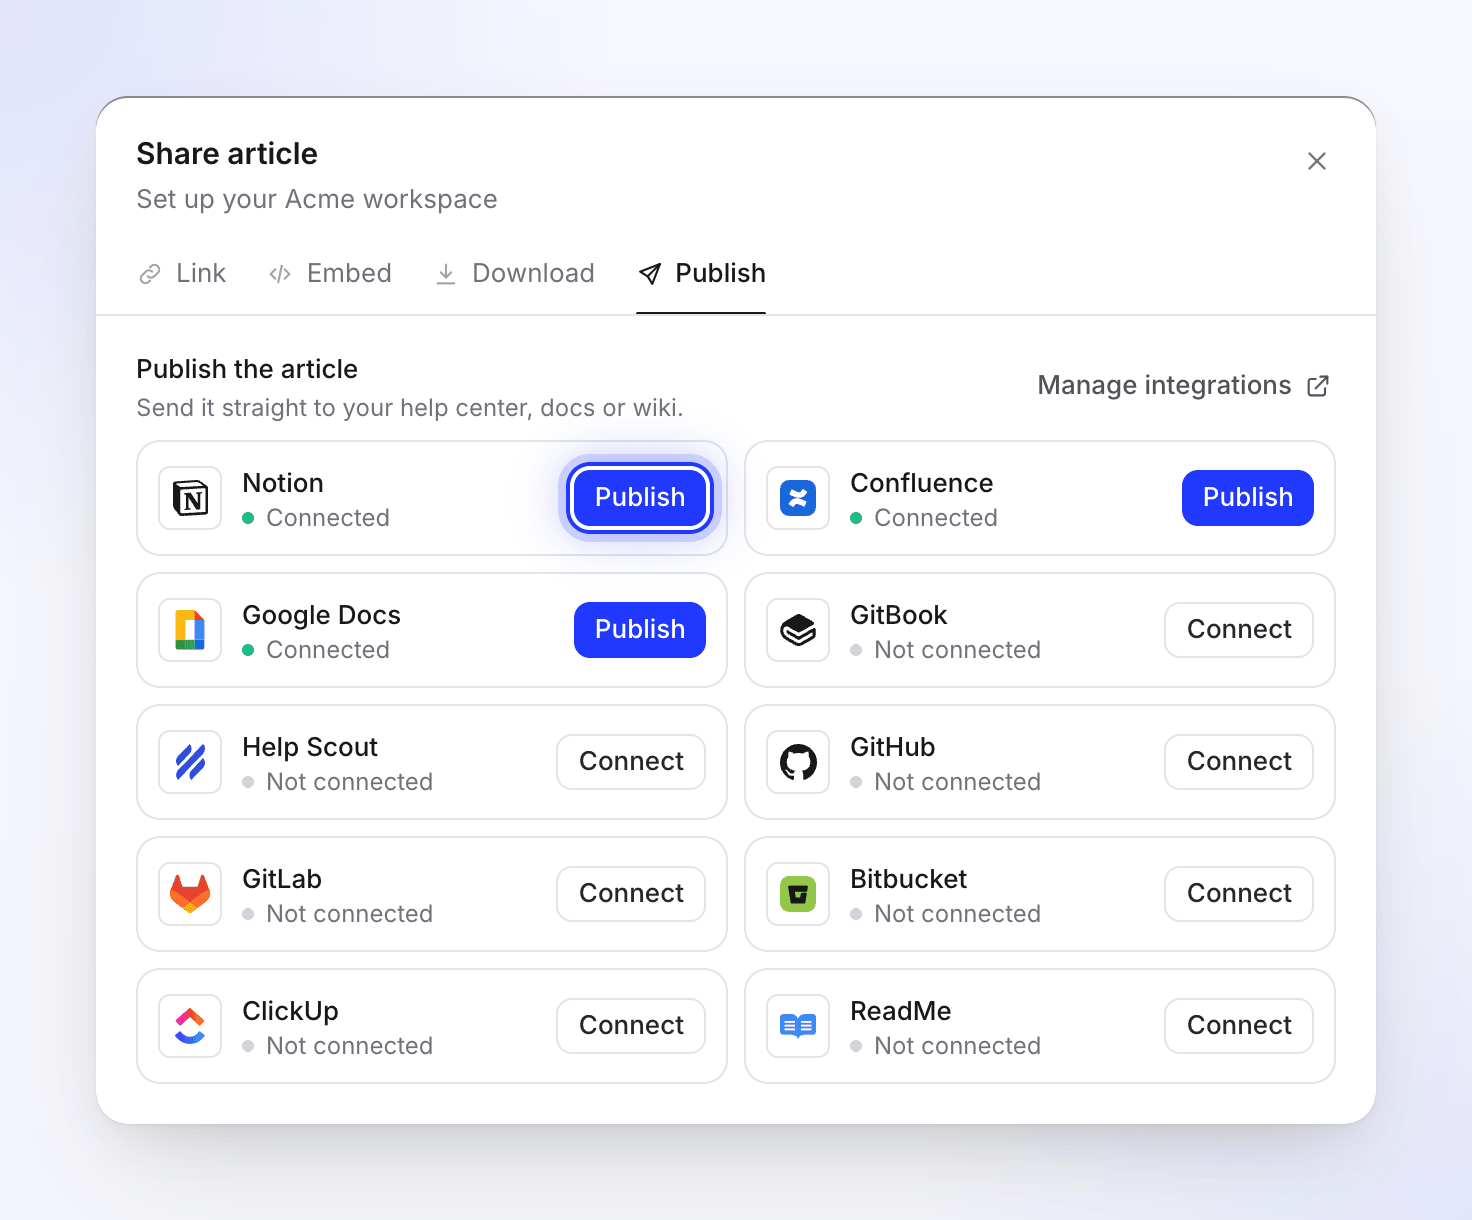
- Open the article (or a video that has an article) and click Share → Publish.
- Under Publish the article, click Publish next to a connected tool. Tools that aren't connected show Connect, which opens the Integrations page.
- Choose where the article goes and click Publish. Clevera checks for an article with the same title first ("Checking for an existing article…").
- When it's done you see "Published to Notion." (with your tool's name) and the new page opens in a new tab.
The article is published in the language you have open in the editor. Switch language in the top bar first to publish a translation. Publishing never uses credits.
You can publish up to 20 times a minute. After that you see "Too many publish attempts. Please wait a moment before trying again."
Publish again after you edit
Publishing makes a copy, and it only goes one way. When you change the article in Clevera, the copy in the other tool stays as it was until you publish again. Edits people make to the copy in the other tool never come back to Clevera.
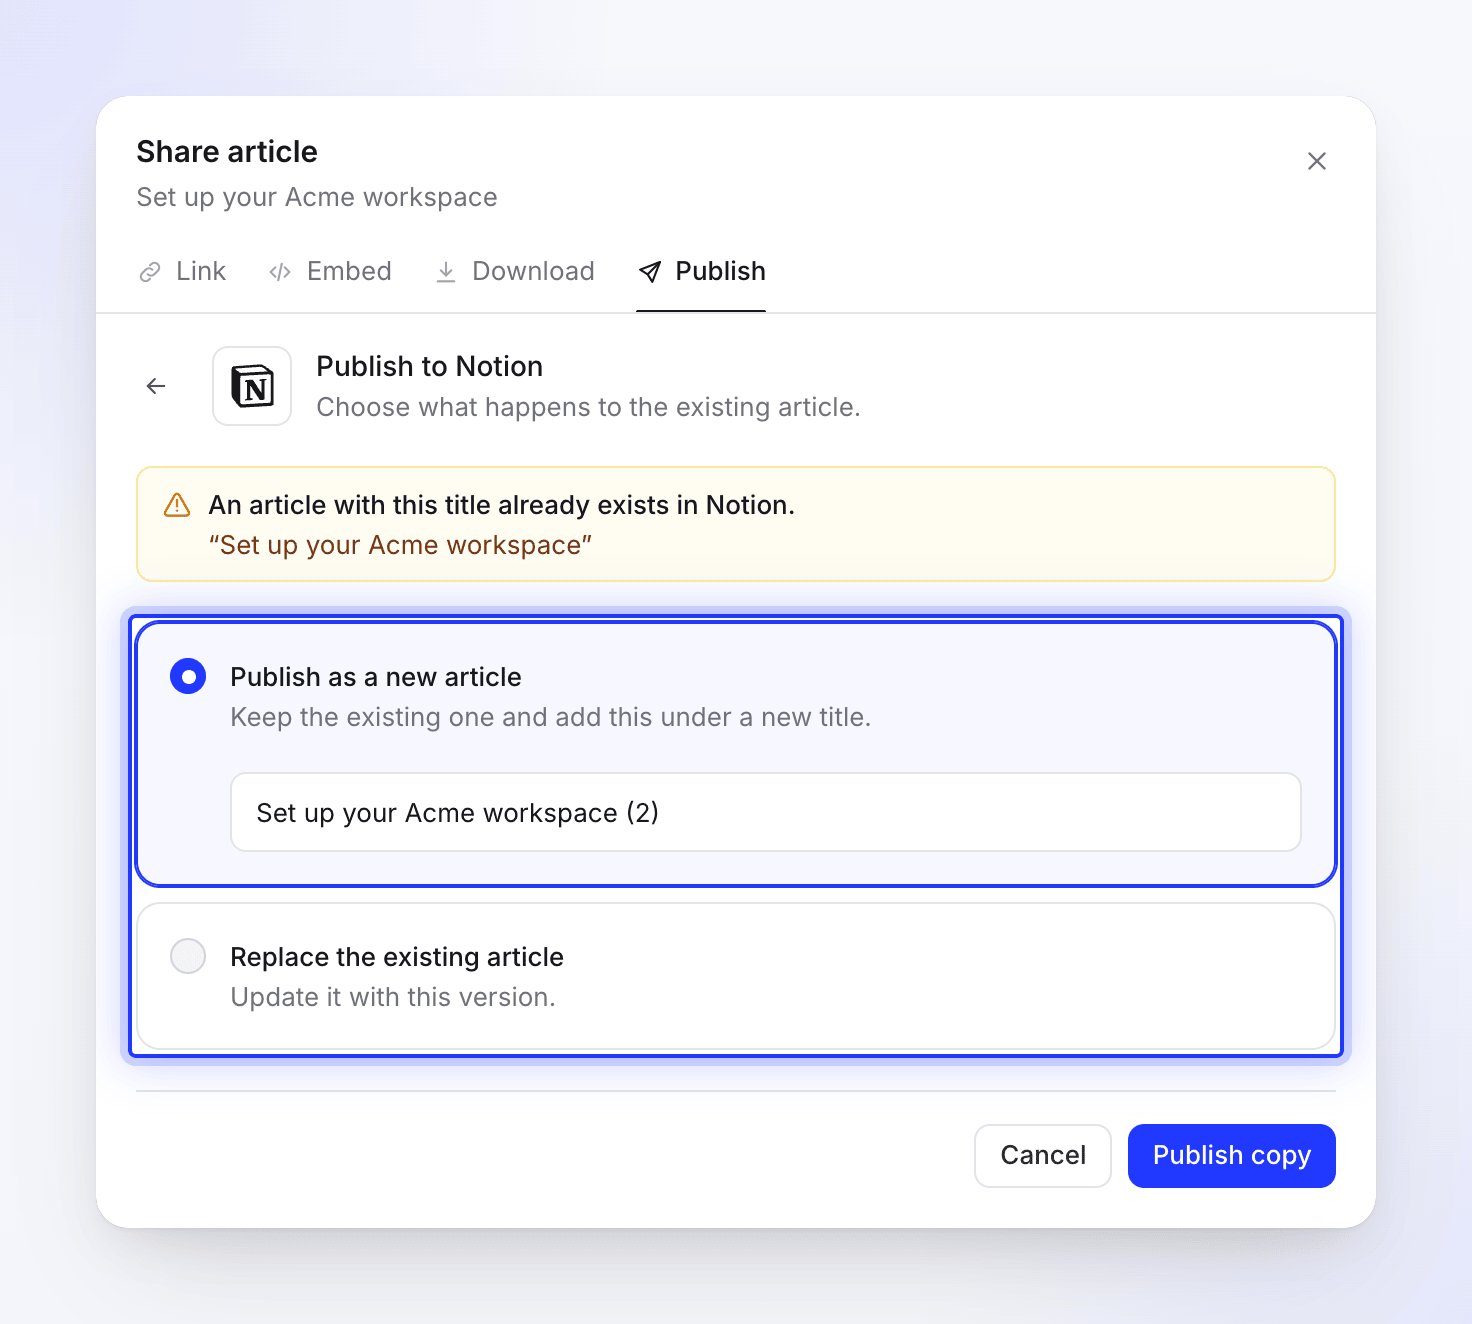
When you publish an article whose title already exists in the place you chose, Clevera asks what to do: "An article with this title already exists in Notion." Choose one:
| Option | What happens |
|---|---|
| Publish as a new article | "Keep the existing one and add this under a new title." Clevera suggests a title such as "Set up billing (2)". Click Publish copy. |
| Replace the existing article | "Update it with this version." Click Replace. |
What Replace does depends on the tool:
| Tool | Replace |
|---|---|
| Confluence, GitBook, ReadMe, ClickUp | Updates the same page. Its address stays the same. |
| Notion | Moves the old page to Notion's trash and creates a new page in the same place. The address changes, and comments on the old page stay with the old page. |
| Google Docs | Never asks: every publish creates a new document. |
Edits people made in the other tool are overwritten by Replace.
How images and videos are carried
| Tool | Screenshots | Video |
|---|---|---|
| Notion | Uploaded into Notion | An embedded player at the top |
| Confluence | Uploaded as page attachments | An embedded player at the top |
| Google Docs | Copied into the document | A "Watch the video" link at the top |
| ClickUp | A "View Image" link per screenshot | A "Watch the video" link at the top |
| GitBook | Linked from Clevera | An embedded player at the top |
| ReadMe | Uploaded to ReadMe | An embedded player at the top |
The video is included only when its link is shared. In the editor, Share → Link → General access must be Anyone with the link. With Restricted, the article is published without the video.
What changes in the formatting
Clevera converts the article into each tool's own format. Headings, paragraphs, bold, italic, links, bulleted and numbered lists, checklists, quotes, code blocks and dividers come through everywhere. Some parts change shape:
| In Clevera | In the other tool |
|---|---|
| Callouts (info, tip, warning…) | The tool's callout or panel where it has one; otherwise a quote or shaded paragraph with an emoji |
| Numbered steps | A paragraph that starts with a bold "Step 1:" |
| Collapsible sections | A toggle or expand block where the tool has one; otherwise a bold title followed by the content |
| Tables | A table with the text of each cell; formatting inside cells is dropped |
| Pictures or lists inside a callout, step or quote | Only the text is kept |
Each tool's article lists the exact result.
Manage or disconnect a connection
On Integrations, click a connected tool (or its ⋯ menu) for:
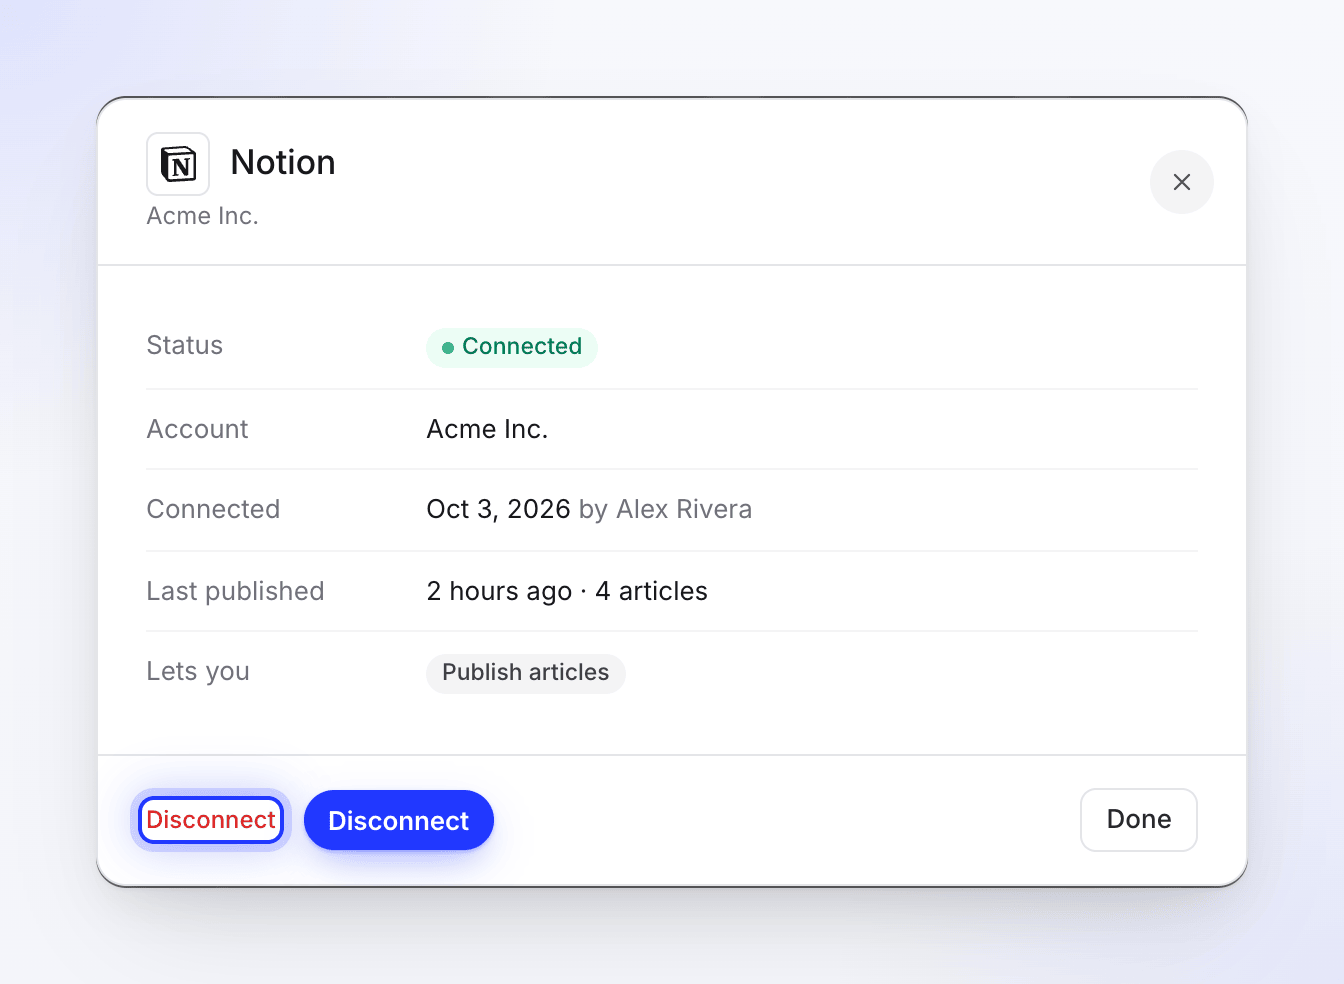
- Configure: the status, account, who connected it and when, and when it last published.
- Reconnect: runs the sign-in (or key check) again. Use it when the status shows Error or Needs attention, or to switch accounts.
- Disconnect: asks "Disconnect Notion?" with "You can no longer publish to it from the editor. Content you already published stays in Notion."
Disconnecting deletes Clevera's stored access, but the tool may still list Clevera as an authorized app. To revoke it there too, follow the steps in each tool's article. A workspace that moves off Pro can still disconnect its tools.
When a connection stops working
Some tools (Confluence and Google Docs among them) use sign-ins that Clevera renews in the background. If a renewal fails, the connection shows Error or Needs attention, and the person who connected it gets a notification: "Your Confluence connection expired" / "Reconnect it to keep publishing."
If someone removes Clevera's access inside the tool, publishing shows "Your Notion connection expired. Reconnect it to publish." (or the tool's own message) and opens Integrations. In both cases, click Reconnect.
Troubleshooting
| You see | What to do |
|---|---|
| "Integrations are included in Pro and Custom plans." | Upgrade the workspace. See Choose a plan. |
| "You do not have permission to manage integrations. Only team owners and administrators can perform this action." | Ask an owner or admin to connect the tool. |
| "Too many connection attempts. Please try again later." | Wait a minute and connect again. |
| "Invalid authorization state. Please try again." or "Authorization expired. Please try again." | The sign-in took more than 10 minutes or ran in another tab. Click Connect again. |
| "Connect Notion first." | The tool isn't connected. Ask an owner or admin to connect it. |
| "Couldn’t load your Notion locations" | Click Try again. If it repeats, reconnect the tool. |
| "Generate the article first, then publish it here." | The article isn't ready yet. Wait for it to finish. |
| "No article found. Please generate an article first." | This language has no article. Switch language or generate one. |
| "Integrations didn't load" | Click Try again or reload the page. |