

Add and edit elements
Put text, images, video overlays, blur, highlights, shapes, emoji, audio and sound effects on top of your video from the Elements tab. Place, time and animate them, and add full-screen scenes and transitions.
Elements are things you place on top of your video: text, images, video overlays, blur over private details, highlights, shapes, animated emoji, audio and sound effects. Add them from the Elements tab in the video editor, then set where they sit, how they animate and when they play.
Before you start
- The Elements tab is in the video editor for how-to videos, product demos and Polish videos. Social clips add elements from the + button on the timeline; see Edit a social clip.
- You need edit rights on the video.
- Adding and editing elements is free. It doesn't use credits.
Add an element
Move the playhead
Put the playhead where the element should start. New elements start there.
Click Add element
In the Elements tab, click Add element. The Add an element list opens, grouped by Text, Media, Annotate and Sound. Type in Search elements to filter it.
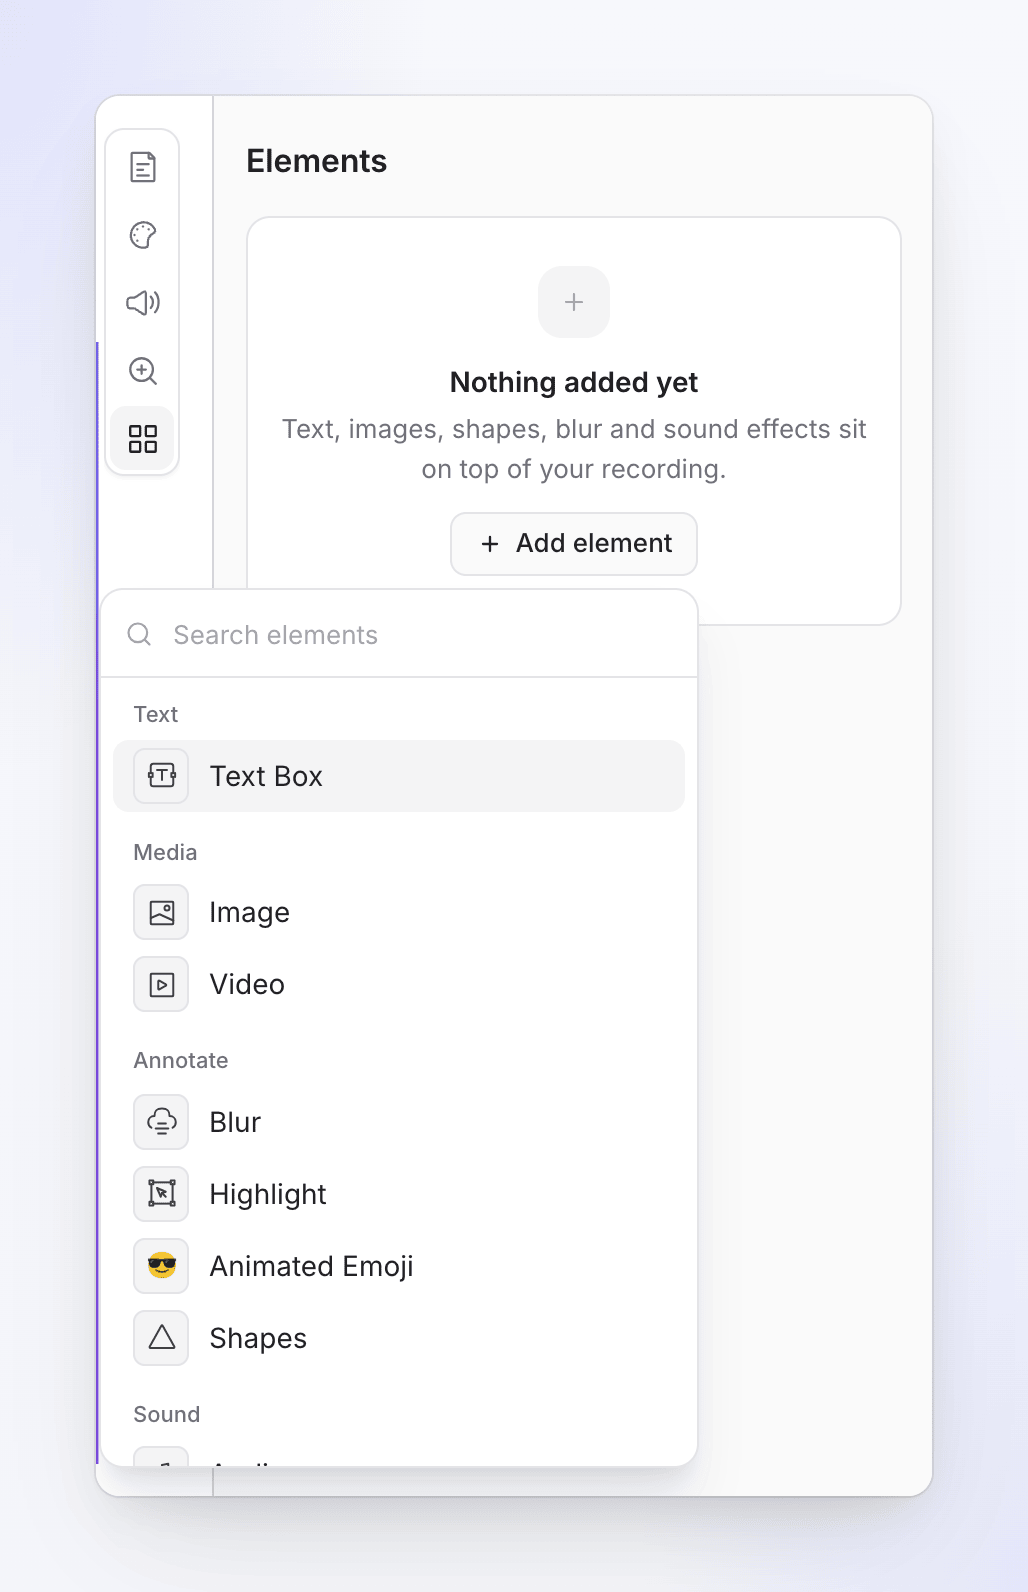
Pick an element
Click one. It's added at the playhead, selected, and its options open. Most elements last 5 seconds; a sound effect lasts 2 seconds.
Set it up
Choose its content (text, image, file or sound), then its placement and animation.
| Element | What it's for |
|---|---|
| Text Box | "Text with background and caption styles" |
| Image | "Add images to your video": a logo, a screenshot, a badge |
| Video | "Add video overlays" |
| Blur | "Blur sensitive information", such as emails or customer names |
| Highlight | "Draw attention to specific areas" |
| Animated Emoji | "Add animated emoji overlays" |
| Shapes | "Add animated shape overlays": arrows, circles, callouts |
| Audio | "Add audio tracks", such as your own music or a recorded line |
| Sound Effect | "Add a catalog sound effect" |
Change when an element plays
Every element has its own block on the timeline.
| To | Do this |
|---|---|
| Move it in time | Drag the block |
| Make it longer or shorter | Drag either edge |
| Nudge it | ← / → moves the selected element one frame; with Shift, one second |
| Delete it | Select it and press Delete or Backspace. There's no confirmation; Undo brings it back. |
| Hide it without deleting | Hide in video (eye icon in the list, or ⋯ in its options) |
The In this video list in the Elements tab shows every element with its time range, such as "0:03 – 0:07". Click one to select it and jump to it. Hidden elements are greyed out.
Elements are tied to a moment of the recording: when a step before an element gets longer or shorter, the element moves with it. See Understand the timeline.
Place an element
Drag an element on the video to move it, or drag its handles to resize it. The Placement card gives exact control:
| Setting | What it does |
|---|---|
| Position | Snaps the element to a region of the frame, or a Custom box |
| Size | "How much of the cell the design fills." |
| Align | Where it sits inside its region: Top left to Bottom right |
| Fixed during zoom | "Stays in place instead of zooming with the recording." Shown when the video has zooms. See below. |
A Blur has no Placement card: drag it over what you want to hide and resize it with its handles.
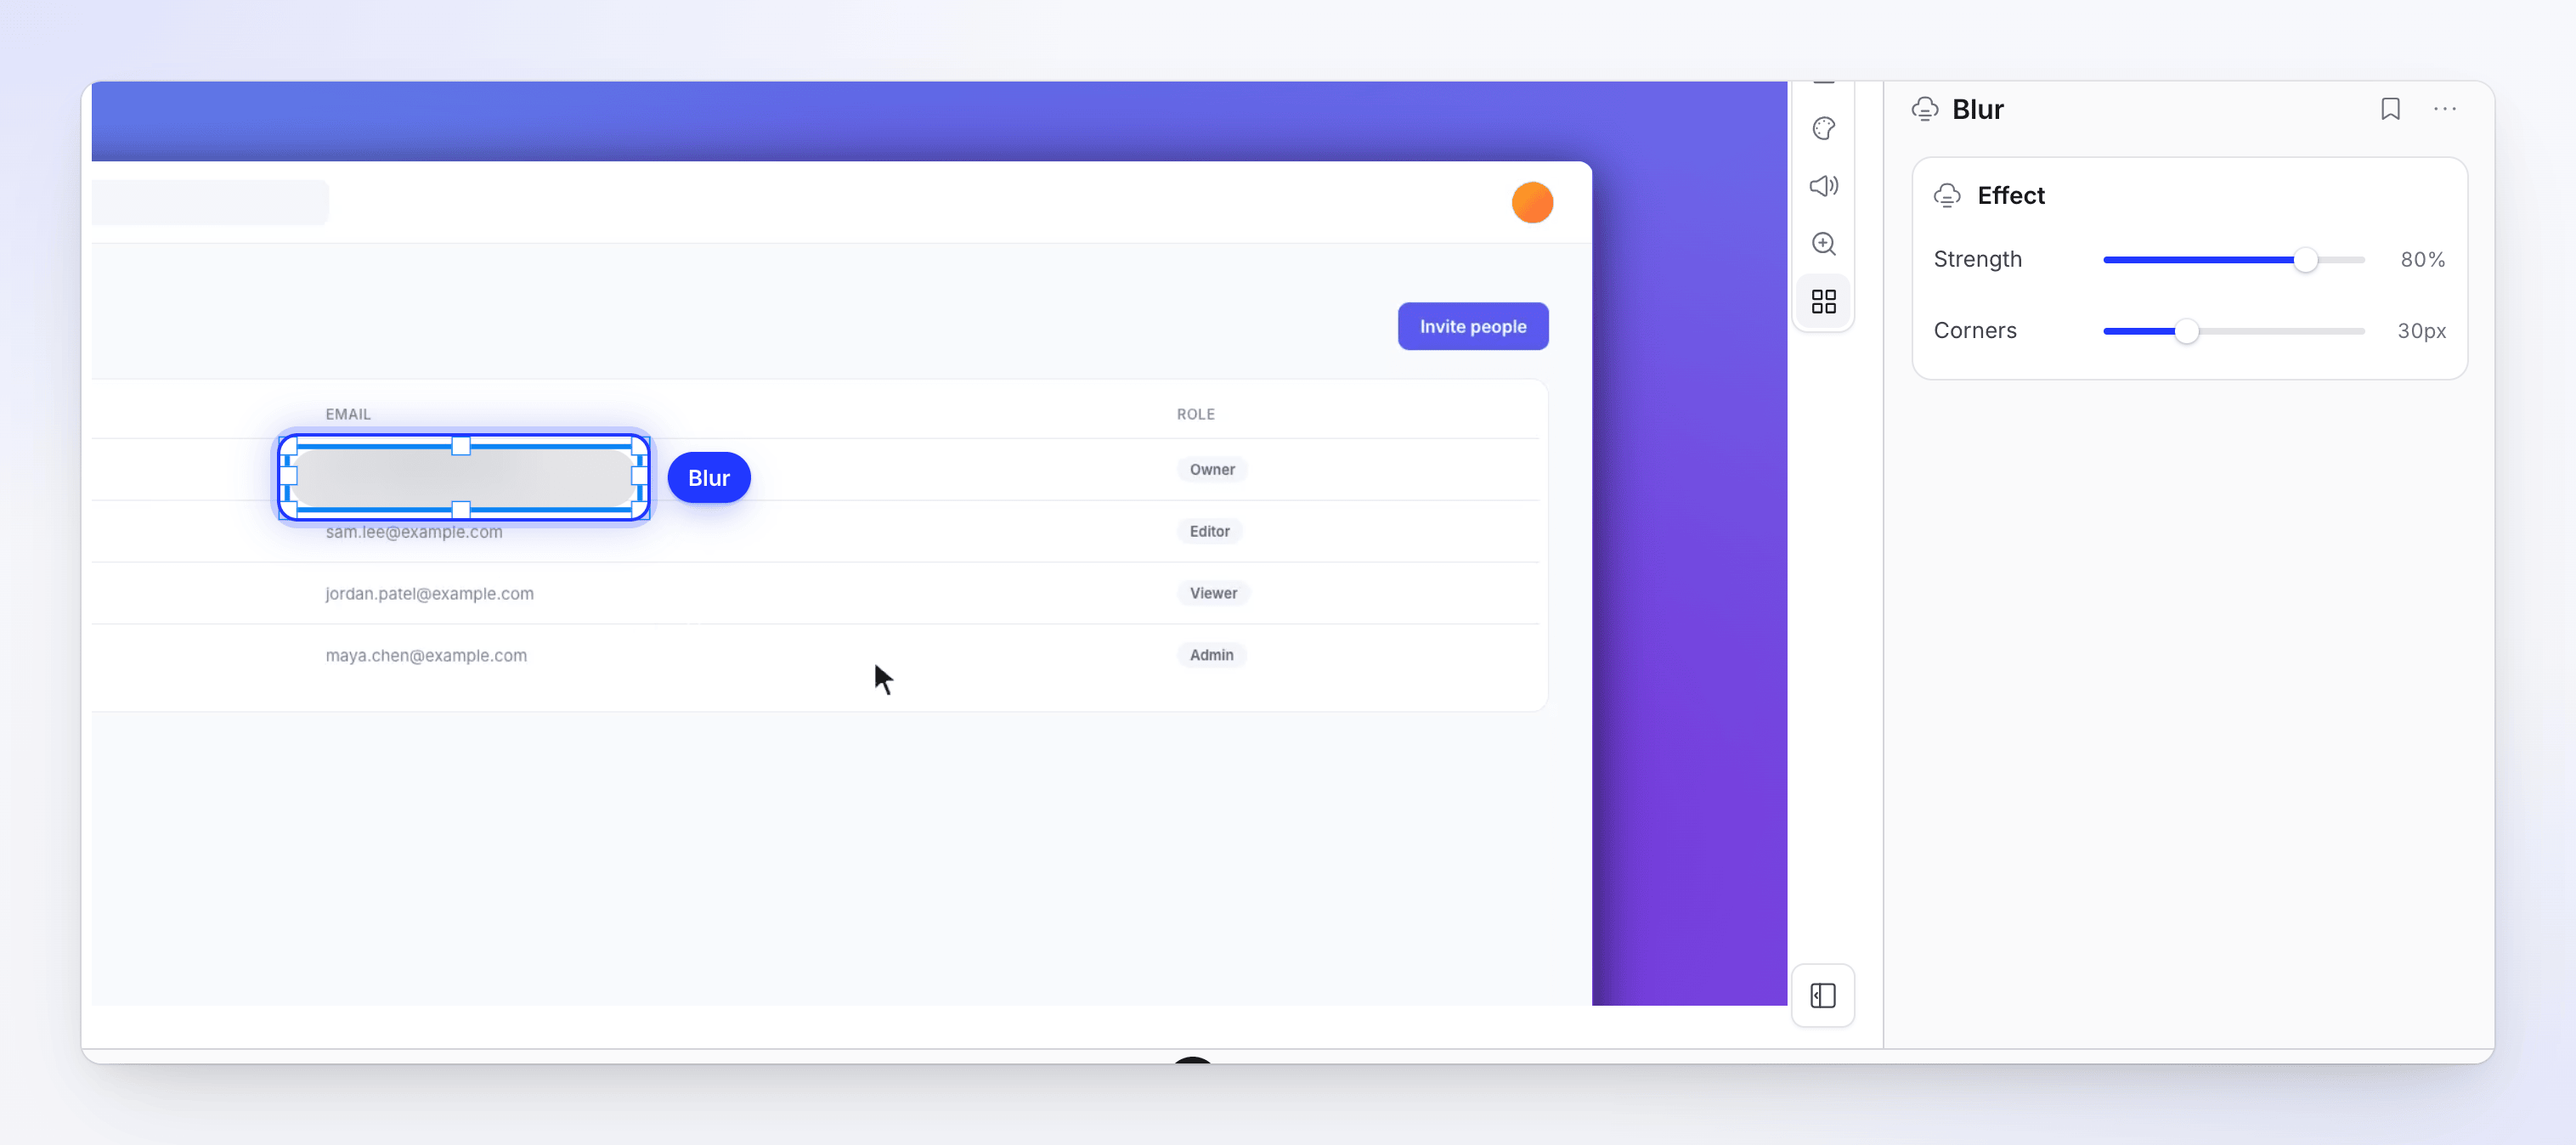
Use the placement grid
The placement grid helps you line elements up with each other and keep them a safe distance from the edges. It's an editing aid only: it never appears in the exported video.
- Show or hide it: press G, or click the grid button in the Placement card (Show grid (G) / Hide grid (G)). G doesn't work while you're typing in a field. The grid stays on until you turn it off, and the editor remembers your choice in this browser.
- What you see: a 12 × 12 grid of lines inside a dashed safe area that sits 5% in from each edge of the video.
- Click a region: with an element selected, hover the grid to see the region under the pointer, such as Top right or Bottom third, and click to move the element there. It's the same as picking that region in Position.
- Snap while dragging: hold Alt (Option on a Mac) while you drag. A moved element keeps its size and its nearest edge snaps to a grid line or to the edge of the video. When you resize, each edge you drag snaps on its own. Release Alt to drag freely again, even in the middle of a drag. Snapping works whether the grid is shown or not. Handles that keep an element's proportions don't snap.
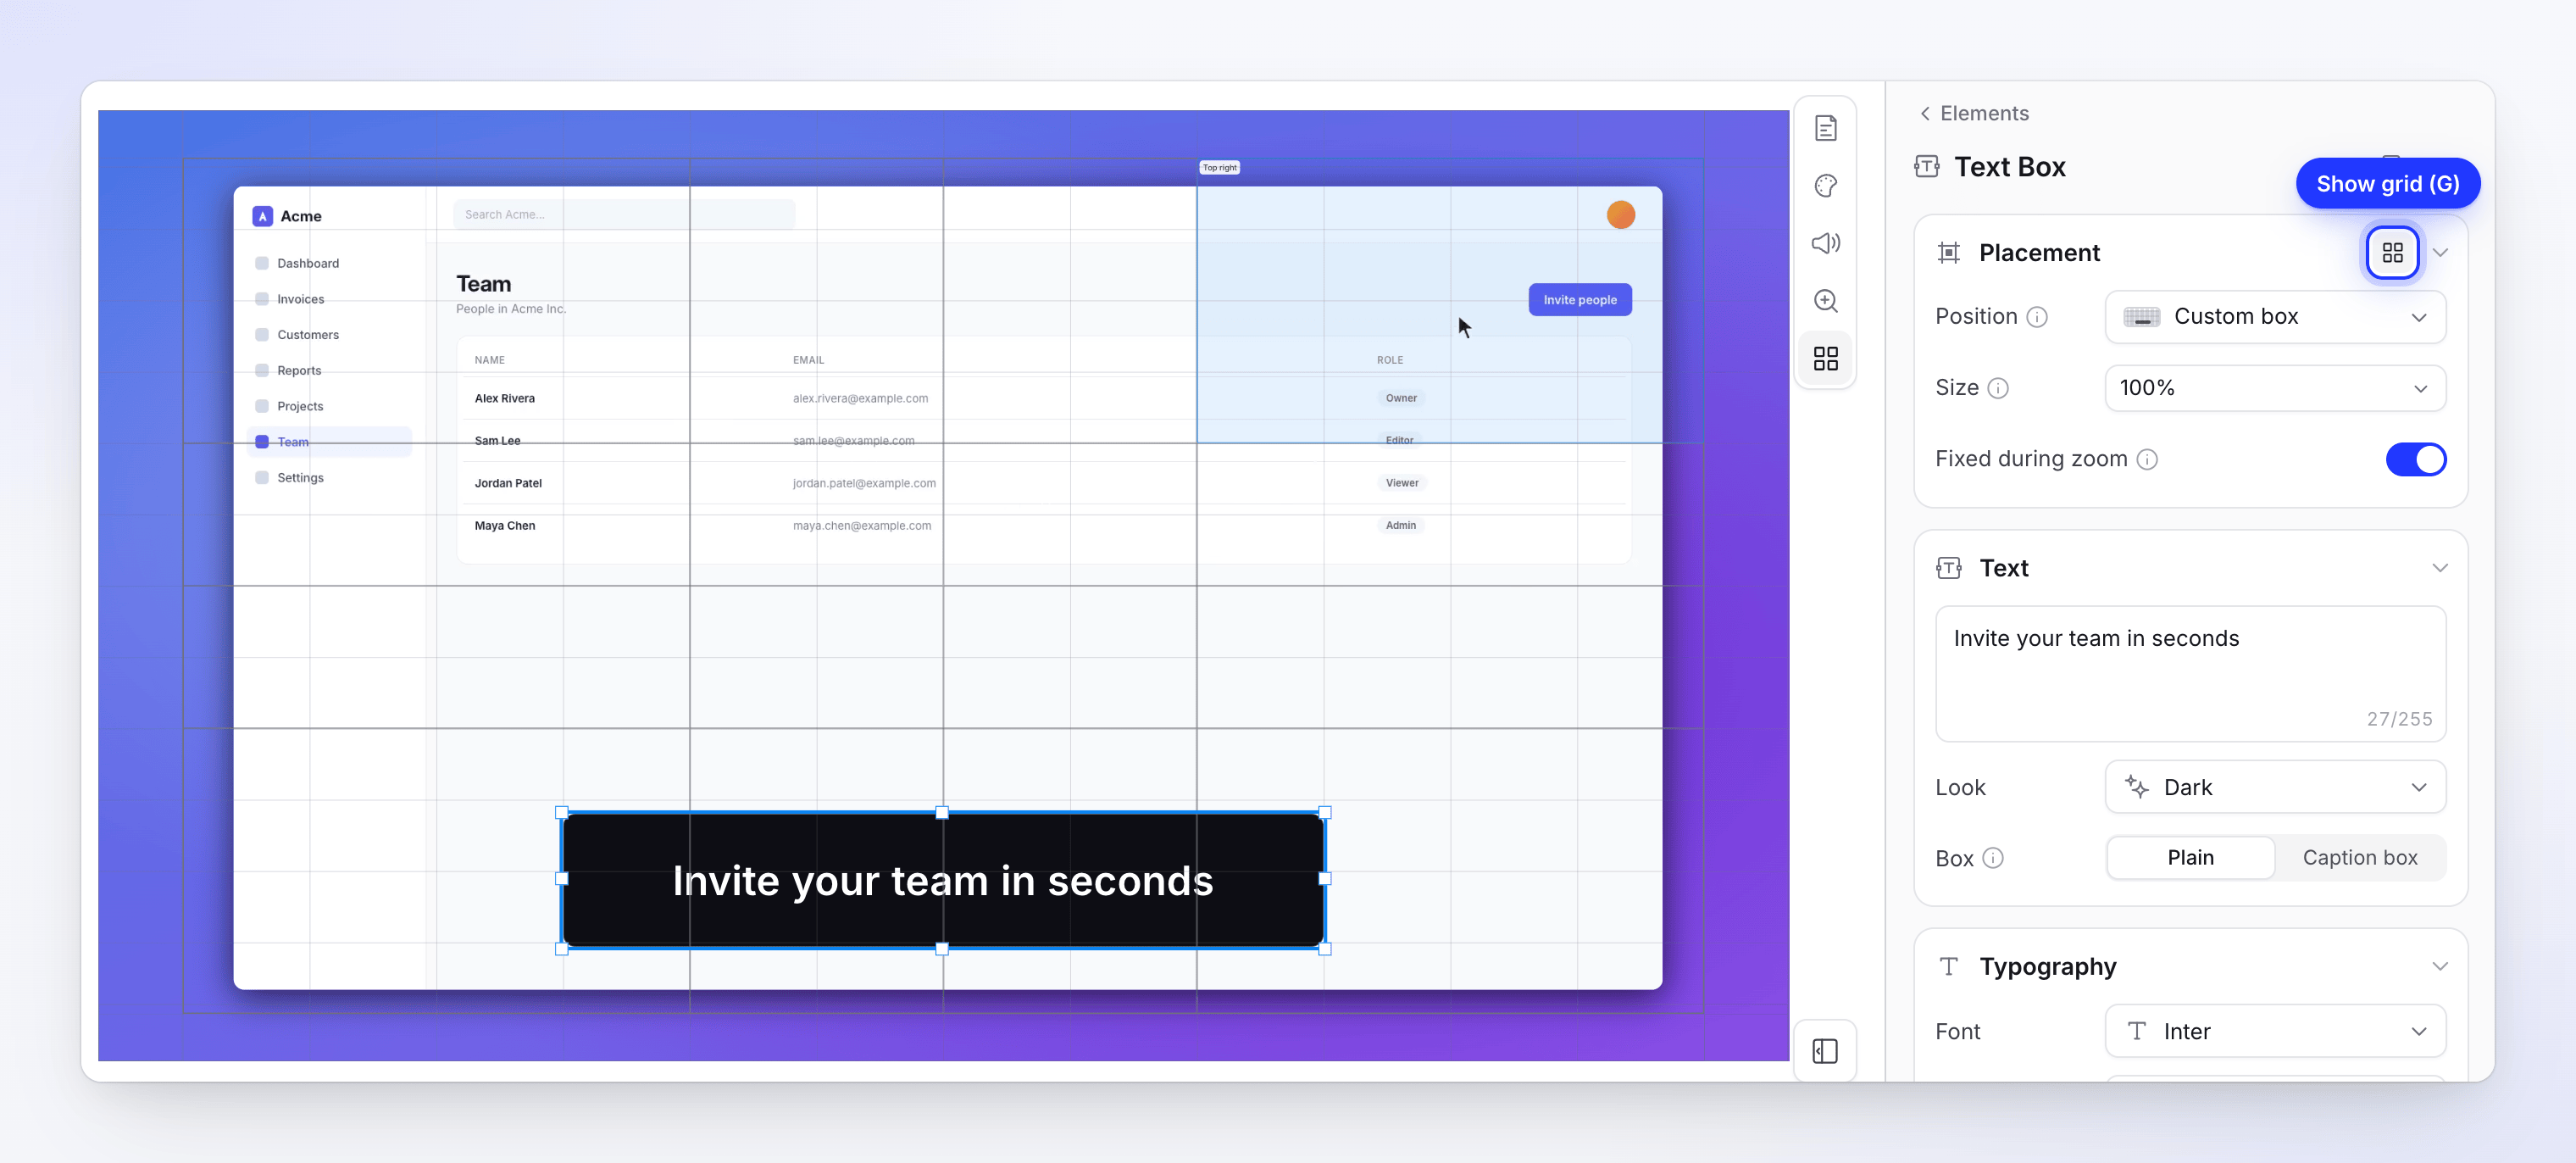
The grid has 33 named regions, the same list Position offers:
| Group | Regions |
|---|---|
| Canvas | Full canvas, Top edge, Bottom edge, Left edge, Right edge |
| Whole | Safe area |
| Halves | Top half, Bottom half, Left half, Right half |
| Quadrants | Top-left quadrant, Top-right quadrant, Bottom-left quadrant, Bottom-right quadrant |
| Third bands | Top third, Middle third, Bottom third |
| Third columns | Left third, Center third, Right third |
| Two thirds | Top two thirds, Bottom two thirds, Left two thirds, Right two thirds |
| Ninths | Top left, Top center, Top right, Middle left, Center, Middle right, Bottom left, Bottom center, Bottom right |
After you drag an element by hand, Position reads Custom box: "Dragged off the grid. Pick a region, or draw a cell, to snap the frame back."
Fixed during zoom
When the camera zooms in, the recording gets bigger and moves. An element can either ride along with it or stay where it is on the frame:
| Fixed during zoom on | Fixed during zoom off | |
|---|---|---|
| During a zoom | Stays the same size, in the same place on the frame | Grows and moves with the recording, staying over the same spot of it |
| Use it for | Logos, watermarks, titles, lower thirds, captions-like text | Arrows and shapes that point at a button, an image laid over part of the screen |
| Default | Text boxes and animated emoji | Images, videos and shapes |
Blur and Highlight always zoom with the recording, whatever the setting, because they mark a spot on it: a blur that stayed still would slide off the email it hides.
Animate an element
The Animation card has three tabs: Entrance, Idle and Exit. Its header sums up what's set, for example "Fade in · Float · Slide out".
| Tab | Moves | Extra settings |
|---|---|---|
| Entrance | None, Fade, Slide, Scale, Blur, Wipe, Iris, Flip, Swing, Loom | Direction, Speed (Fast, Normal, Slow) and, under More options, Easing (Smooth, Gentle, Snappy, Bouncy, Magnetic), Travel (Slide only) and Stagger |
| Idle (while on screen) | None, Drift, Scale, Tilt, Float, Pulse, Wiggle | Direction or Speed. See below. |
| Exit | None, Fade, Slide, Scale, Blur, Wipe, Iris, Flip, Swing | Same as Entrance |
Defaults: Speed Normal, Easing Smooth.
Keep an element moving (Idle)
An idle animation keeps an element gently alive between its entrance and its exit, so a logo or a callout doesn't sit frozen while the video plays. Open the Idle tab and pick a Move; each tile previews it.
| Move | What it does | Setting |
|---|---|---|
| Drift | Travels slowly in one direction for the whole time the element is on screen | Direction: Up, Down, Left, Right or Auto (default), which carries on in the direction of the entrance |
| Scale | Slowly grows or shrinks over the whole time | Direction: grow (default) or shrink |
| Tilt | Slowly turns toward one side | Direction: Left, Right (default), Up or Down |
| Float | Bobs gently up and down | Speed |
| Pulse | Breathes slightly bigger and smaller | Speed |
| Wiggle | A small, restless jiggle | Speed |
Speed is Slow, Normal (default) or Fast. Float, Pulse and Wiggle ease in after the entrance has settled and ease out before the exit starts, so the element never jumps.
Not every element has an Idle tab. Shapes have their own Loop animation instead (see Shapes), and elements whose content already moves on its own don't offer one.
Options for each element
Text Box
| Setting | Details |
|---|---|
| Text | Up to 255 characters |
| Look | Text styles: Dark, Light, Bold Outline, Neon, Editorial, Lower Third, Highlight, Ocean, Blush, Terminal. Shows "Custom · edited" once you change details. |
| Box | Plain or Caption box. A caption box grows with the text: "Height adjusts automatically; resize the width on the canvas." Set Max lines (1–6). |
| Typography | Font (system fonts and Google fonts), Weight, Size (8–500), Bold, Italic, Underline, Color, letter spacing and line height |
| More styling | Text outline, Text shadow, Background, Box shadow, Border |
| Text reveal | How the words appear and leave: In (Slide, Zoom In, Fade, Center build, Typewriter, Wipe, Drop, Rotate) and Out, revealed by Line, Word (default) or Letter. Typewriter adds Key sounds. |
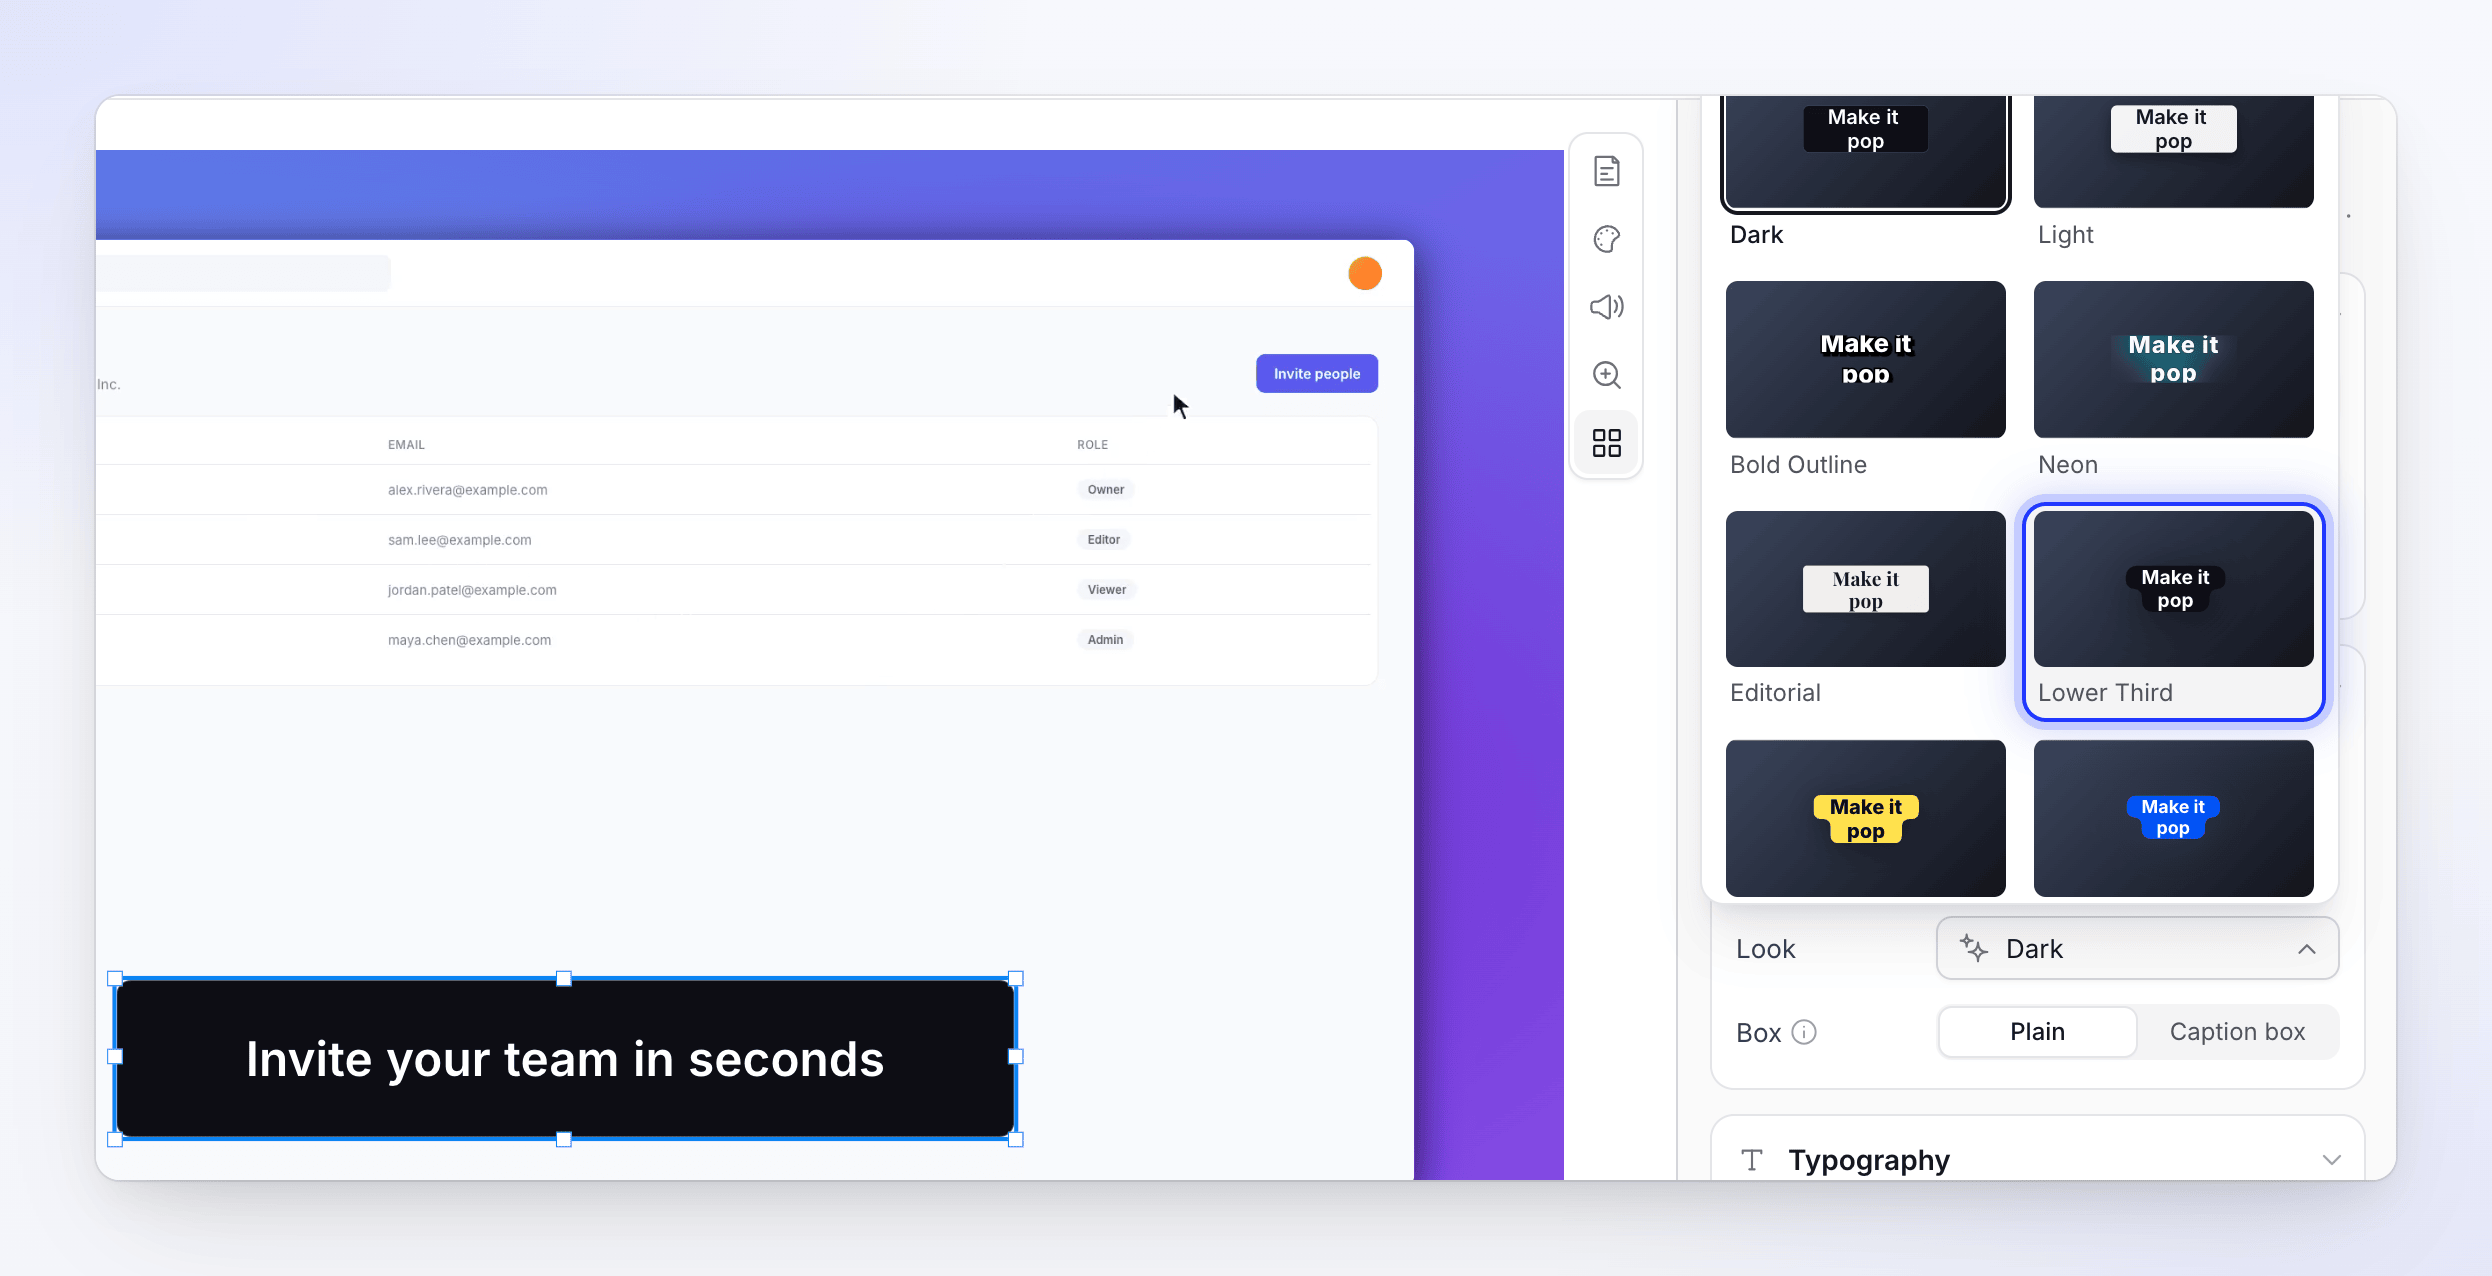
Image and Video
Click Choose an image (or Choose a video) to open your media library, or Replace to swap it. Set Corners, Shadow and Border. A video also has Volume (default 100%) and Loop.
Blur and Highlight
- Blur: Strength (0–100%) and Corners. Size the blur box over what you want to hide.
- Highlight: Color and Corners.
Shapes
Pick a Shape (Arrow, Rectangle, Circle, Ellipse, Triangle, Star, Polygon, Heart, Callout, Spark) and a Loop animation (Blink Pulse, Shape Glow, Dotted Ants, or Arrow Push for arrows). Set Fill, Stroke, Stroke width and Corners. Arrows and callouts have a Direction (Pointer for callouts).
Animated Emoji
Choose an emoji from Choose an emoji (search or browse by category) and whether it Plays on a Loop (default) or Once.
Audio and Sound Effect
- Audio: click Choose audio to pick or upload a file. Set Volume (default 100%) and Loop.
- Sound Effect: pick one from Choose a sound effect (search, filter by category, and preview each with its play button), or Upload audio. Set Volume, Loop, and under More options, Fade in, Fade out and Start at ("Skips the start of the file.").
Save an element as a preset
Use the bookmark button (Presets) at the top of an element's options: Save current as preset, enter a name and click Save. Saved presets are shared with your team; apply one from the same menu. Deleting one asks "Delete this preset?": it's removed for everyone on the team.
Your media library
Images, videos and audio come from your team's media library. Click Upload or drop files anywhere in the window to add them. Filter with All (everything your team uploaded), This video or My uploads.
| File | Formats | Max size |
|---|---|---|
| Images | JPG, PNG, WebP or SVG | 8 MB |
| Videos | MP4, MOV, WebM or AVI | 100 MB |
| Audio | MP3, WAV, OGG or M4A | 20 MB |
Deleting a file from the library doesn't break videos that use it: "Anything already using it keeps working."
Elements in other languages
Each language of a video has its own elements. Elements you add before translating are copied into the translation as they are; text you typed in a text box isn't translated. Elements you add after translating appear only in the language you have open. See Understand language versions of a video.
Scenes, cards and transitions
Full-screen scenes aren't elements. Add them with the + button in the timeline toolbar (Add to the timeline at the playhead):
| Item | What it adds |
|---|---|
| Title card | "Full-screen scene with on-screen text." |
| Video | "Insert an uploaded video clip." |
| Logo reveal | "Animated logo reveal scene." |
| List | "Animated list of product features." |
| Text beats | "Kinetic typography with animated beats." |
| Clip | "Silent clip from your screen recording." (Voice clip in Polish videos, with your original voice) |
| Image | "Show one of your pictures as its own scene." |
| Chapter | "Section heading to organize your video." |
| Voiceover | "Add narration synced to your video." |
Each scene opens its own editor; every field is explained in Edit scenes and cards. In the title card and intro card editors, Load title card template starts from a Built-in style or one Your team saved: "Built-in styles keep your text; team templates restore the whole saved design."
Transitions sit between scenes in recordings made with the desktop app and in uploaded videos: click the Add transition pill on the seam between two scenes on the timeline. Pick a Type (Fade, Slide, Wipe, Clock wipe, Iris, Zoom, Dreamy zoom, Film burn, Linear blur, Slide overlap, Zoom cross or Zoom swap), its Duration and Easing, and an optional Sound.
Troubleshooting
| Message | What to do |
|---|---|
| "… isn't a supported image. Use JPG, PNG, WebP or SVG." | Convert the file. The same message names the formats for videos and audio. |
| "… is 12.4 MB. The limit is 8 MB." | Compress the file and upload it again. |
| "Couldn't upload …" | Check your connection and try again. |
| "Couldn't load your library" | Click Try again. |