

Edit the script and voice-over
Edit the voice-over line of any step in a how-to video or product demo and Clevera records it again in the video's voice. Add, mute or delete narration, choose what plays under each step, and see what it costs.
The Script tab lists the narrated steps of a how-to video or product demo, each with its voice-over line. Change a line and Clevera records it again in the video's voice; you can also add, mute, hide or delete narration and choose which part of the recording plays under each step.
Before you start
- The Script tab is in the video editor for how-to videos and product demos. Polish videos have no voice-over, so they have no Script tab. For social clips, see Edit a social clip.
- Anyone who can open the video can read the script. Editing needs edit rights; without them the row actions don't appear.
- Recording a line again uses credits. See What it costs.
Read the script
The header shows the totals, for example "4 chapters · 12 steps · 3:54". Steps are grouped under chapters, in play order. The first and last steps can be tagged Introduction and Conclusion. A step can show Muted or Hidden.
Click a step to select it and move the player there. Selecting a step on the timeline opens it here too.
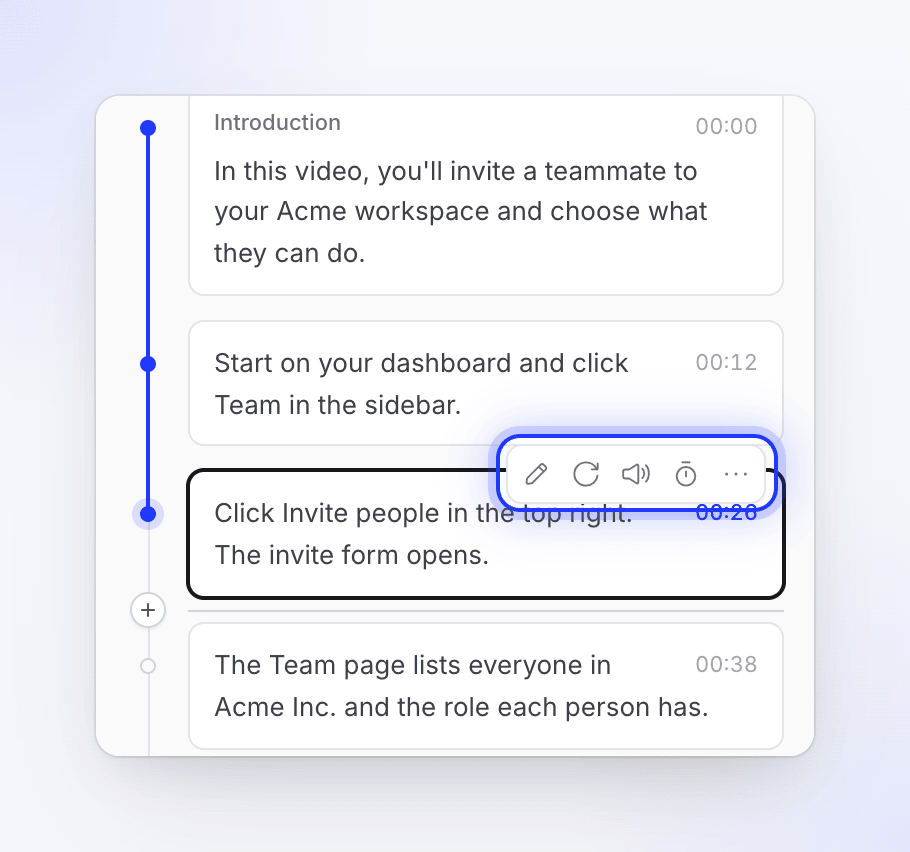
Hover a step (or select it) to see its actions:
| Action | What it does |
|---|---|
| Edit narration | Opens the line's text to edit |
| Add voiceover | Adds narration to a step that has none |
| Regenerate voice | Records the same words again |
| Mute narration / Unmute narration | Silences the line without deleting it. A muted step lasts as long as its footage instead of its narration, so the video usually gets shorter. Not available on the introduction and conclusion. |
| Edit sync and pacing | Chooses which parts of the recording play under the step, and how fast |
| Event settings | Older recordings only: speed and visibility per recorded click or event |
| ⋯ → Hide from video / Show in video | Introduction and conclusion only. A hidden one is taken out of the video, with its time. |
| ⋯ → Delete narration | Removes the line and its voice-over |
Edit a voice-over line
Open the line
Hover the step and click Edit narration.
Change the words
Type the new line. It needs 6 to 1,024 characters. To change how a word is said, add a voice tag: click the tag button (Add a voice tag (or type /)) or type / and pick one, such as a short pause. "Each voice engine reads these its own way." See Use voice tags in narration.
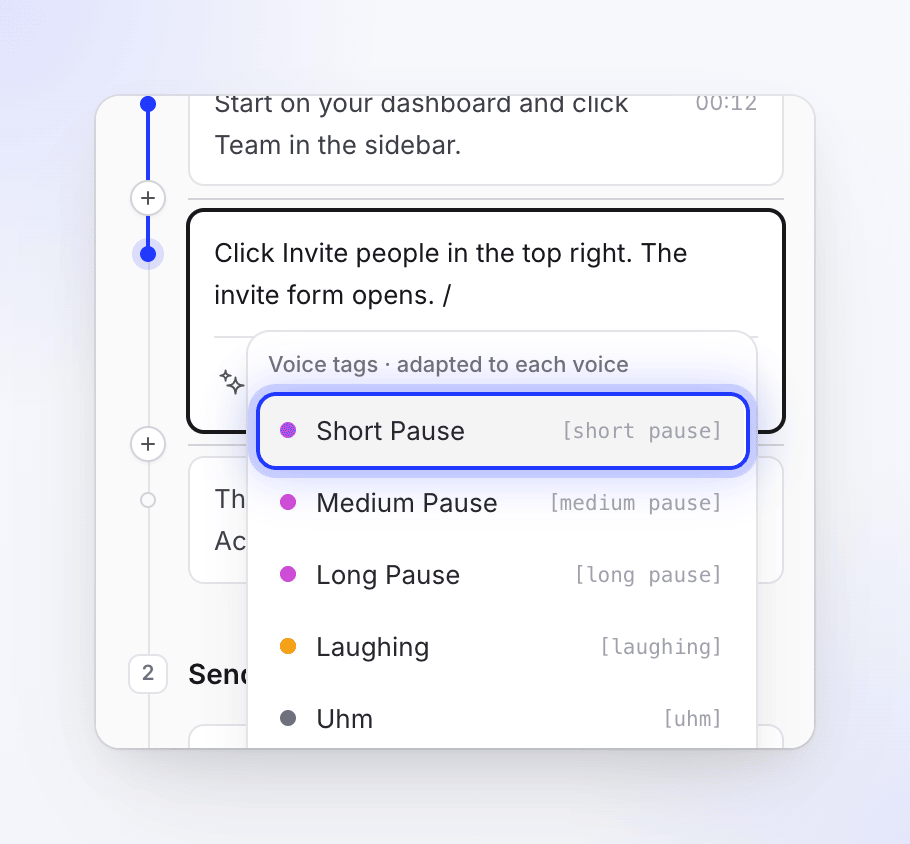
Type / to add a pause or another voice tag. Save it
Click Save, or press ⌘ Enter (Mac) / Ctrl Enter (Windows). Press Esc or Cancel to leave without saving.
Wait for the new recording
The line dims and pulses while its new voice-over is recorded in the background. When it's ready, the step is re-timed to the new length and its captions, if it has any, are made again.
Saving also unmutes a muted line. If you save the same words without changes, nothing is recorded. If the new recording fails, the previous one comes back: "Voiceover update failed. Restored previous voiceover."
To change many lines at once, for example "make the whole voice-over friendlier", ask the assistant.
Record a line again
Regenerate voice records the same words again, for example after you changed the voice or if a word sounds off. Each take can sound slightly different.
Add narration
Add a voiceover step
Use the + button in the timeline toolbar (Add to the timeline at the playhead) and choose Voiceover, or click Add voiceover on a step without narration. For screen recordings, the Add voiceover dialog opens:
| Field | What it does |
|---|---|
| What the voice says | The line, at least 6 characters. A counter shows "about N s spoken". |
| What viewers see | Freeze frame: one frame of the recording held while the line plays. Play a clip: pick the part of the recording to play with Choose clip…. |
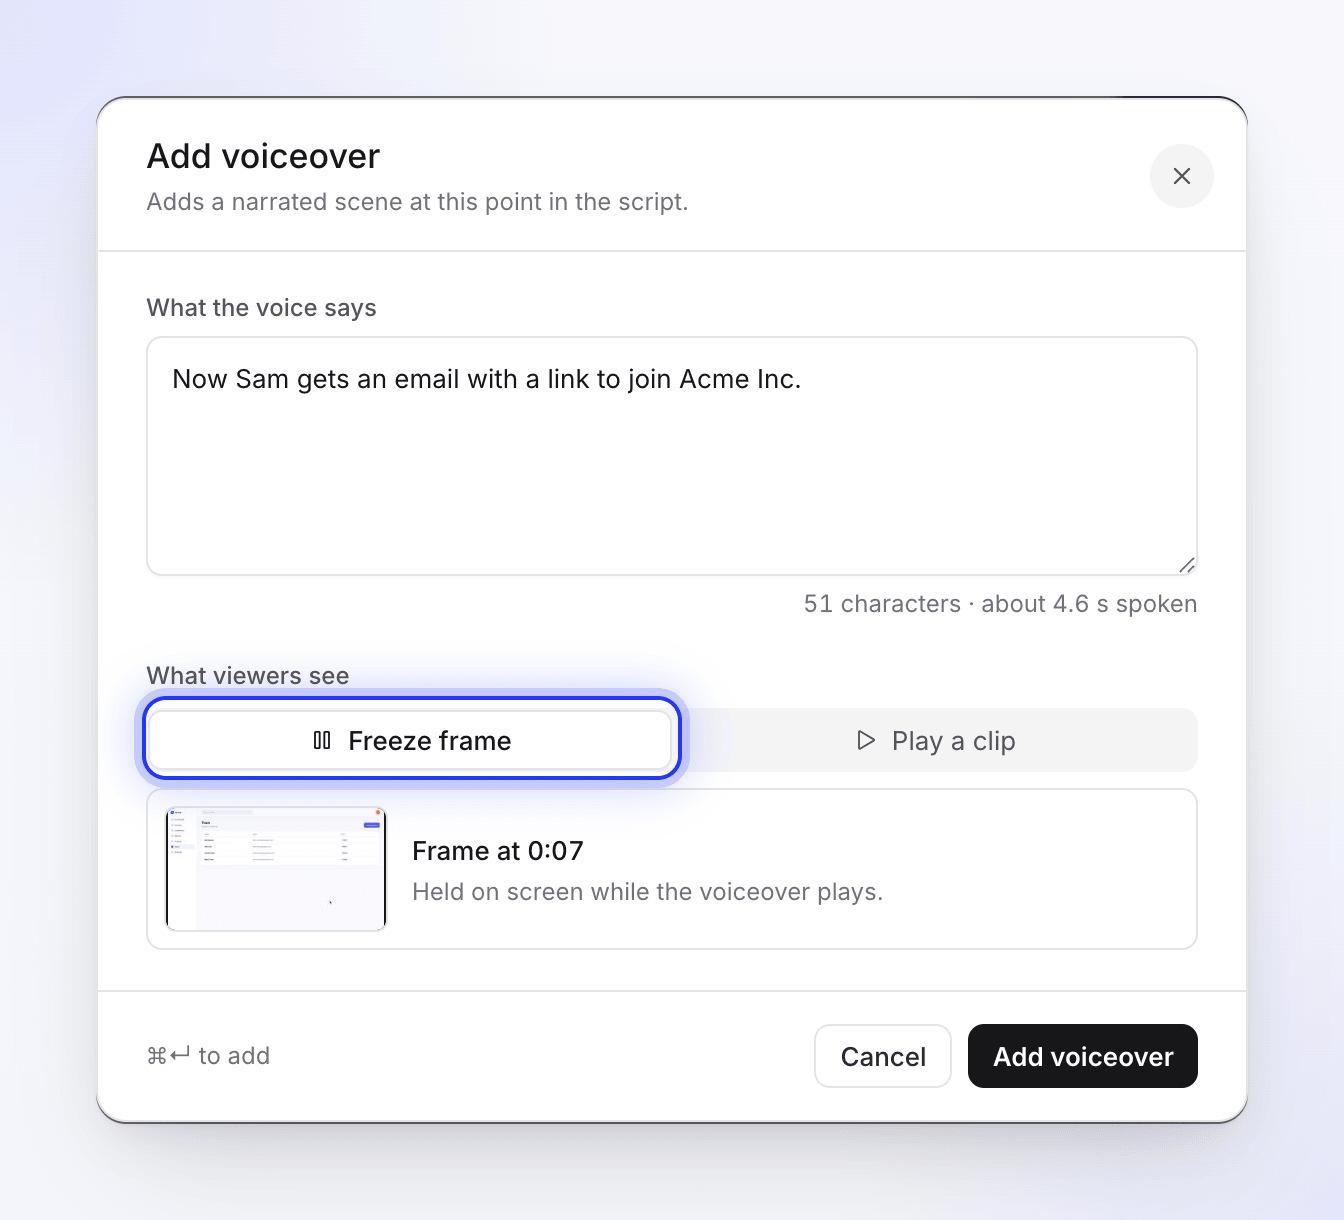
Click Add voiceover (or press ⌘ Enter). The new step is added at that point in the script.
Add an intro card
Click Add an intro card ("A title screen before the first step") at the top of the script to put a title screen before the first step. It disappears from the list once you have one. See Edit scenes and cards.
Choose what plays under a step
Edit sync and pacing opens the Sync & pacing window: "Choose which parts of the recording play while this step's narration is spoken, and how fast." It's available for recordings made with the current desktop app and for uploaded videos. You can also double-click the step on the timeline.
In short:
| To | Do this |
|---|---|
| Add a part of the recording | Drag across the recording, then Add clip |
| Trim a part | Select it and drag its edges |
| Speed a part up or slow it down | Select it and pick a speed, from Very Slow (0.5×) to Ultra Fast (8×) |
| Hold one frame | Right-click the recording to add a freeze frame, then set Holds for |
| Remove a part | Remove clip or Remove freeze frame |
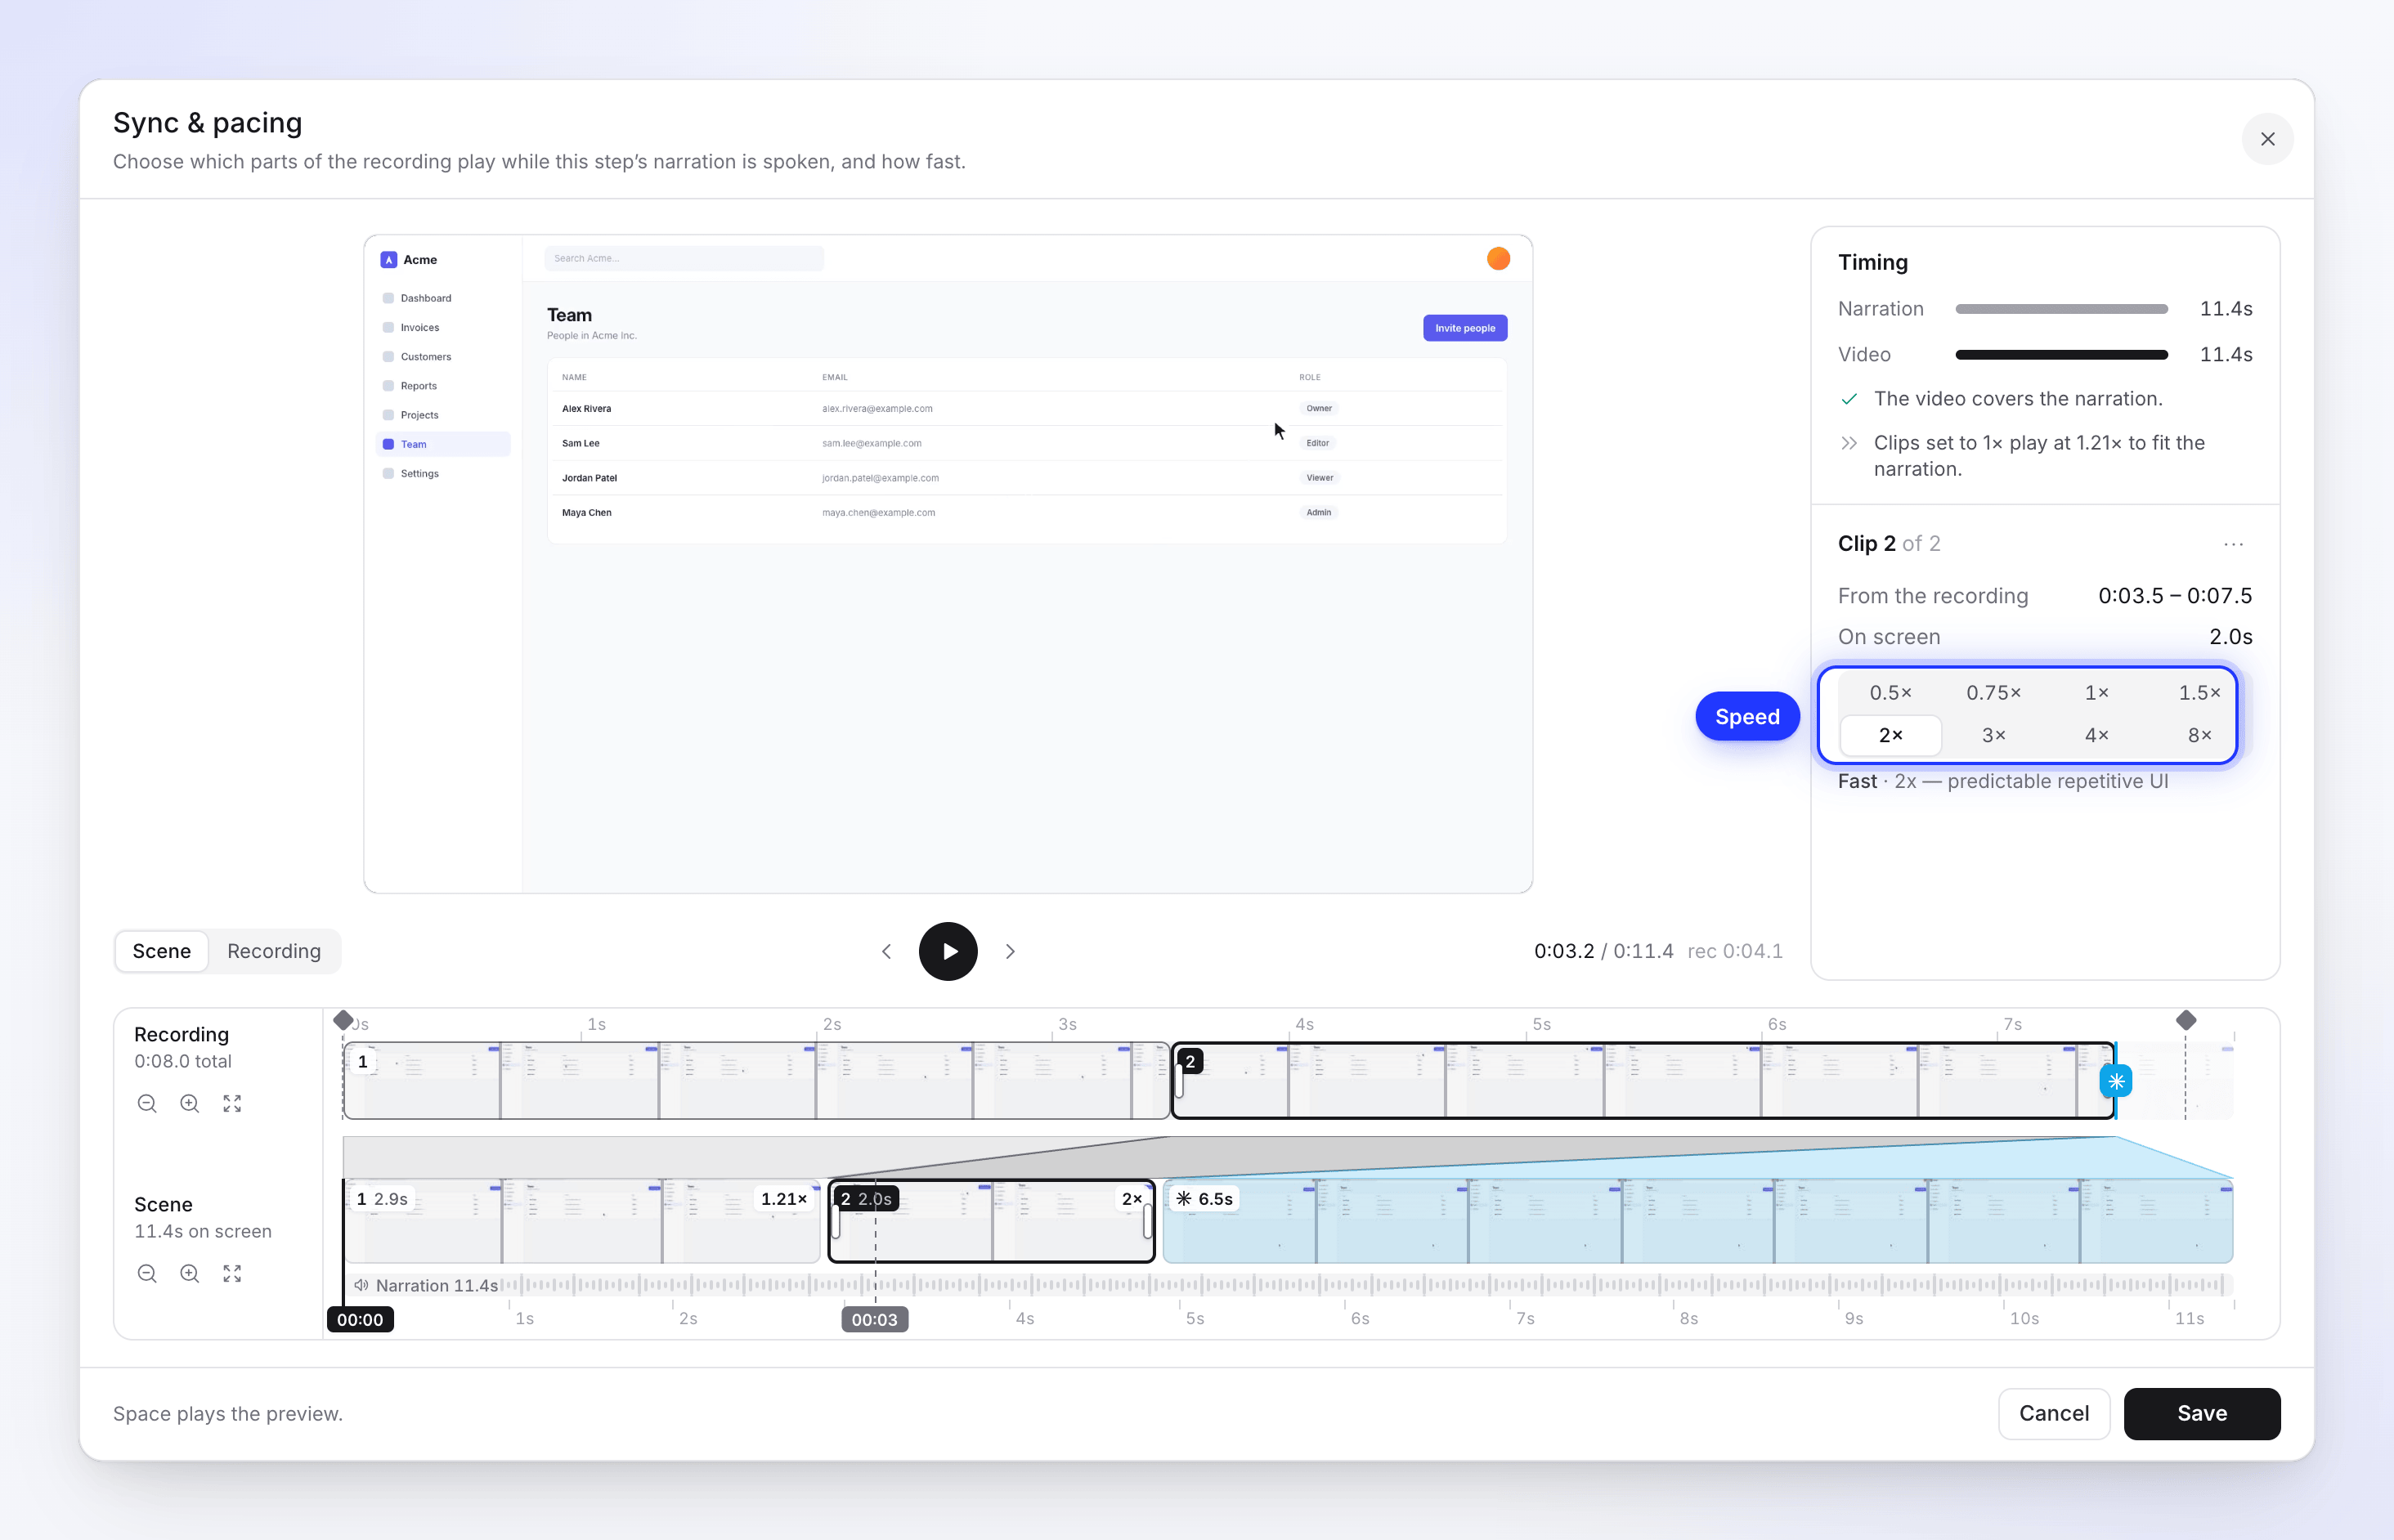
The timing panel tells you how the video and narration fit, for example "The video covers the narration." or "The video runs 3.0s past the narration. Trim a clip or speed one up." Click Save when you're done, or Reset changes to start over. The narration isn't recorded again, so it's free.
For the full guide, with every message and a worked example, see Use sync and pacing to match footage to narration. Older recordings use Event settings instead: see Change event speed and visibility in older recordings.
Delete narration
Choose ⋯ → Delete narration and confirm. "The voice-over and its text will be removed from your timeline." If the step has part of your recording attached, you choose what happens to it:
- Move video to previous voiceover
- Move video to next voiceover
- Remove video too
Chapters
Chapters group steps under a heading. Use Rename chapter or Delete chapter on a chapter heading, or drag it to move it. To add one, use + in the timeline toolbar and choose Chapter. Deleting a chapter keeps its steps.
What it costs
| Change | Credits |
|---|---|
| Saving a changed line, or Regenerate voice | Uses credits to record the line again. Shows on the Usage page as Voice-over. |
| A line in a voice from your own ElevenLabs account | No Clevera credits; your ElevenLabs account is charged |
| Adding a voiceover step | Uses credits to record the new line |
| Muting, hiding, deleting, sync and pacing, speeds, chapters | Free |
There's no estimate before you save. One line usually costs very little; the cost grows with the length of the line. If your workspace is out of credits, saving a line shows "You have used all your credits for this billing period…" and nothing is recorded.
Troubleshooting
| Message | What to do |
|---|---|
| "Text must be at least 6 characters" / "Text must be no more than 1024 characters" | Lengthen or split the line. |
| "Voiceover update failed. Restored previous voiceover." | Try Regenerate voice again. |
| "ElevenLabs error: …" | The message comes from ElevenLabs. Check your key in Profile → Connections. |
| "Couldn't add the voiceover. Try again." | Try again; check your connection. |
| "Discard your changes?" | You closed a line with unsaved edits. Choose Keep editing to go back. |