

Turn a screen recording into a how-to video
Turn a screen recording into a narrated step-by-step guide. Pick the kind of guide, add your recording, check the options and generate. The AI writes the voice-over, cuts dead time and zooms in on your clicks.
A how-to video turns a screen recording into a narrated guide: the AI watches what you do, writes and records a voice-over, cuts the waiting and the retries, and zooms in on each click. Use it when you want someone to be able to repeat a task after watching.
Before you start
- A recording of the task. Record it with the Clevera desktop app, upload an MP4 you already have, or pick one from your library. You can also let the AI record a web app for you with Record with AI. We recommend recordings under 30 minutes.
- Talk while you record, if you can. You don't need a good microphone or a clean take. The AI listens to what you said and uses your explanation as the backbone of the script, then replaces your voice with a clear AI voice-over.
- Credits. A how-to video usually costs 5–25 credits for a recording of up to 5 minutes. Longer recordings cost more. See Read the credit estimate.
Make a how-to video
Pick the kind of guide
Click Create, open the How-to family and pick the card that matches your guide. The kind changes how the AI opens, paces and closes the video; see The four kinds of how-to.
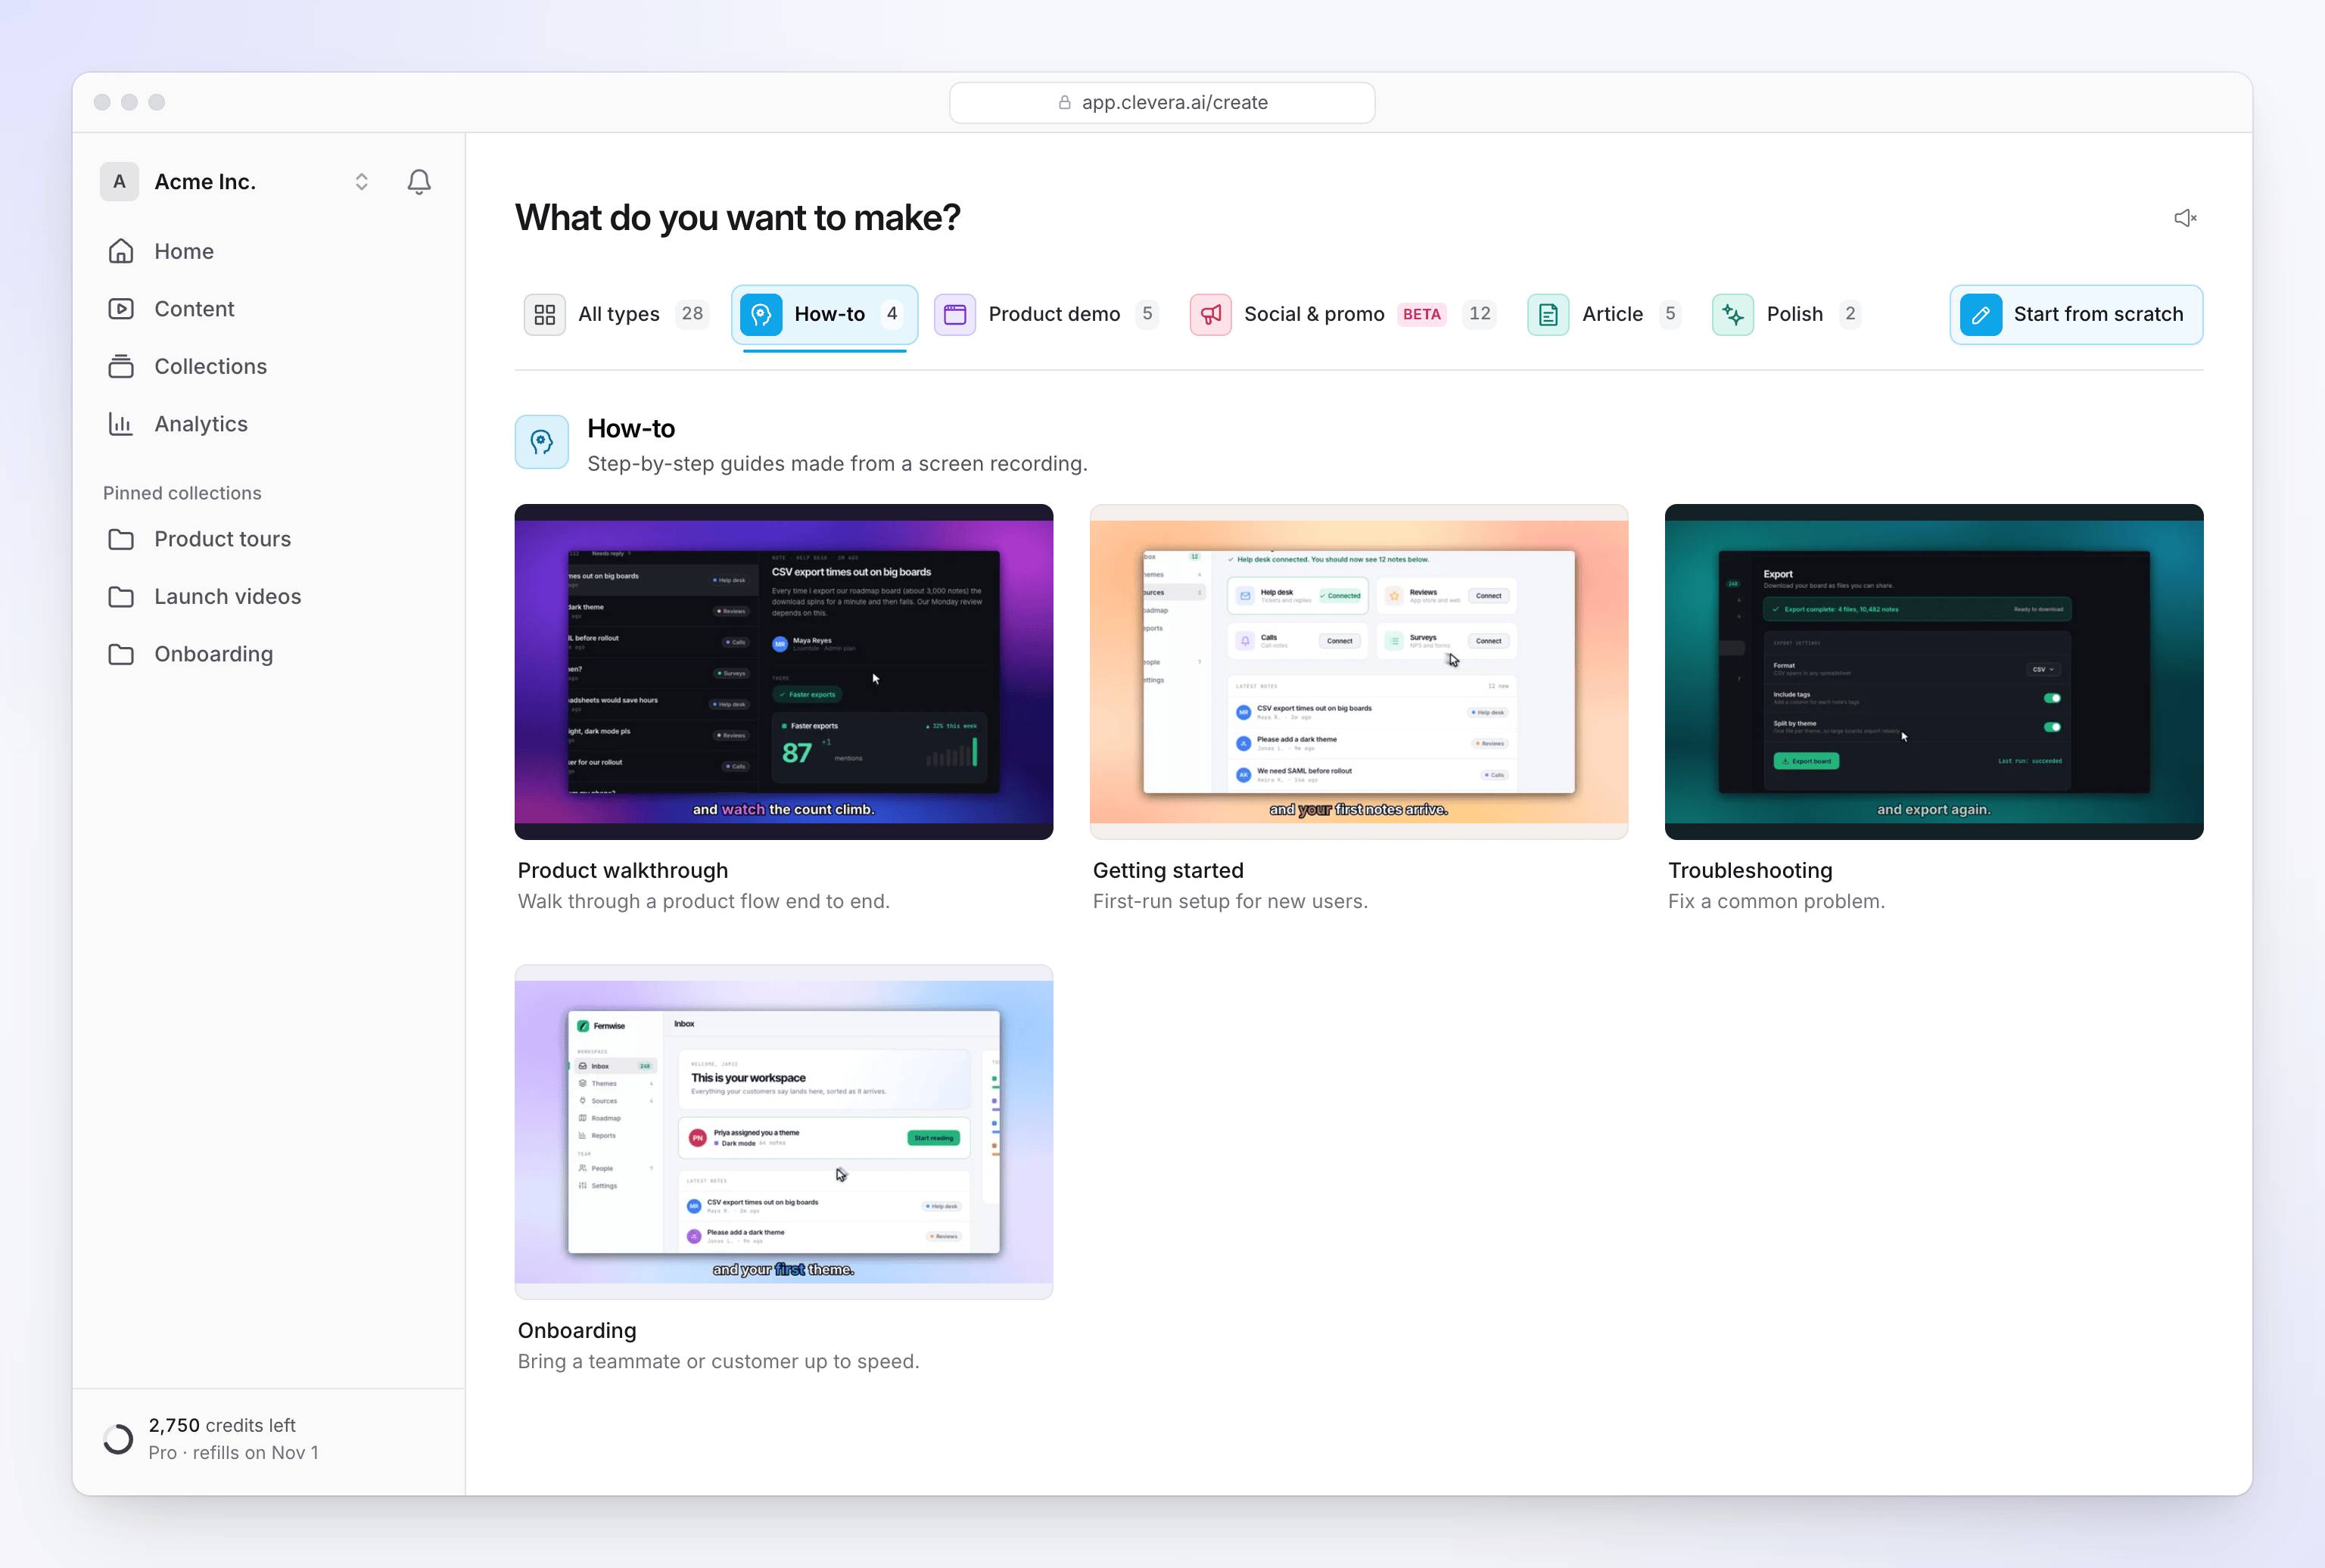
Each kind changes how the AI opens and paces the guide. Add your recording
Click + in the box and choose one of the Footage rows:
- Record your screen opens the Clevera desktop app. A window, "Continue from Clevera desktop app", tells you to switch to the app and click Start recording. When you stop, the recording uploads and opens in your browser, ready to use.
- Upload a video takes an MP4 up to 250 MB.
- Choose from library lists recordings you already made or uploaded. Recordings that no video uses for 15 days are deleted automatically.
You can add up to 3 videos, plus pictures and PDFs. See Use several recordings, pictures and PDFs in one video.
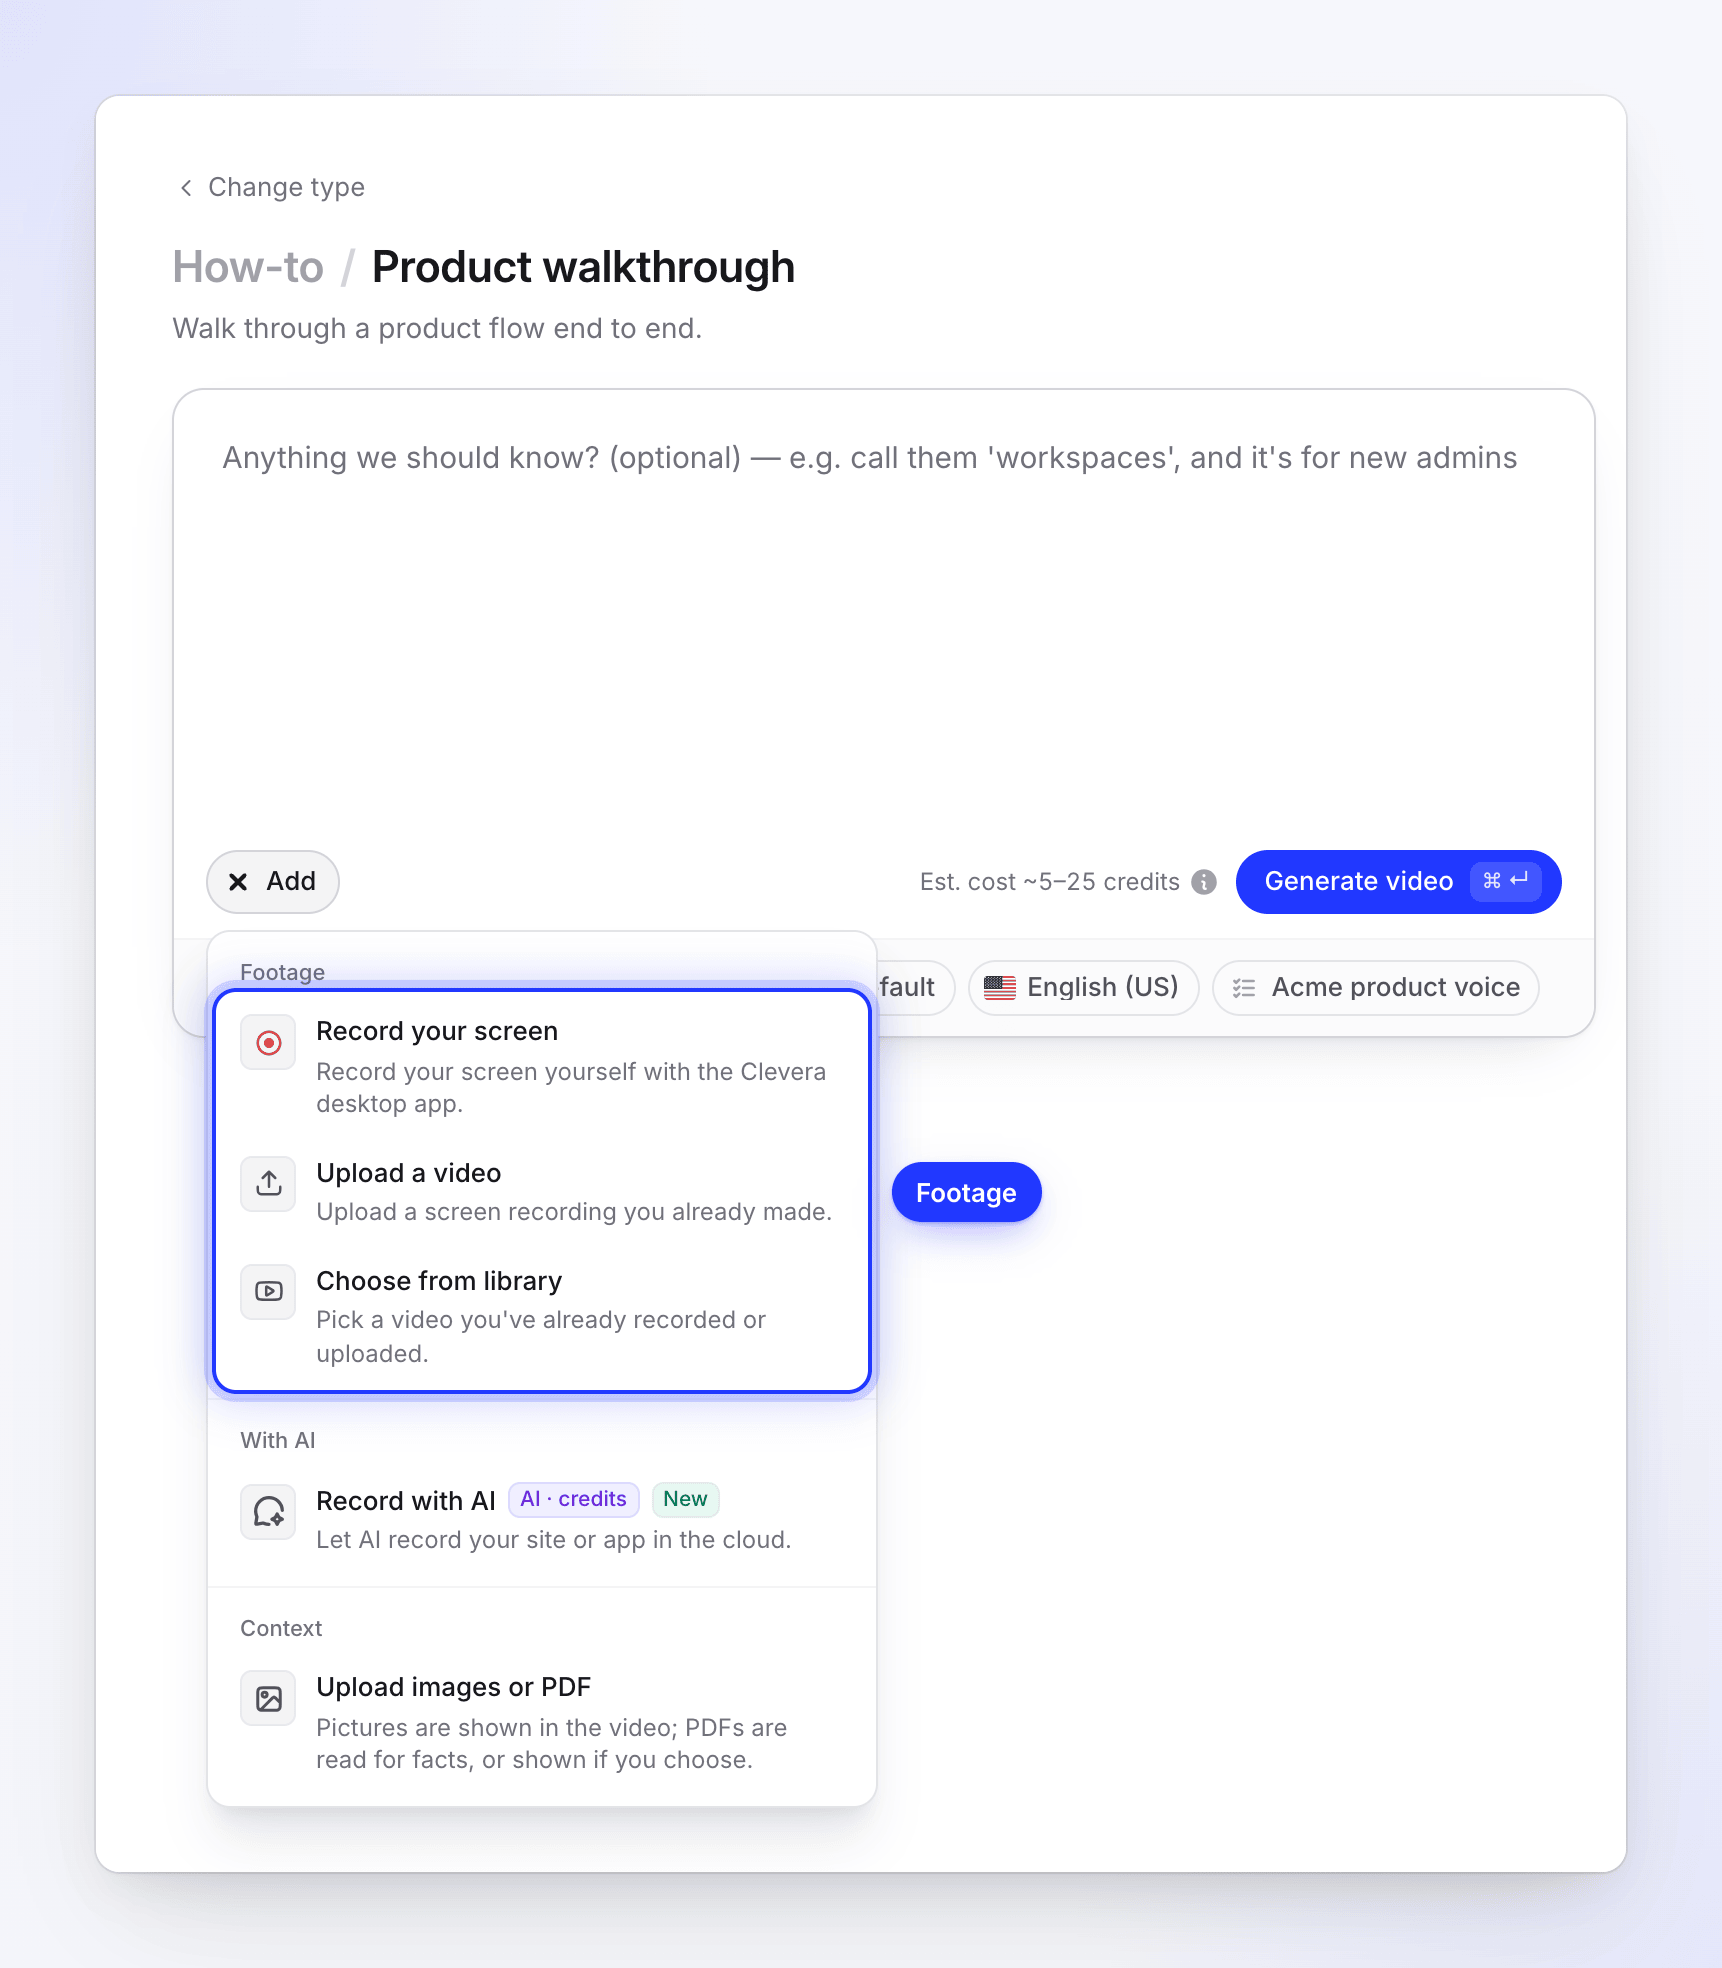
Add up to 3 videos, plus pictures and PDFs. Tell the AI anything it should know
The brief is optional for a how-to. Use it for what the recording can't show, for example "skip the sign-up bit, focus on the dashboard" or "the audience is new admins". It takes up to 5,000 characters. See Write a brief that gets a good video.
Check the options
The pills under the box show the current settings. Change any of them, or leave them as they are. See Options for how-to videos.
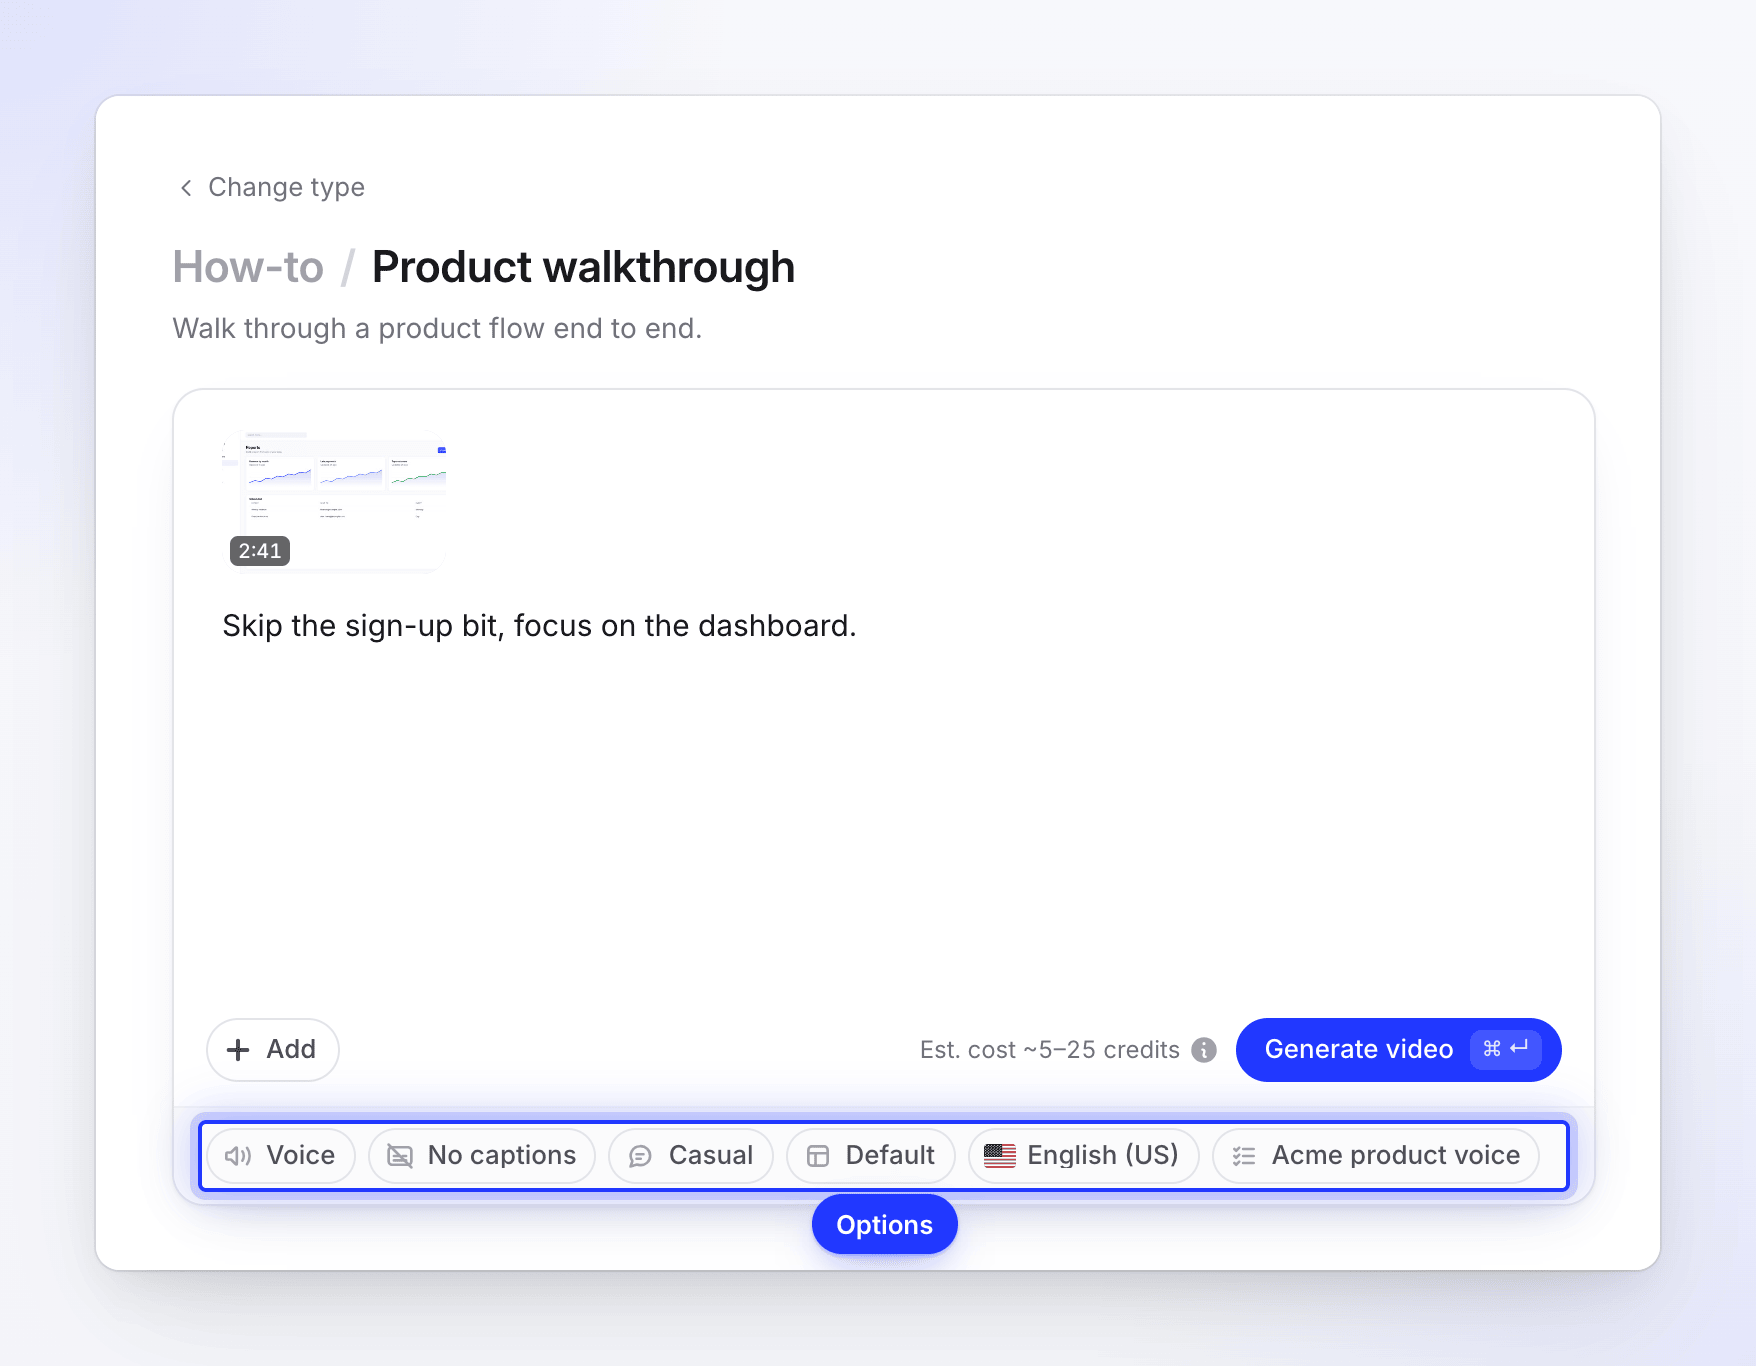
Leave the pills as they are, or change any of them. Generate
Check the cost beside the button, then click Generate video (or press ⌘↵ on a Mac, Ctrl↵ on Windows). The generation page opens and shows each stage as it happens. You can close the tab; the video keeps going.
If something is missing when you press Generate video, a short message points at it, for example "Add a video first — record, upload, or choose from your library." See Fix what's missing when you press Generate.
The four kinds of how-to
| Kind | Use it for | How the AI shapes the video |
|---|---|---|
| Product walkthrough | Walk through a product flow end to end. | Opens on what the area does and who it helps. Moves briskly through navigation and holds on each capability. |
| Getting started | First-run setup for new users. | Opens on the first success the viewer will reach. Keeps to the fewest steps, defines product terms the first time they appear and skips optional settings you don't explain. |
| Troubleshooting | Fix a common problem. | Opens by naming the symptom or the exact error. Follows diagnose, fix, verify; says why each step fixes it and warns before anything irreversible. |
| Onboarding | Bring a teammate or customer up to speed. | Opens warmly on what the viewer will be able to do. Orients them on each screen before the detail and leaves out jargon the screen doesn't introduce. |
All four keep every option, setting and tip you explain while recording. They differ in the opening, the pace and what they leave out.
Options for how-to videos
| Pill | What it sets | Default |
|---|---|---|
| Voice | Who reads the script. Press play to hear a sample. Built-in voices, or your own ElevenLabs voices. | A built-in voice |
| Captions | Show captions (the spoken words, on screen) or No captions. | No captions |
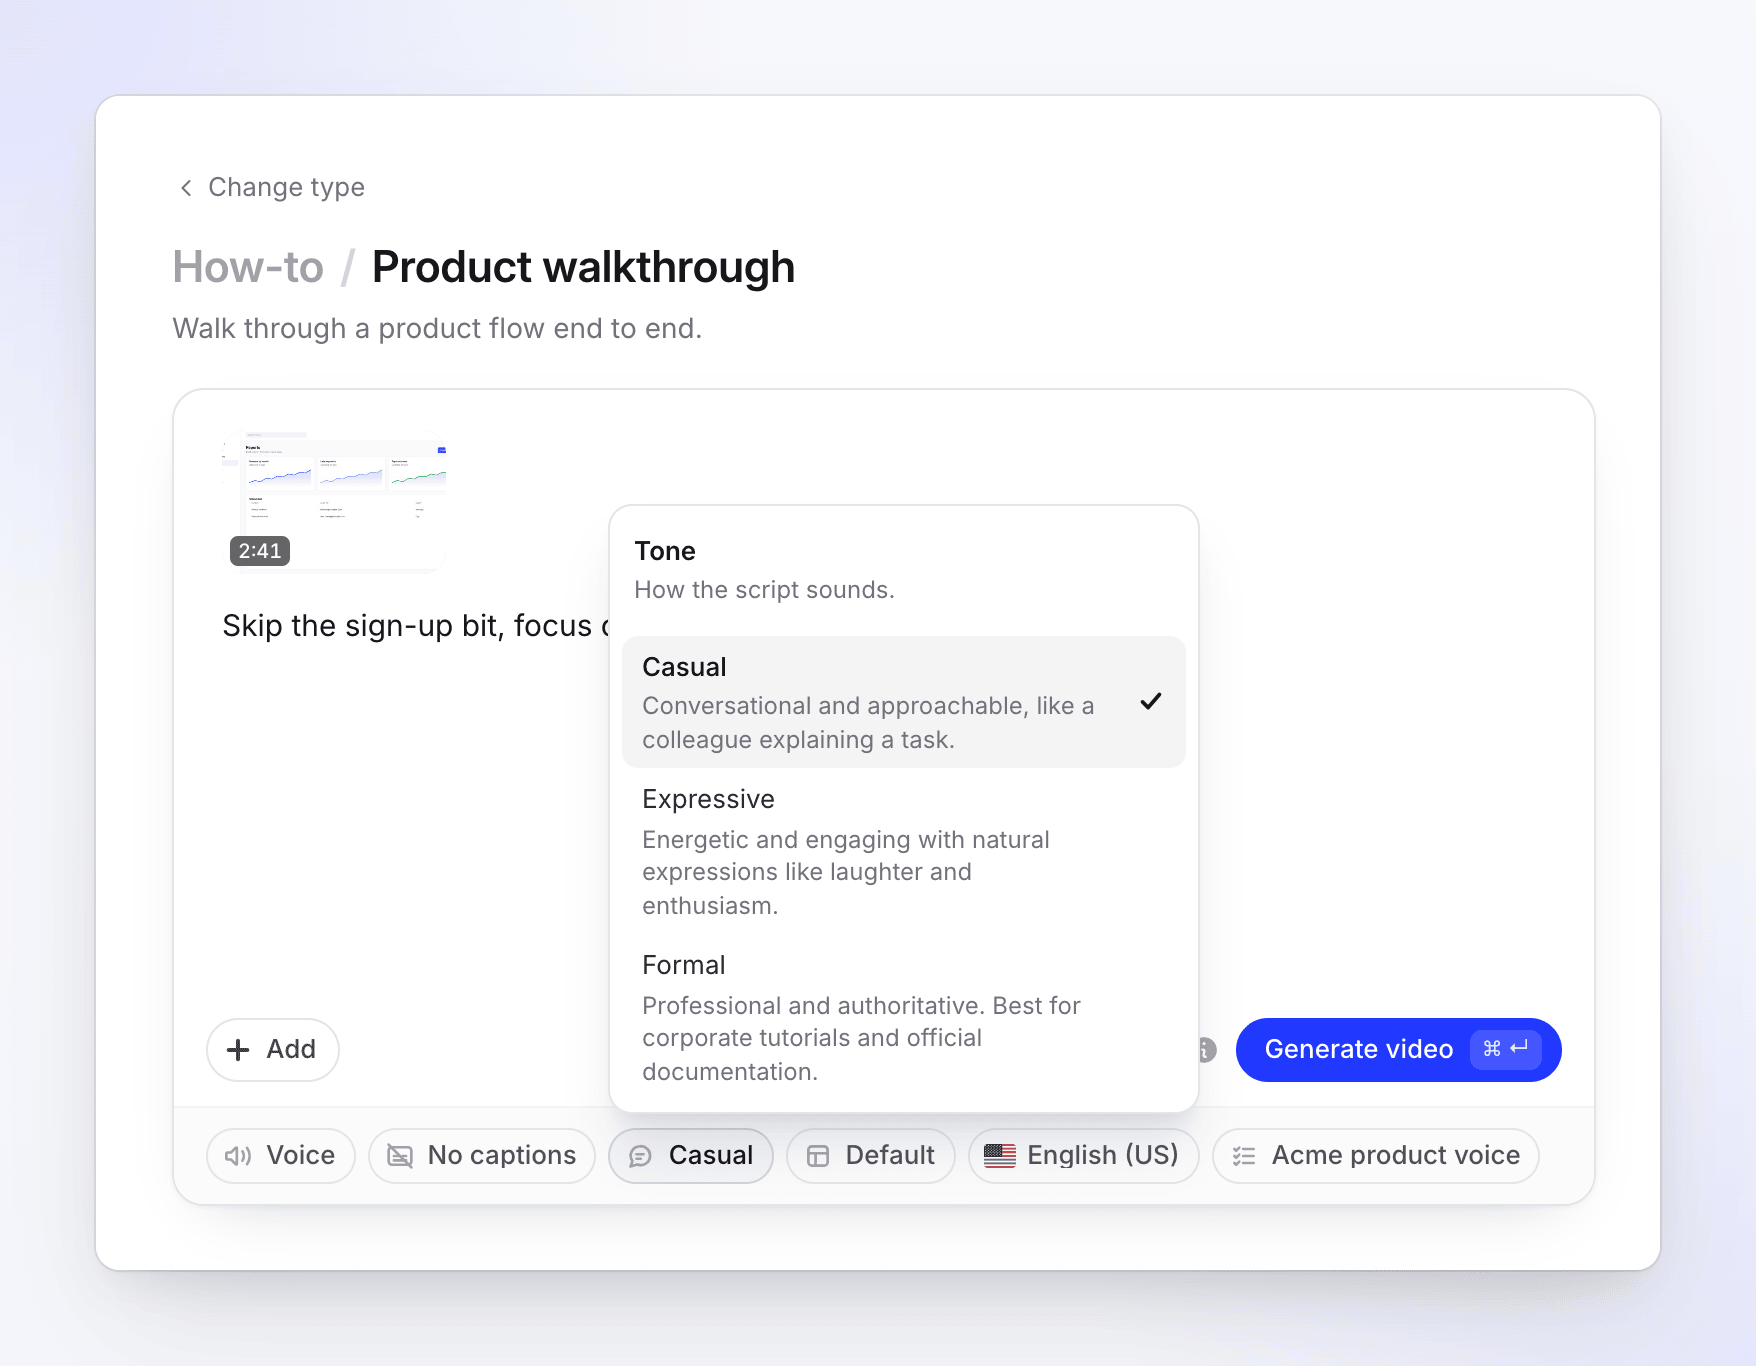
| Tone | How the voice-over sounds: Casual, Expressive or Formal. | Casual |
| Template | The background, music, intro and title cards. See Use a video template for your brand. | Your workspace's default template |
| Language | The language of the script, the voice and on-screen text. 74 languages. | English (US), or the last one you used |
| AI rules | Rules the AI follows, such as words to avoid. See Create and apply AI rules. | Your workspace's default rules |
The tone options mean:
- Casual: conversational and approachable, like a colleague explaining a task.
- Expressive: energetic and engaging, with natural expressions like laughter and enthusiasm.
- Formal: professional and authoritative. Best for corporate tutorials and official documentation.
How-to videos follow the shape of your recording, usually landscape. There is no format, length, look or avatar pill: the length follows your recording once the AI has cut it. You can change the aspect ratio in the editor after the video is made. Your last voice and language are remembered for the next video.
What the AI does with your recording
The generation page shows five stages: Looking at your materials, Planning the story, Designing the scenes, Adding music & polish and Finishing up. Behind them:
- It watches the recording and reads what you said. If you spoke, your explanation drives the script: what to click and why, the tips and the warnings, in your order. Without a voice track it writes from what the screen shows and never invents features, numbers or results.
- It cuts what a viewer doesn't need. Detours, loading, retries, idle stretches and off-topic moments are cut or sped up. Typing is sped up rather than removed, so the viewer still sees what was entered.
- It writes one continuous script, then splits it into parts that play over the matching footage. Each line is spoken while its action is on screen, never long before or after.
- It opens with a short spoken introduction over a few preview moments from your recording, and closes on the result.
- It records the voice-over, adds a title and chapter headings, and applies your template: background, music, intro card and, in longer videos, up to two chapter title cards.
- It adds zooms on your clicks and typing. Desktop app recordings get the smoothest result because Clevera redraws your cursor. See Understand automatic zooms and cursor effects.
After it's made
Click Open your video on the generation page. In the editor you can rewrite any line and re-record it in the same voice, change the voice, music, captions and background, adjust or remove zooms, and add elements. You can also ask the assistant to change the narration for you, or translate the video into another language.
Exporting an MP4 never costs credits.
Troubleshooting
| Message or problem | What to do |
|---|---|
| "This recording is still processing. Please wait until it is ready." | Wait for the recording's processing to finish, then press Generate video again. |
| "The Free plan makes videos up to 3 minutes. Trim the recording or upgrade to make longer videos." | Use a shorter recording, or upgrade your plan. |
| "The Free plan runs one generation at a time." | Wait for your current video to finish, or upgrade. |
| "Choose a template." / "Create a template to continue." | Open the Template pill and pick or create a template. |
| The heads-up "I could not watch your recording closely, so the video uses it as one long take" | The video was made, but without the usual cuts. Open it and check the pacing, or try again with the same recording. |