

Change voice, music and sound
Use the Audio tab to switch the AI voice that reads your voice-over, pick, shape or turn off the background music, and set your microphone and system audio in Polish videos. What each change costs.
The Audio tab in the video editor is where you change the AI voice that reads your voice-over, pick or turn off the background music, and, for Polish videos, set the volume of your own microphone and computer sound.
Before you start
- The Audio tab is in the video editor for how-to videos, product demos and Polish videos. Social clips handle sound differently; see Edit a social clip.
- You need edit rights. Without them the tab is greyed out with "You don't have permission to edit".
- The tab shows only the sections your video has:
| Section | Shown for |
|---|---|
| Voice | Videos with an AI voice-over: how-to videos and product demos |
| Music | How-to videos, product demos and Polish videos |
| Recording audio | Polish videos recorded with the Clevera desktop app that captured a microphone or system audio |
Each section can be collapsed; its header shows a short summary, for example "Calm piano · 50%".
Change the voice
Changing the voice records the whole voice-over again in the new voice. Your script stays the same.
Open the voice picker
In Voice, click the Voice row. It shows the current voice's name. The Choose a voice list opens.
Find a voice
Search by name, style or gender, or use the filter (All and the most common labels, such as gender). Voices you applied recently are listed first under Recent. Tabs at the top switch between Built-in and ElevenLabs voices (see below).
Preview it
Click the play button next to a voice to hear a sample. The video pauses while the sample plays.
Apply it
Click the voice. A card asks "Switch to {voice}?" and notes that it "re-records all narration". Click Apply voice, or Cancel.
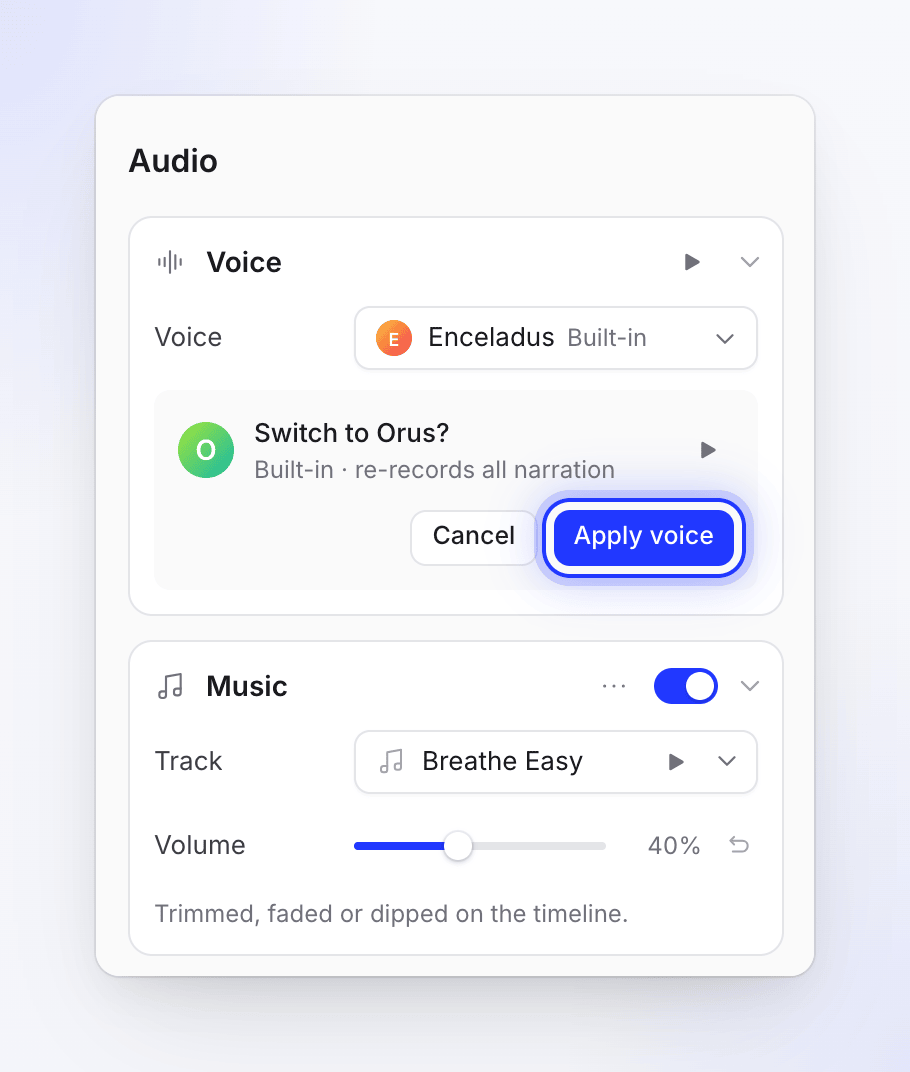
Every line is recorded again in the new voice. Keep working
The section shows "Switching to {voice}" with a percentage: "Every narration line is being re-recorded. You can keep editing." When it's done, a message says "Voice updated successfully!" and the new voice-over loads.
Scenes are re-timed to the new recording's length, and elements on the timeline follow them. You can't start another voice change until the current one finishes.
Voice sources
| Tab | What it is | What it costs |
|---|---|---|
| Built-in | Clevera's own voices | Credits, as voice-over |
| ElevenLabs | Voices from your own ElevenLabs account, including voices you cloned or designed there | No Clevera credits. Uses the character credits on your ElevenLabs account. |
The voices listed depend on the language you're editing. Avatar voices, the voices AI avatars speak with, are only for social clips with an AI avatar, so they don't appear in this editor. See Choose a voice and preview it.
Use your ElevenLabs voices
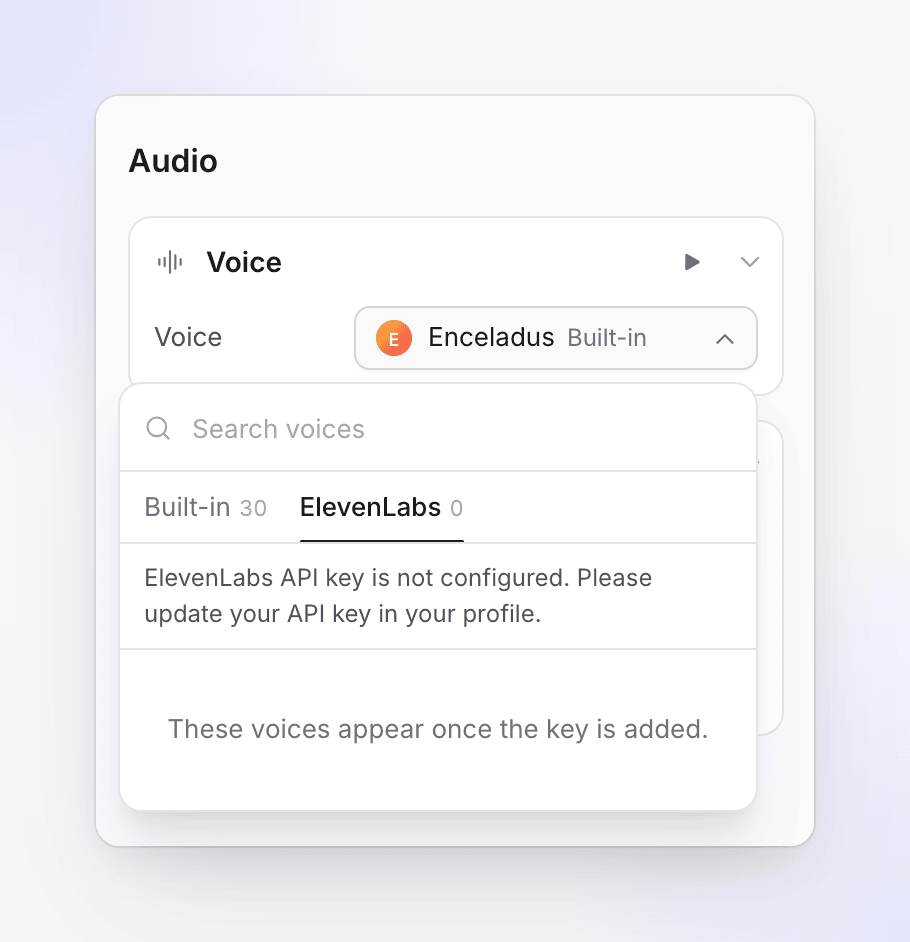
To see the ElevenLabs tab's voices, add your ElevenLabs API key under Profile → Connections → ElevenLabs voices. Until then the tab says "These voices appear once the key is added." The key needs at least 3,000 character credits left and the permissions listed on that card. See Use your own ElevenLabs voices.
Voices and languages
Each language of a video has its own voice. Changing the voice changes only the language you're editing; switch languages in the top bar to change another one. You can't change the video's language from the Audio tab: use Translate instead.
There are no speed or speaking-style controls in the editor. To change how a line sounds, change its words in the Script tab.
Change the music
Music comes from Clevera's music library and plays under the whole video. Every track is royalty-free or AI-generated, and licensed for commercial use in your videos.
Open the track picker
In Music, click the Track row. The Choose music list opens.
Filter by mood
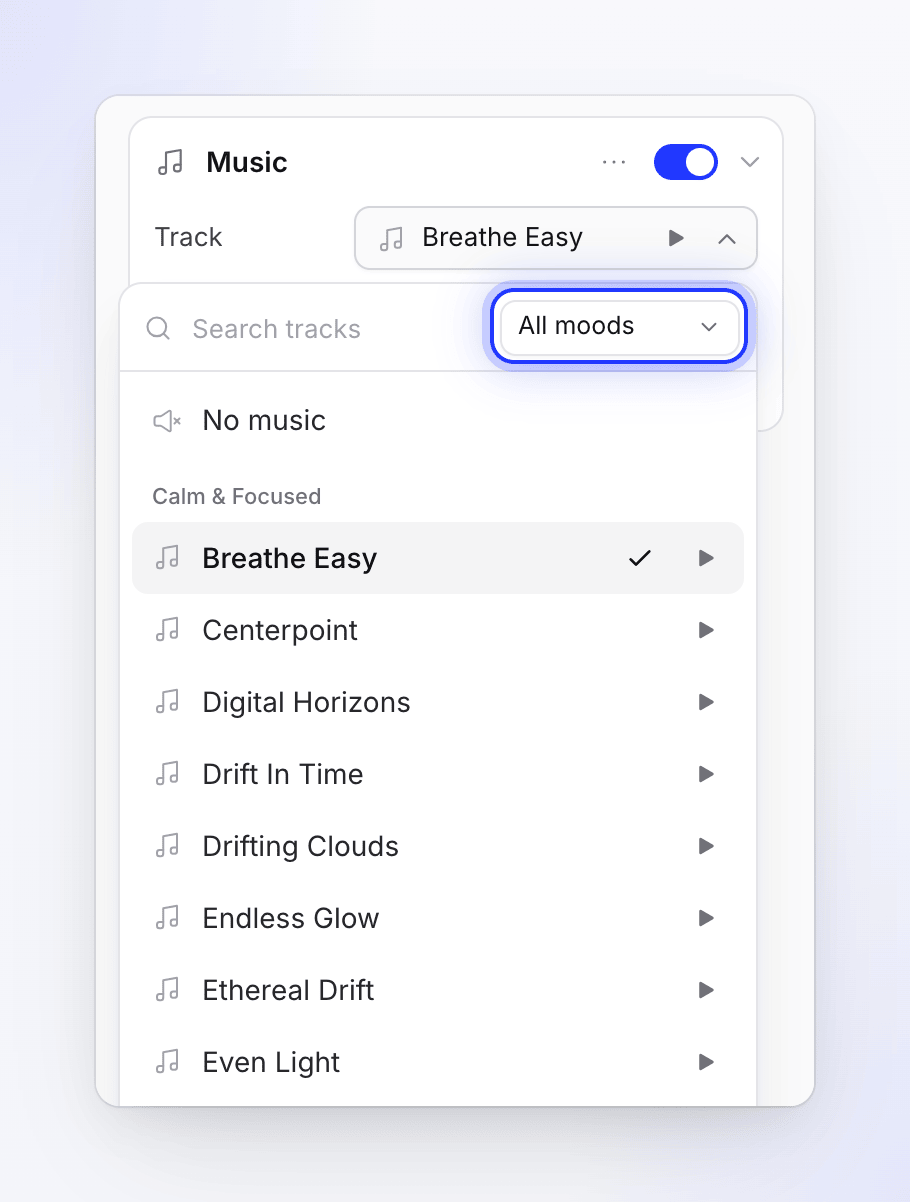
Use the mood filter: All moods, Calm & Focused, Cinematic & Inspiring, Upbeat & Motivational, Warm & Human or Modern & Techy. Or search by name.
Preview and pick
Click play to hear a track (the video pauses), then click the track to use it. Choose No music at the top of the list for silence.
Set the volume
Drag Volume. The default is 50%.
The switch in the Music header turns music off and on. Turning it back on brings back the last track you used.
Fades, trims and volume dips
Shape the music on its timeline lane, not in the panel. Select the music lane to expand it, then:
| To | Do this |
|---|---|
| Start the music later | Drag the music start along the lane |
| Change a fade | Drag the fade handle at either end. Default fade-in is 1 s, fade-out 2 s. |
| Lower the music under a moment | Drag on the lane to add a volume dip. Drag it to move it, double-click it to remove it. |

Music doesn't lower itself under the voice-over automatically. Add volume dips where you want it quieter. The Music section shows "Trimmed, faded or dipped on the timeline." once you have.
To undo all of that, open ⋯ (Music options) → Reset timeline edits…: "The track goes back to playing under the whole video: its trim, fades and volume dips are removed. The track and volume stay."
Music presets
Save a track and volume to reuse on other videos: ⋯ → Save as preset…, enter a name, then Save preset. Apply one with ⋯ → Apply a preset…. Presets are shared with your whole workspace, and deleting one removes it "for everyone in this workspace". A preset keeps only the track and volume, not fades or dips.
Use your own music
The Music section uses the library only. To play a track of your own, add an Audio element in the Elements tab and upload the file there (MP3, WAV, OGG or M4A, up to 20 MB). It plays where you place it on the timeline, and you set its Volume and Loop in its options. See Add and edit elements.
Recording audio (Polish videos)
Polish videos keep your own voice and computer sound from the recording. There is no AI voice.
| Setting | What it is | Default |
|---|---|---|
| Microphone | "Your spoken narration from the recording." | On, 100% |
| System audio | "Sounds from your computer during the recording." | On, 100% |
Each has a Volume slider, 0–100%, that works while the switch is on. A channel the recording didn't capture shows "No microphone in this capture." or "No system audio in this capture." and can't be switched on.
What it costs
| Change | Credits |
|---|---|
| Changing the voice to a Built-in voice | Uses credits for recording the voice-over again. Shows on the Usage page as Voice-over. |
| Changing to an ElevenLabs voice | No Clevera credits; your ElevenLabs account is charged |
| Music, volume, fades, dips, presets, recording audio | Free |
The voice picker doesn't show an estimate. A longer voice-over costs more to record again. See Understand credits.
Troubleshooting
| Message | What to do |
|---|---|
| "Failed to update voice. Please try again." | Pick the voice and click Apply voice again. |
| "A voice change process is already running for this screencast." | Wait for the current change to finish. |
| "ElevenLabs API key is not configured. Please update your API key in your profile." | Add your key in Profile → Connections. |
| "ElevenLabs error: …" | The message comes from ElevenLabs. Check the key, its permissions and your character credits. |
| "Failed to load voice settings." or "Music could not be loaded." | Click Try again. |
| "You do not have permission to change the voice for this screencast." | Ask a teammate with edit rights. |