

Edit an article and its screenshots
Write and format an article in the editor, add blocks with "/", use the quick AI actions, and replace, caption or capture screenshots with your own markers from the recording.
The article editor works like a modern document editor: type to write, press / to add blocks, select text to format it, and click a screenshot to swap, caption or redraw it. Every change saves on its own. This article covers each part of the editor and everything you can do with screenshots.
Before you start
- You need edit access to the article. Without it, editing buttons are greyed out and show "You don't have permission to edit". See roles and creator seats and collections for who can edit what.
- The article must have finished generating. While it is being written you can read along, but not edit.
The editor at a glance
| Area | What's there |
|---|---|
| Top bar, left | Home, the collection it's in, the article's title (click to rename), an info button and the save status |
| Top bar, center | Video / Article switch, only on older items that hold both in one place |
| Top bar, right | Undo, Redo, revision history, the Language menu, Assistant, Share and ⋯ |
| ⋯ menu | Revision history, Analytics, Add to collection (or Change collection), View source recording, Related content, Move to trash |
| Page | The article itself, with the title at the top |
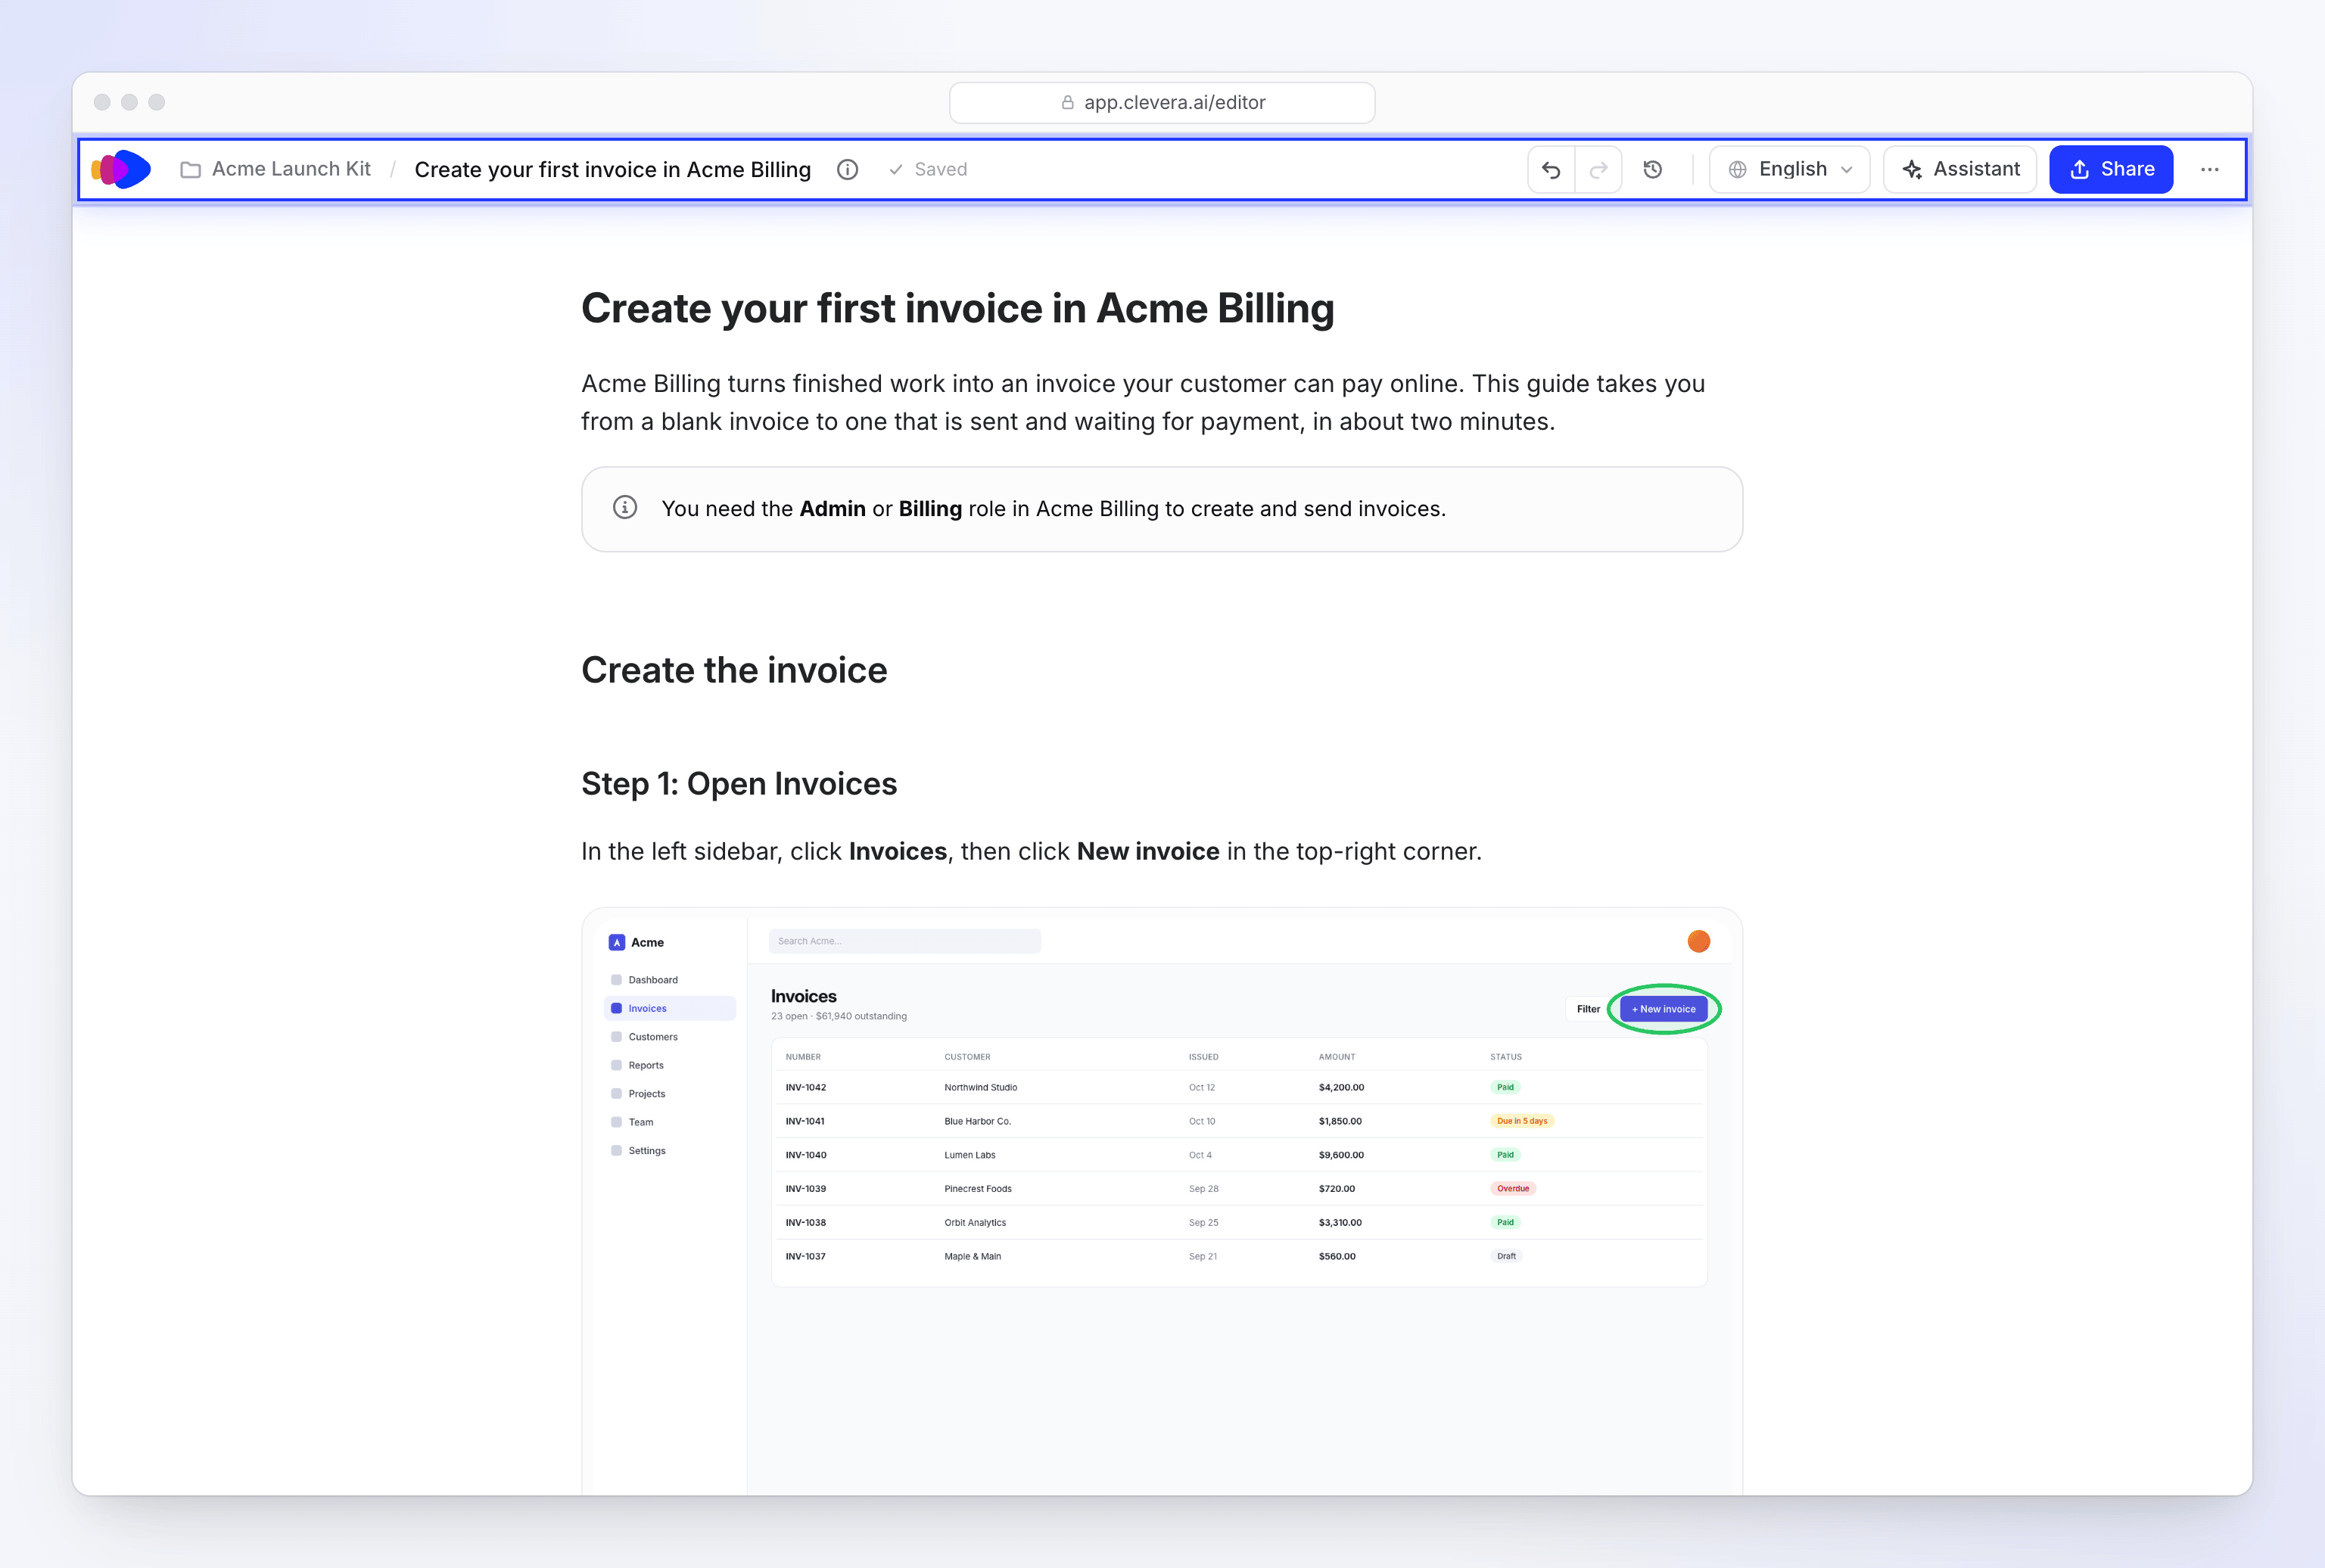
The save status reads Saving… ("Saving your changes"), Unsaved ("Your changes will save in a moment") or Saved ("All changes saved"). There is no Save button.
Write and format text
Add a block
On an empty line, type
/to open the block menu, then type to filter it. Press Enter to insert the highlighted block. See Blocks you can add.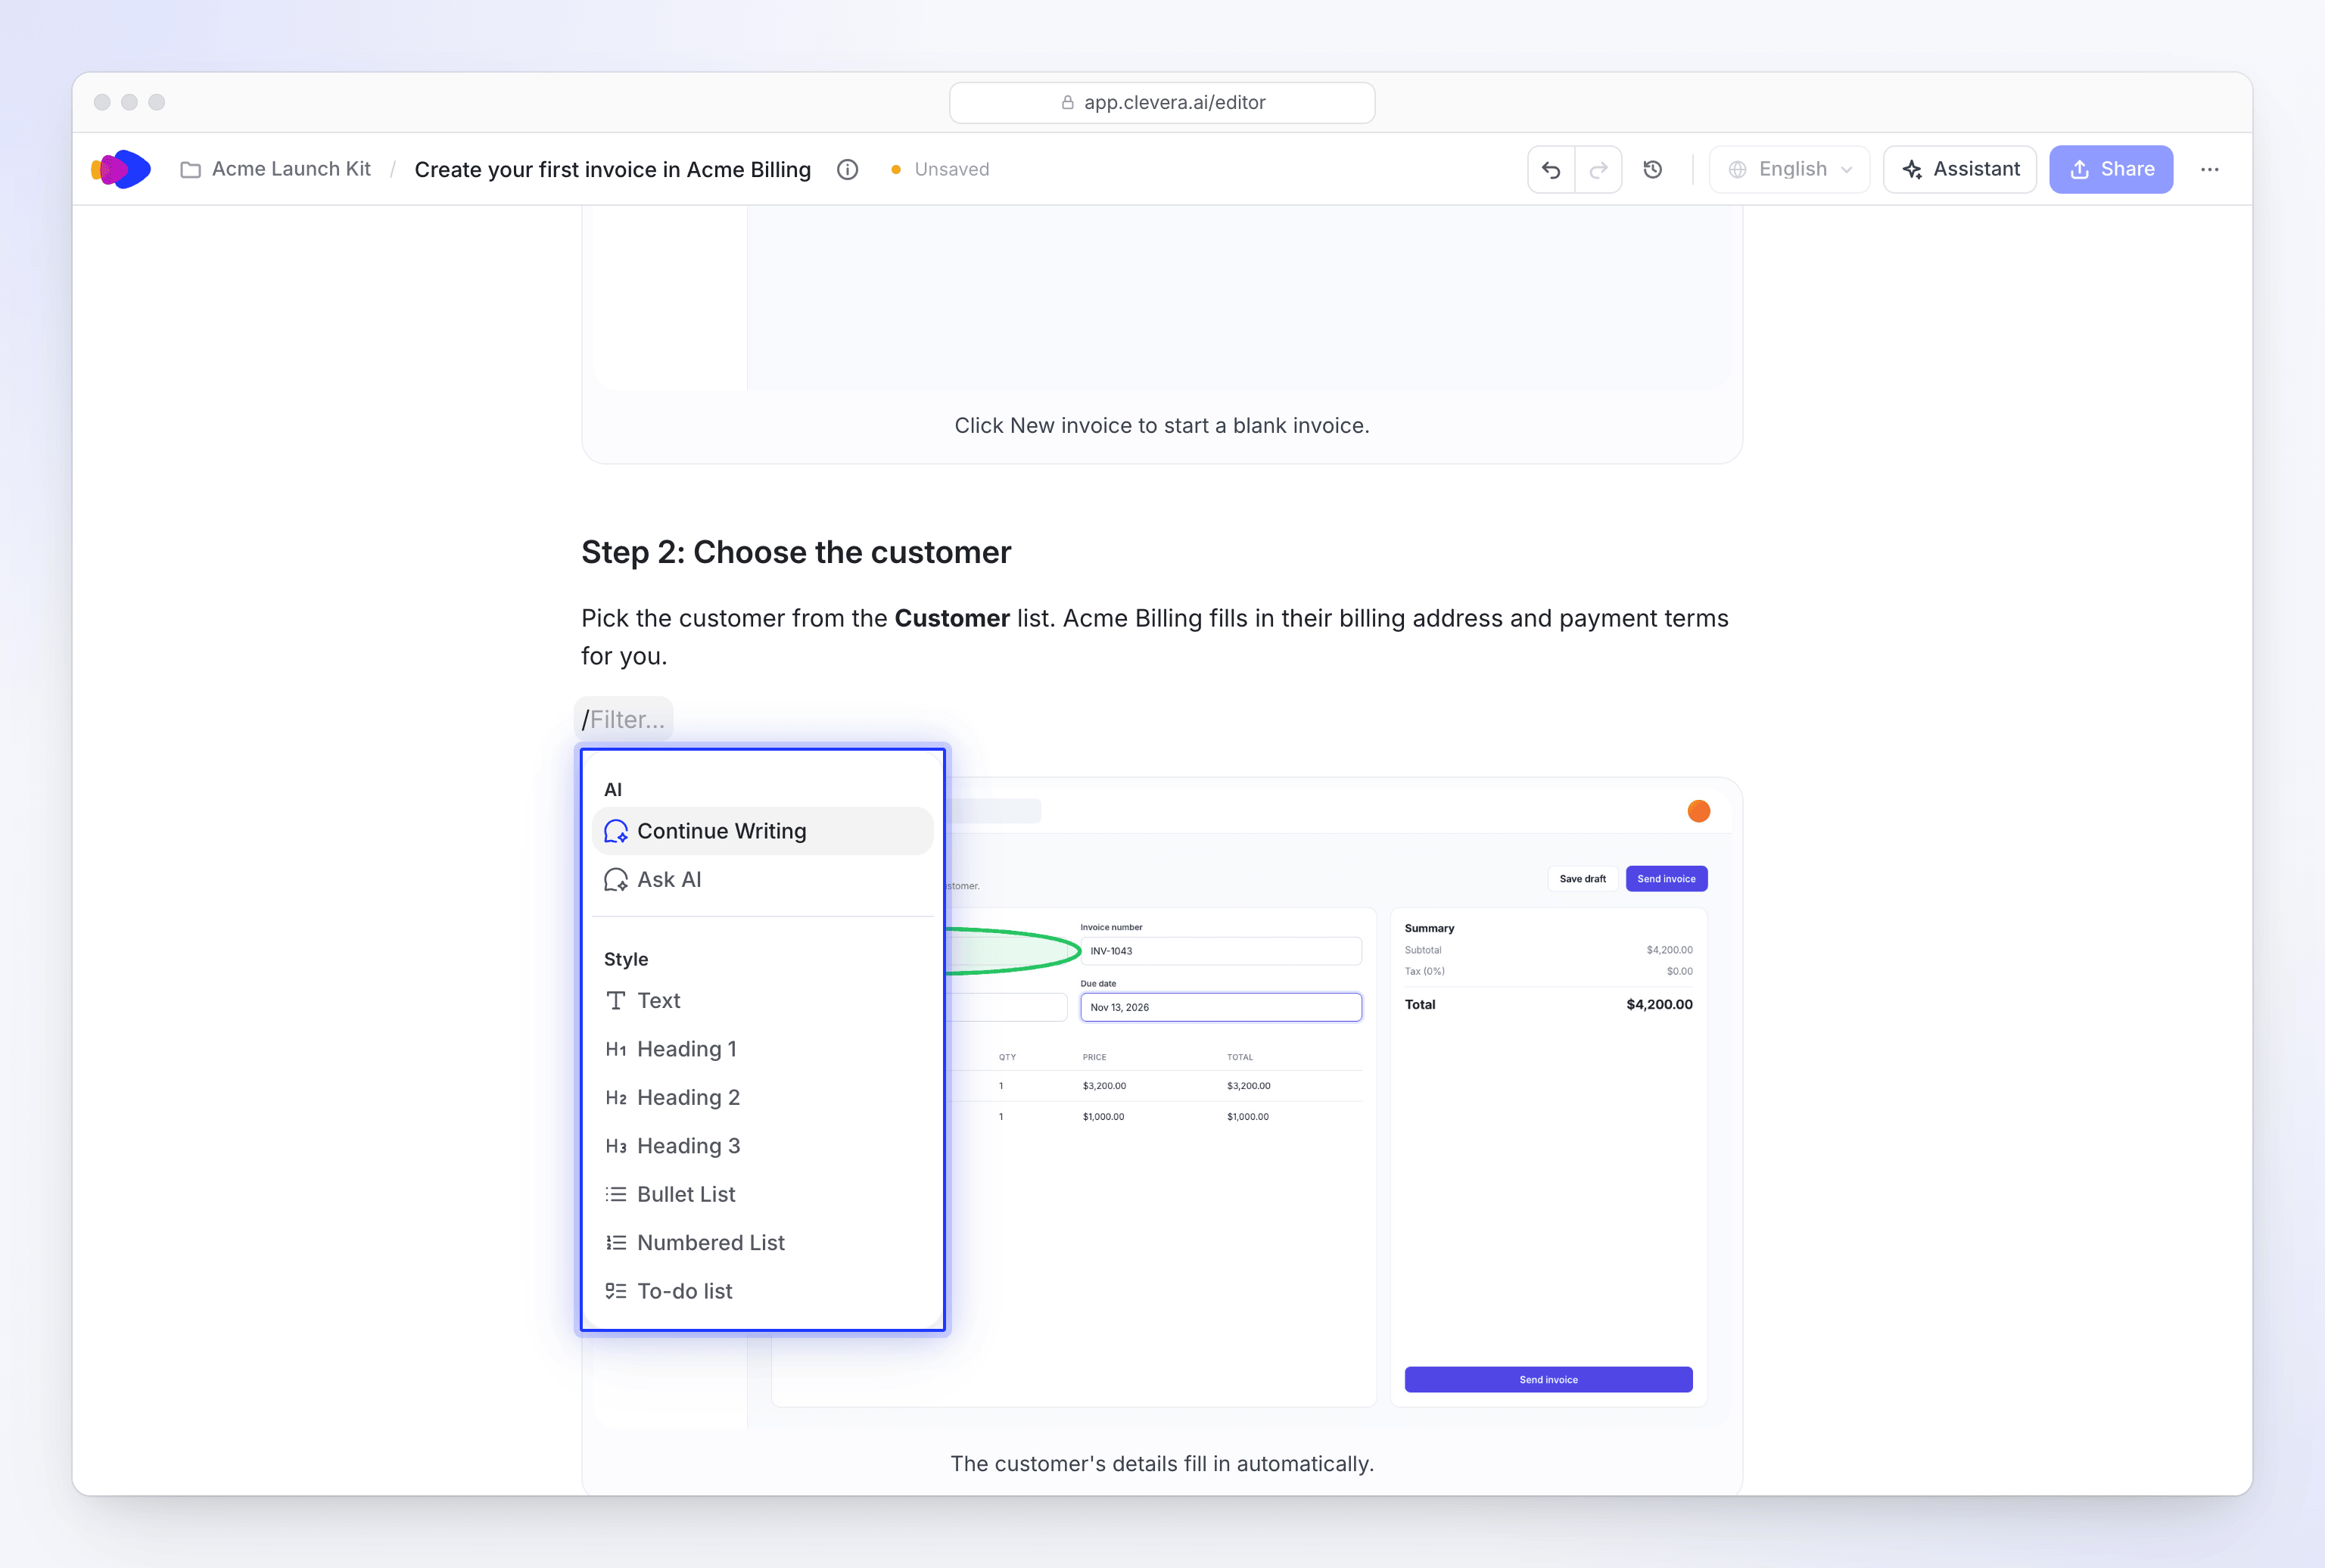
Type / and keep typing to filter. Format a selection
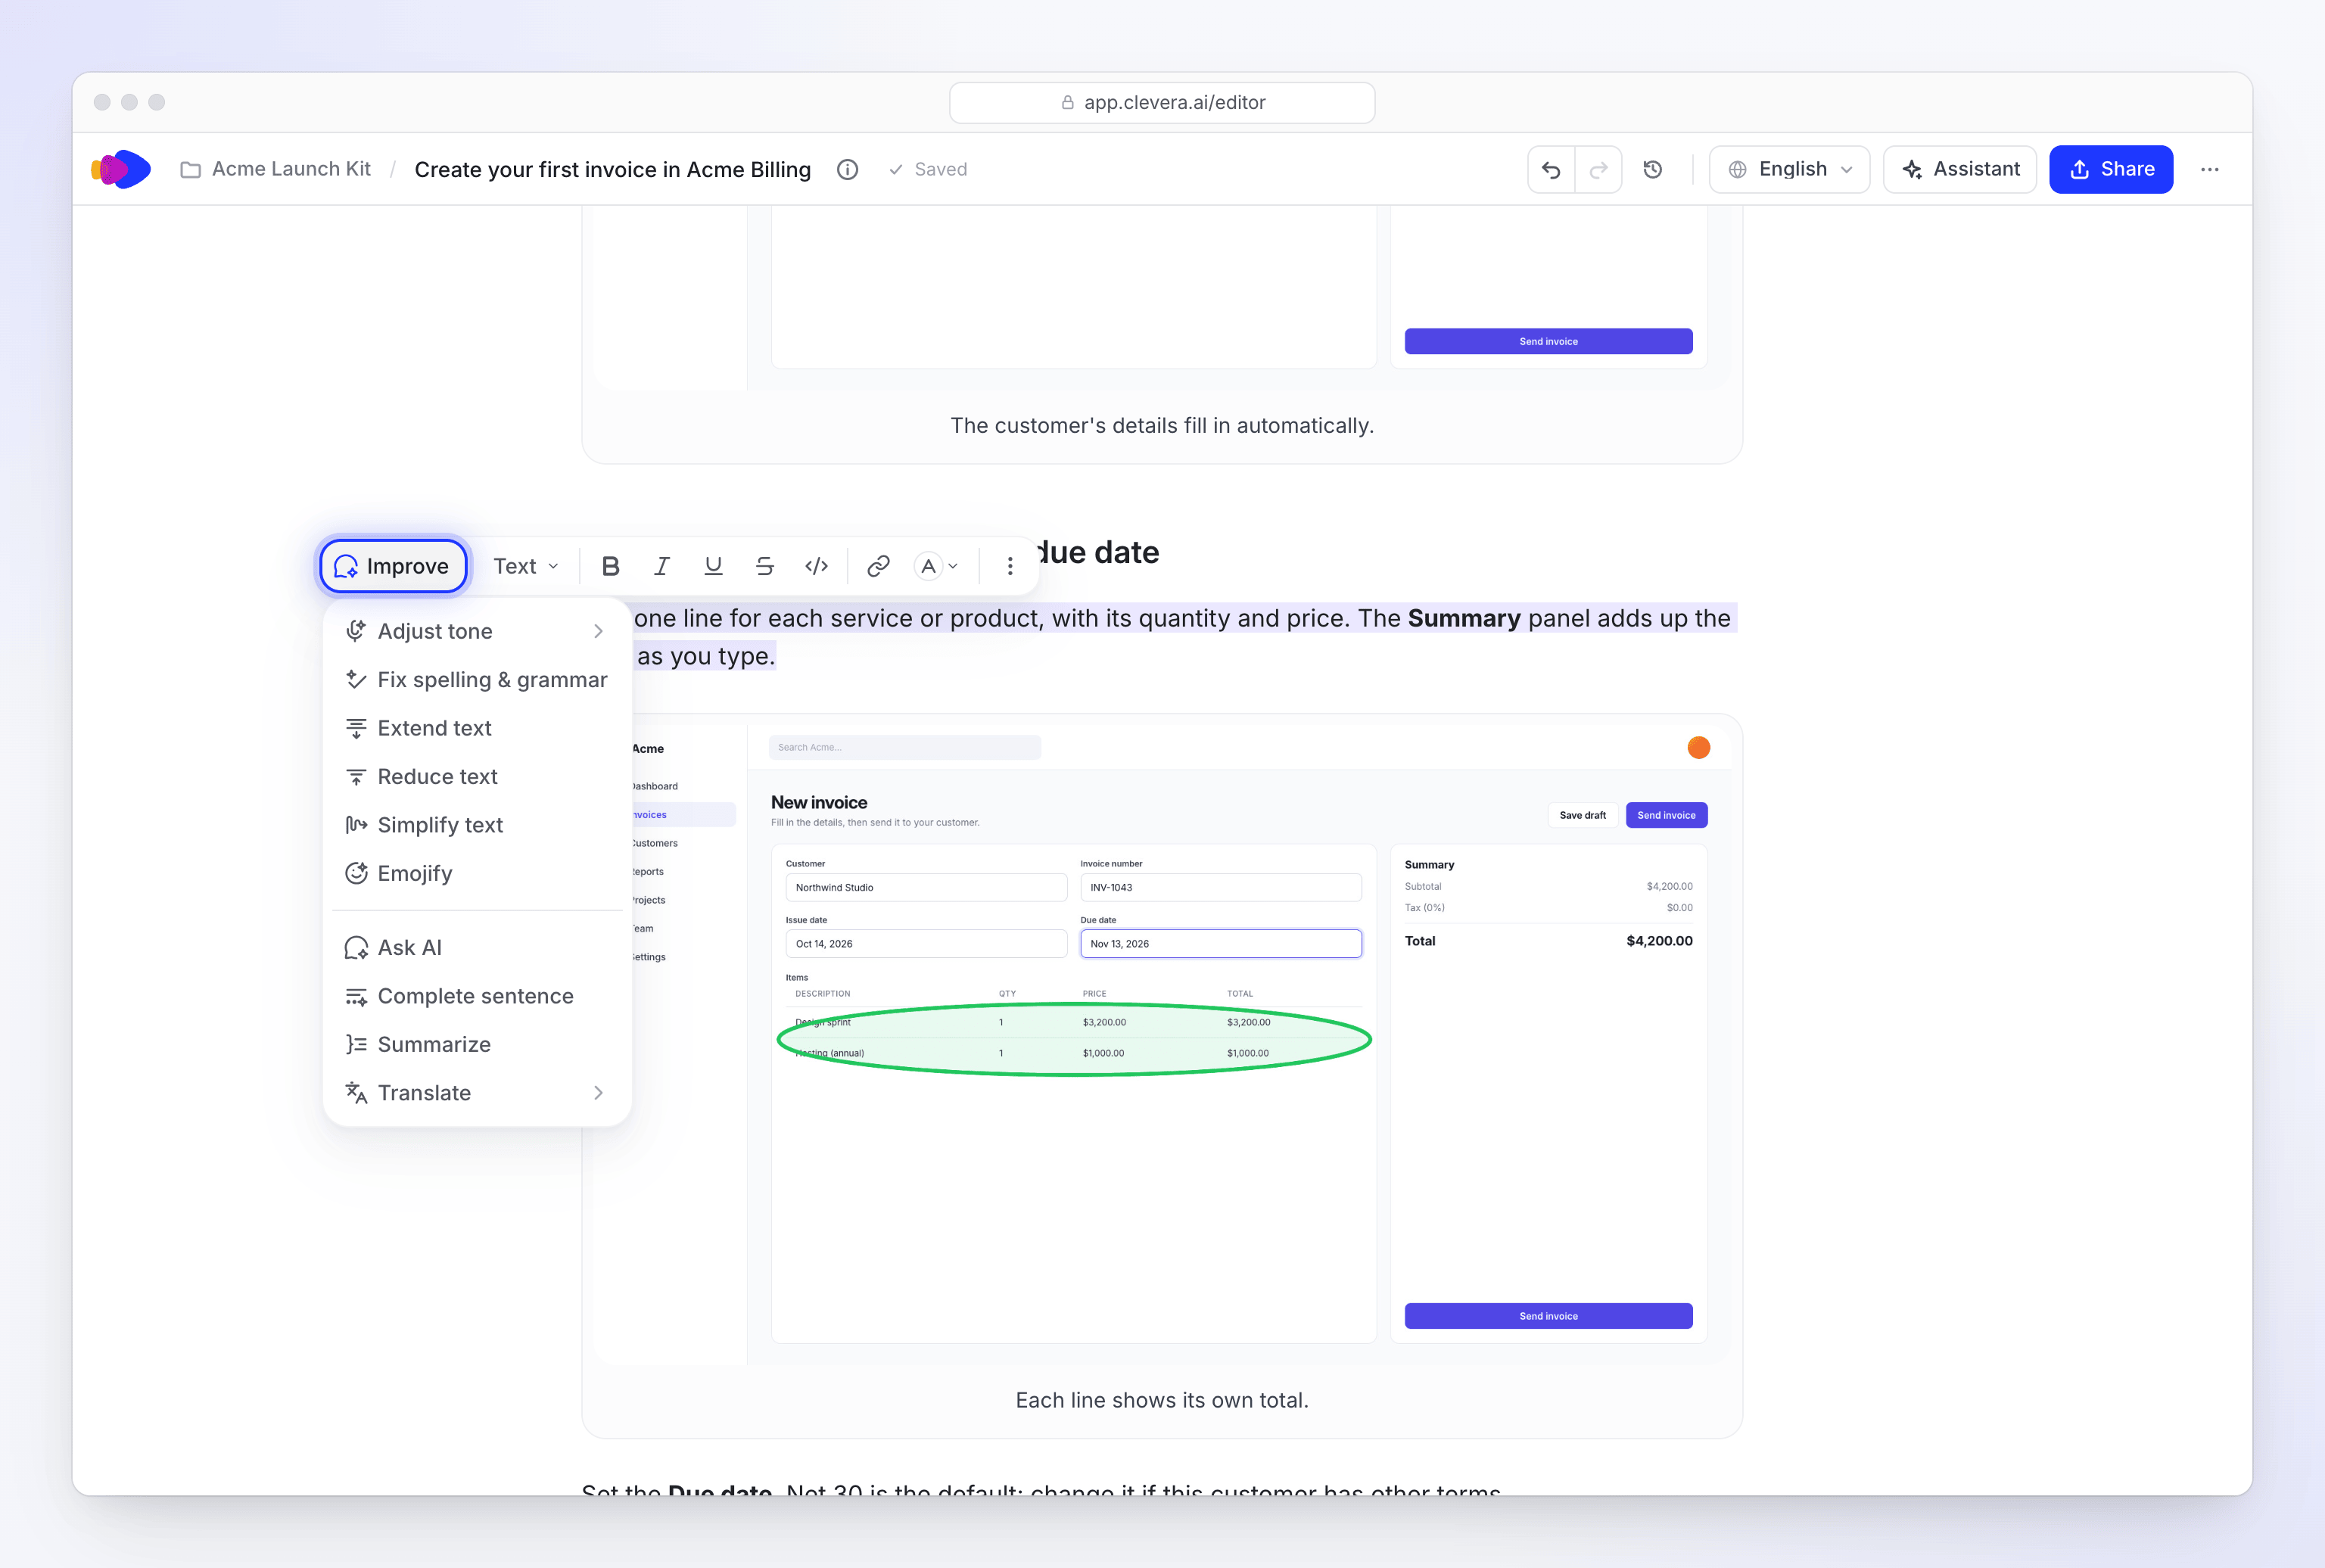
Select text to open the formatting bar: Improve (AI actions), Turn into (shows the current block type, such as Text), bold, italic, underline, strikethrough, inline code, link and text color. More options adds superscript, subscript and text alignment.
Rearrange blocks
Hover a block and use its handle on the left. Drag it to move it, or click it for a menu: Turn Into, color, Duplicate, Copy to clipboard, Copy anchor link, Reset formatting, Ask AI and Delete. Tables also get fit-to-width and Clear all contents; images get Download image.
Undo a change
Press ⌘Z (Mac) or Ctrl+Z (Windows) to undo, ⇧⌘Z or Ctrl+Shift+Z to redo, or use the arrows in the top bar. For older versions, open revision history.
Blocks you can add
| Group | Blocks |
|---|---|
| AI | Continue Writing ("Continue writing from the current position"), Ask AI ("Ask AI to generate content") |
| Style | Text, Heading 1, Heading 2, Heading 3, Bullet List, Numbered List, To-do list, Blockquote, Code Block |
| Insert | Emoji, Table, Separator |
| Upload | Image ("Resizable image with caption"), YouTube ("Embed a YouTube video"), Clevera Video ("Embed a Clevera screencast video") |
| Rich Content | Toggle List ("Collapsible content section"), Info Callout, Warning Callout, Tip Callout, Note Callout, Success Callout, Danger Callout, Step ("Numbered instruction step") |
Use the quick AI actions
Select some text and click Improve in the formatting bar for one-click rewrites of just that selection:
| Action | What it does |
|---|---|
| Fix spelling & grammar | Corrects mistakes without changing the meaning |
| Extend text / Reduce text | Makes the selection longer or shorter |
| Simplify text | Uses plainer words |
| Summarize | Condenses the selection |
| Complete sentence | Finishes an unfinished sentence |
| Emojify | Adds emoji |
| Adjust tone | Rewrites in a tone you pick, such as Business, Casual, Formal or Friendly |
| Translate | Translates only the selection |
You can also type your own instruction with Ask AI. The AI writes into the article and shows the result so you can keep it, try again or discard it.
Work with screenshots
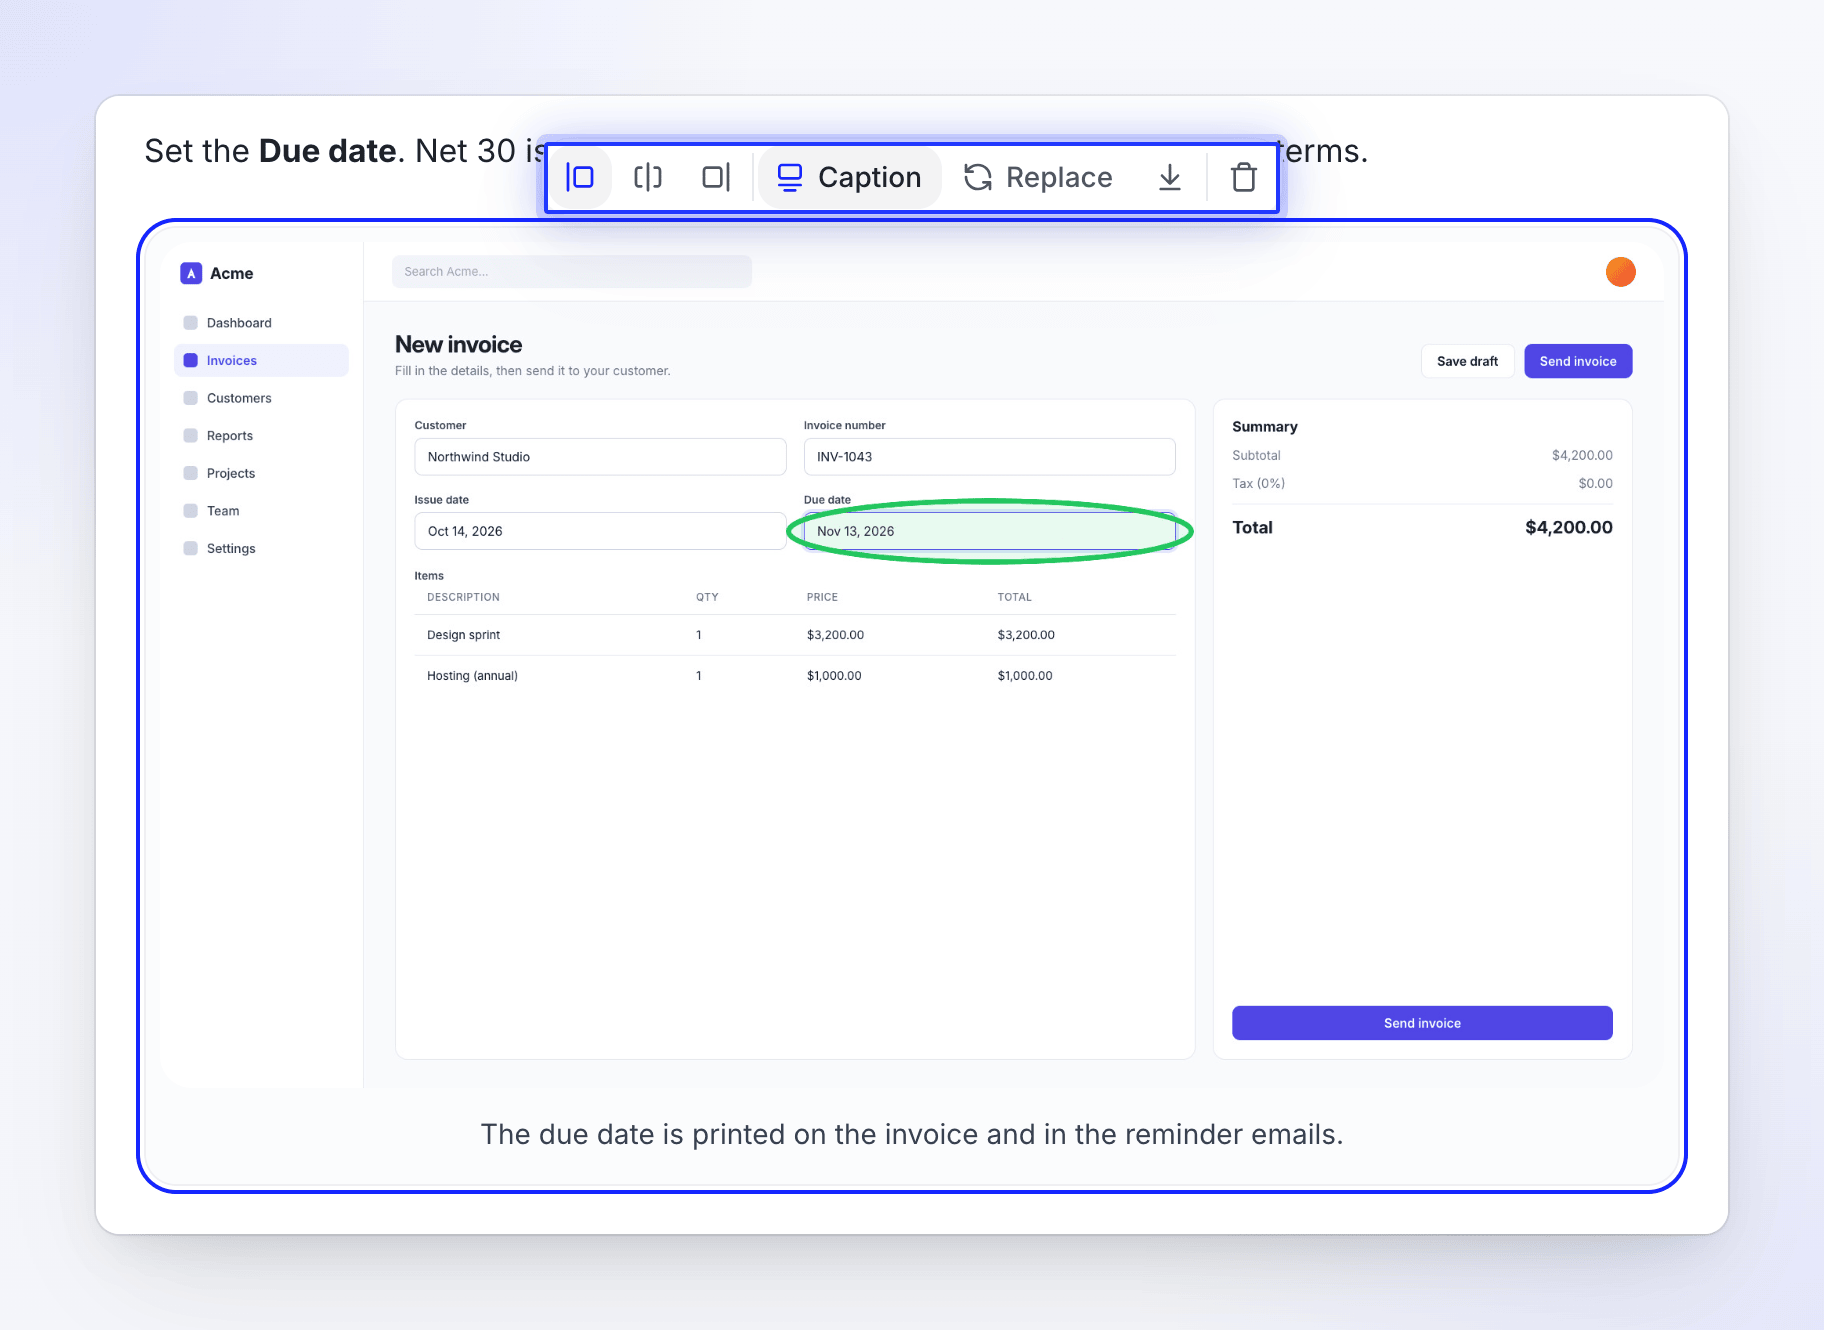
Click a screenshot to select it. Its toolbar has:
| Button | What it does |
|---|---|
| Image align left / center / right | Positions the image |
| Caption | Adds or edits the line under the image |
| Replace | Opens Select Image to swap the picture |
| Download image | Saves the picture to your computer |
| Delete | Removes the image block |
Drag the image's edges to resize it.
Replace or add a screenshot
Replace, or the Image block, opens Select Image with four tabs:
| Tab | What you get |
|---|---|
| Media Library | Pictures already in Clevera: My Uploads and This Screencast |
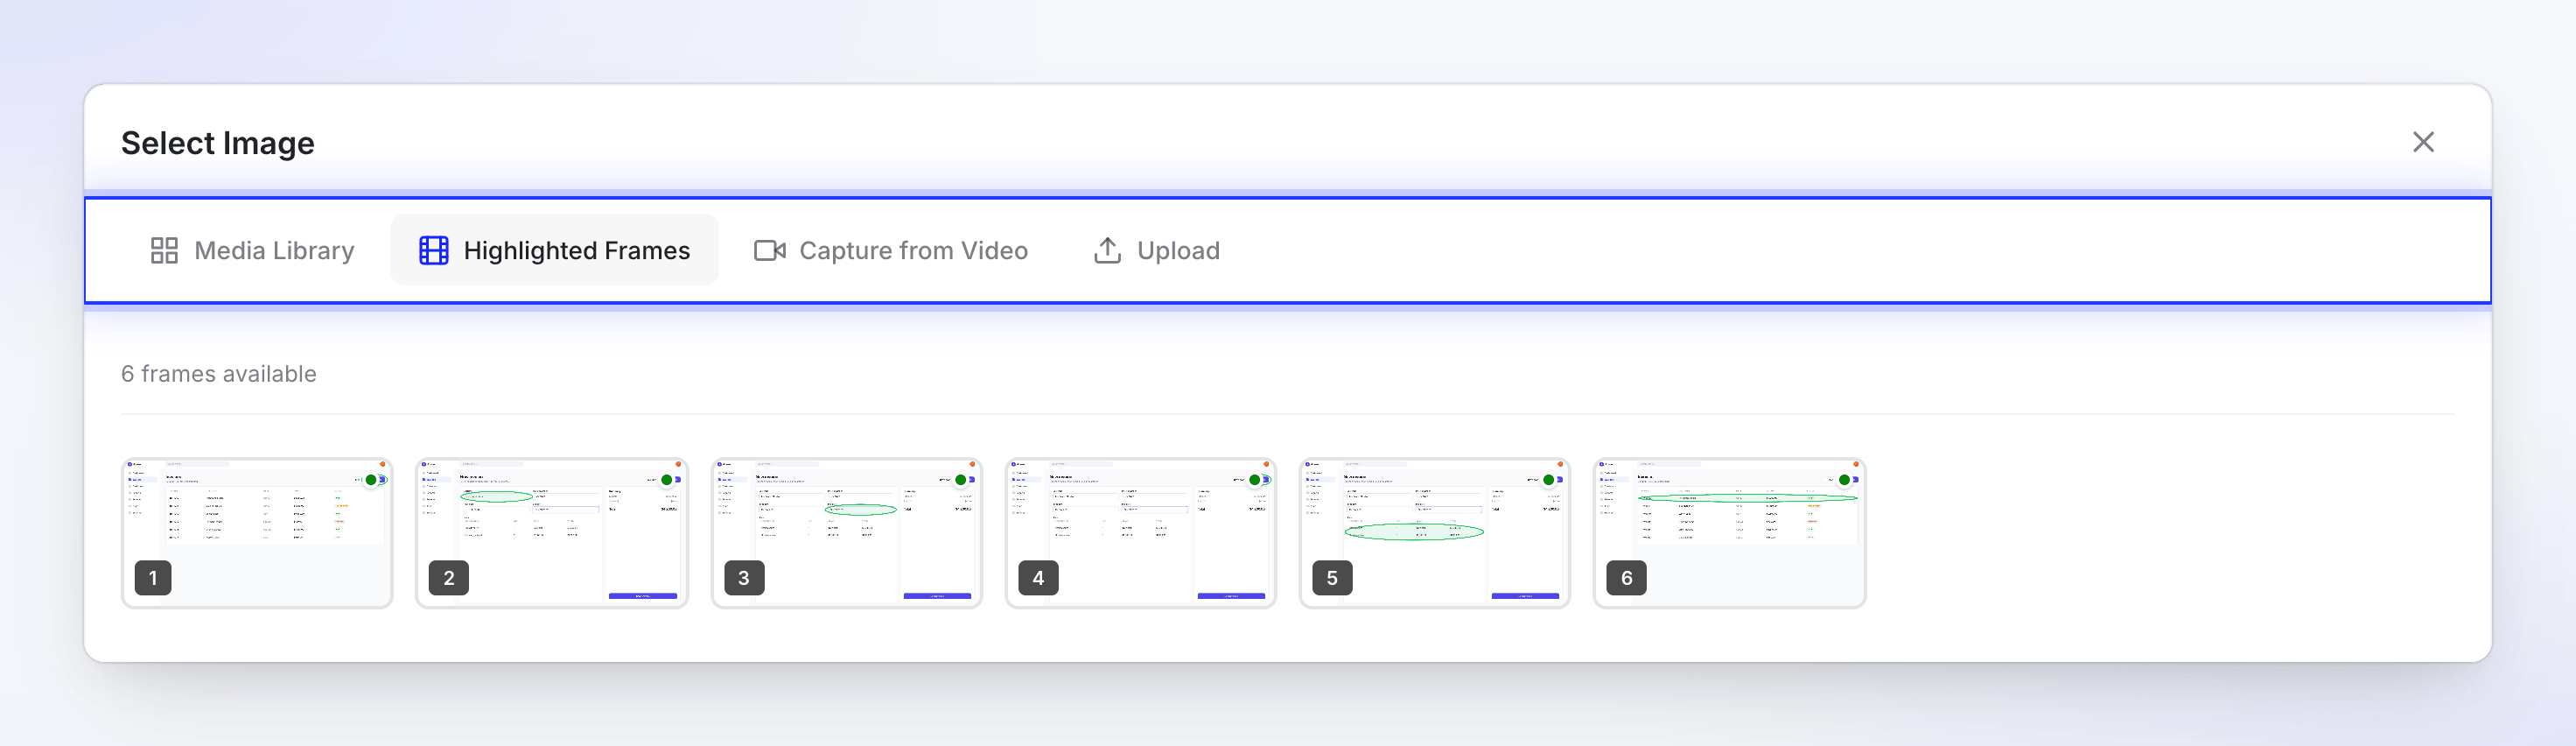
| Highlighted Frames | The frames Clevera took from your recording at each click, with the click marker drawn on them |
| Capture from Video | Any moment of the recording, with your own markers (see below) |
| Upload | A picture from your computer: "Click to upload or drag and drop", images only, up to 5 MB |
Capture a frame with your own markers
Capture from Video lets you take a screenshot from any moment of the source recording and highlight what matters.
Find the moment
Play the video or drag along the timeline. Use Previous frame and Next frame to step one frame at a time.
Draw on it
Under Marker, pick Rectangle, Circle or Arrow and drag on the video. Pick a Color, a Fill for rectangles and circles (None, Light, Medium or Strong) and a Thickness. Select a shape and press Delete to remove it.
Crop it if you like
Pick Crop: "Drag on the video to choose the area to keep — everything outside the box is removed."
Capture
Click Capture this frame. With markers or a crop the button reads, for example, Capture with 2 markers + crop. The new screenshot goes into the article.
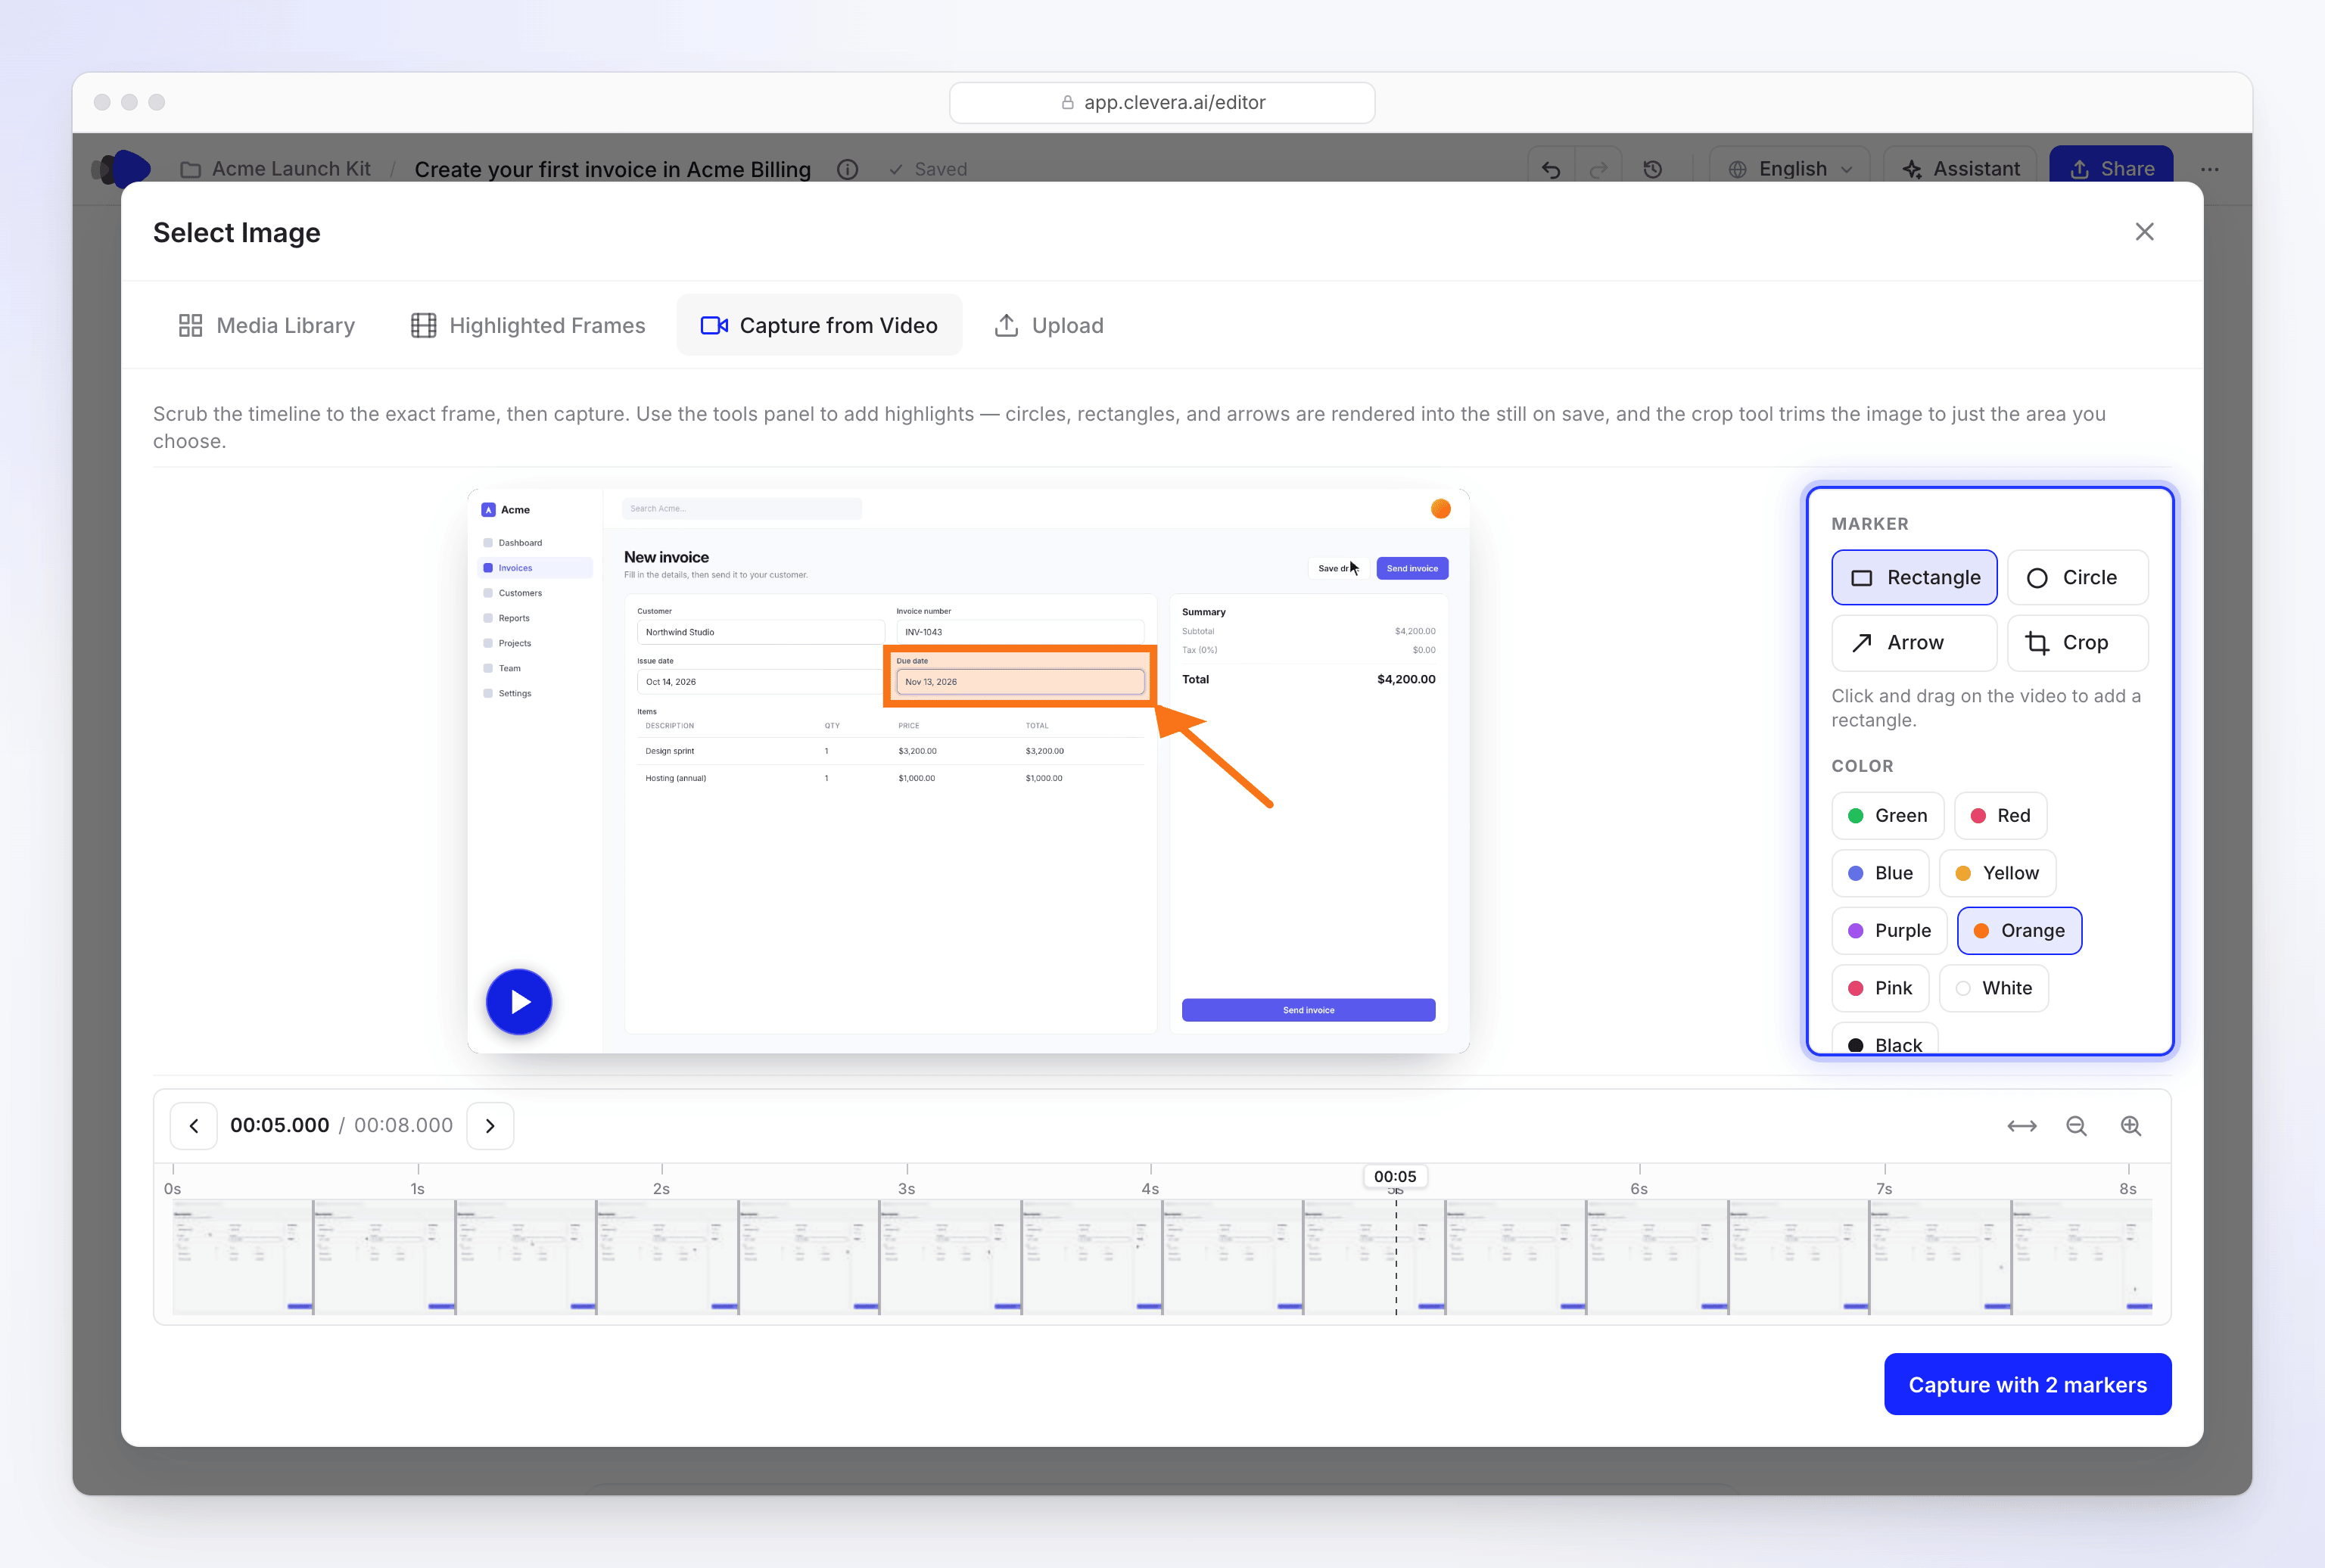
Draw, crop, then capture the frame into the article.
Capture from Video appears only when the article has a source video. If that video was deleted you see "The source video for this screencast is no longer available."
Languages
Each language of an article is a separate copy with its own text, screenshot captions and history. Switch with the Language menu in the top bar; Original marks the language it was written in. To add a language, choose Translate…. Edits you make in one language don't change the others.
Right-to-left languages
Articles in Arabic, Hebrew, Persian, Urdu, Pashto and Sindhi read right to left. Clevera sets the direction from the language of each copy, so there's nothing to switch: an English original and its Arabic translation each read the right way.
| Where | What happens |
|---|---|
| The editor | The article's text runs right to left. The top bar, menus and the assistant panel keep the app's usual layout. |
| The share page and embeds | The page follows the article's language: text, headings and the player's controls run right to left. The video picture is never mirrored, and times still read left to right. |
| PDF, HTML and EPUB downloads | The file is marked right to left, so readers and browsers show it correctly. |
| Word, OpenDocument and Markdown | The text is exported as is, without a direction setting. In Word or another editor, set the paragraphs to right to left if they show the wrong way round. |
See Export or publish an article for every download format.
Troubleshooting
| You see | What it means |
|---|---|
| "You don't have permission to edit" | Your role or the collection's access only lets you view. Ask an owner or the collection's Manager. |
| "Not saved yet. Retrying when you edit again." | A save failed, usually a dropped connection. Keep typing; the next edit saves everything. |
| "Not saved: the article changed." | Someone replaced the article while you edited. Choose Reload latest or Keep mine in the banner. See Write an article together with your team. |
| "Please select an image file" | Upload only takes images. |
| "Could not extract the frame at this position." | Try a slightly different moment in Capture from Video. |
| "Capture from Video is only available for uploaded or recorded videos." | This article has no single source video to capture from. Use Upload or Media Library. |
| "Connecting to the live article… You can read it meanwhile." | The editor is joining live editing. It usually takes a second or two. |