

Publish articles to GitHub
Connect GitHub and publish any Clevera article as a Markdown file to the repository and folder you pick: permissions, file names, front matter, images, updates and every error message.
Connect GitHub once and you can publish any Clevera article to a repository as a Markdown file, ready for a docs site, a wiki-style docs/ folder or a README collection. This article covers connecting, choosing the repository and folder, what the file looks like and how updates work.
Before you start
- Plan: publishing to GitHub is part of the Pro and Custom plans. On Free and Starter the Publish tab shows "Publishing to your tools is included in Pro". See Choose a plan.
- Role in Clevera: only the workspace owner or an Administrator can connect or disconnect GitHub. Everyone else who can open the article can publish once it's connected.
- Access in GitHub: the person who connects needs write access to the repositories you want to publish to, and the right to install a GitHub App on that personal account or organization (or an organization owner to approve it).
- An article: you publish the article that belongs to a video or recording. Generate it first; see Turn a recording into an article.
Publishing uses no credits.
Connect GitHub
Open Integrations
In the sidebar, open the workspace menu and choose Integrations. Find GitHub under Available integrations (or the Development tab) and click Connect. The button appears when you point at the card.
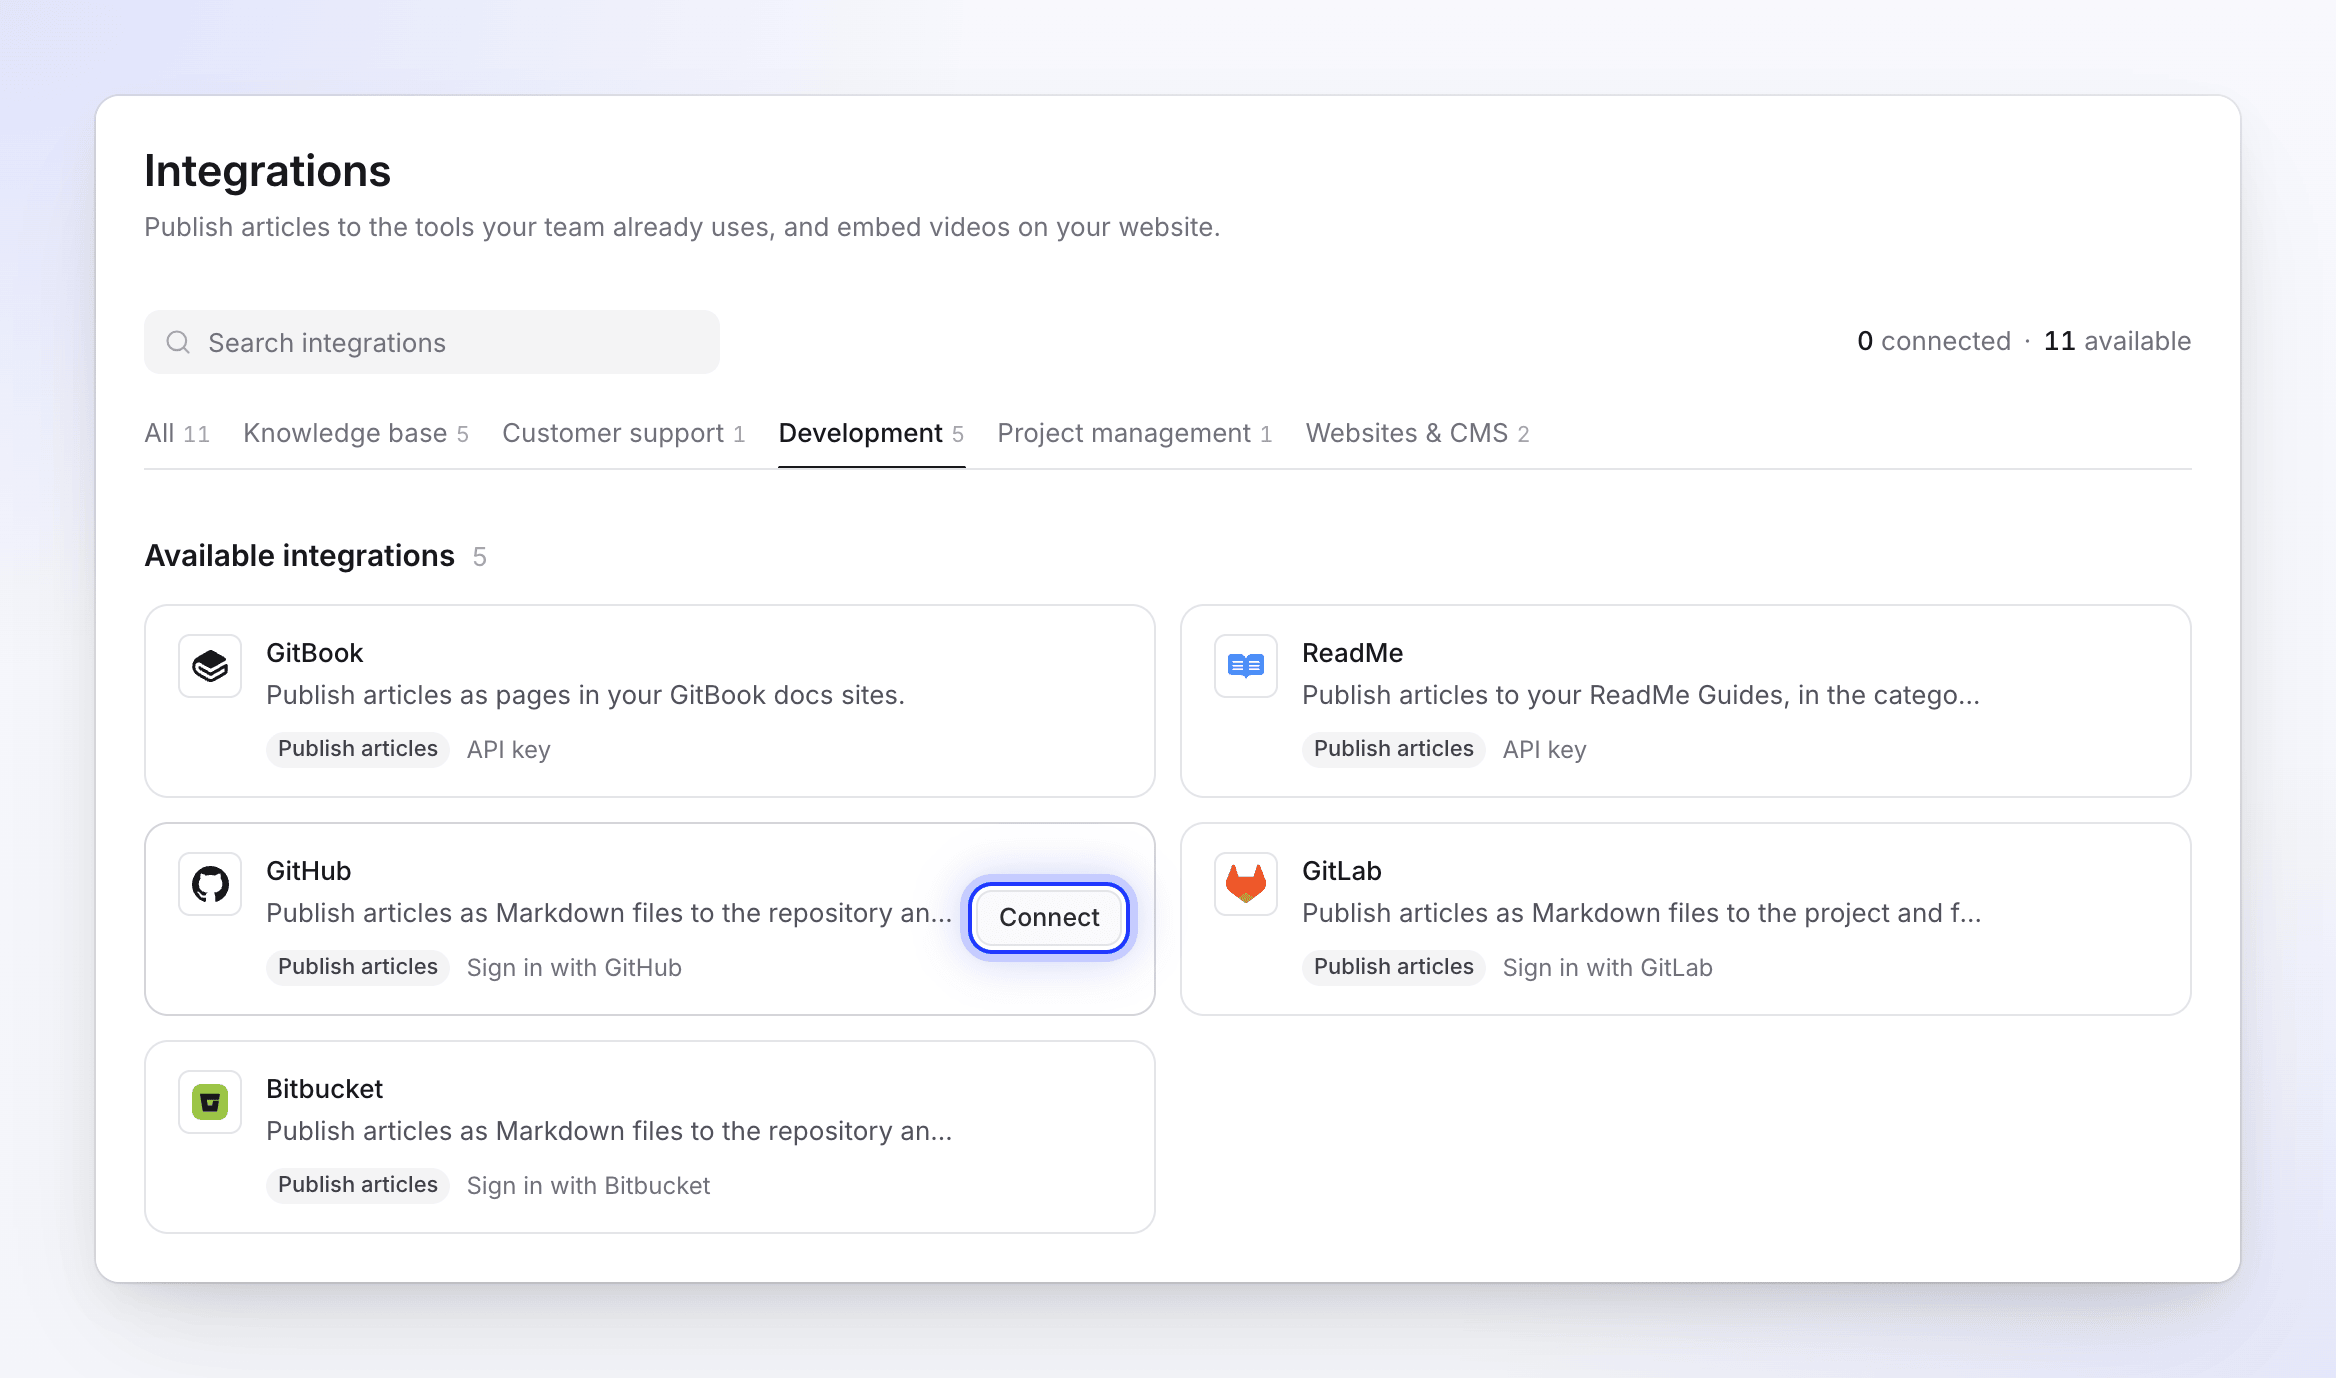
Only owners and Administrators see Connect. Authorize Clevera on GitHub
GitHub asks you to authorize the Clevera AI app. It requests read access to your organization memberships, so Clevera can list the accounts you belong to. Click Authorize.
Install the app on your repositories
GitHub then opens the Clevera AI app installation page. Pick your personal account or an organization, then choose All repositories or Only select repositories. The app asks for:
GitHub permission Why Contents: read and write To create and update the Markdown file Metadata: read-only Required by GitHub for every app; lets Clevera list repositories Click Install. Repeat for each organization you want to publish to.
Check the connection
Back on Integrations, GitHub moves to the Connected list with your GitHub account or organization name and a Connected badge. Before you publish anything it reads "Nothing published yet".
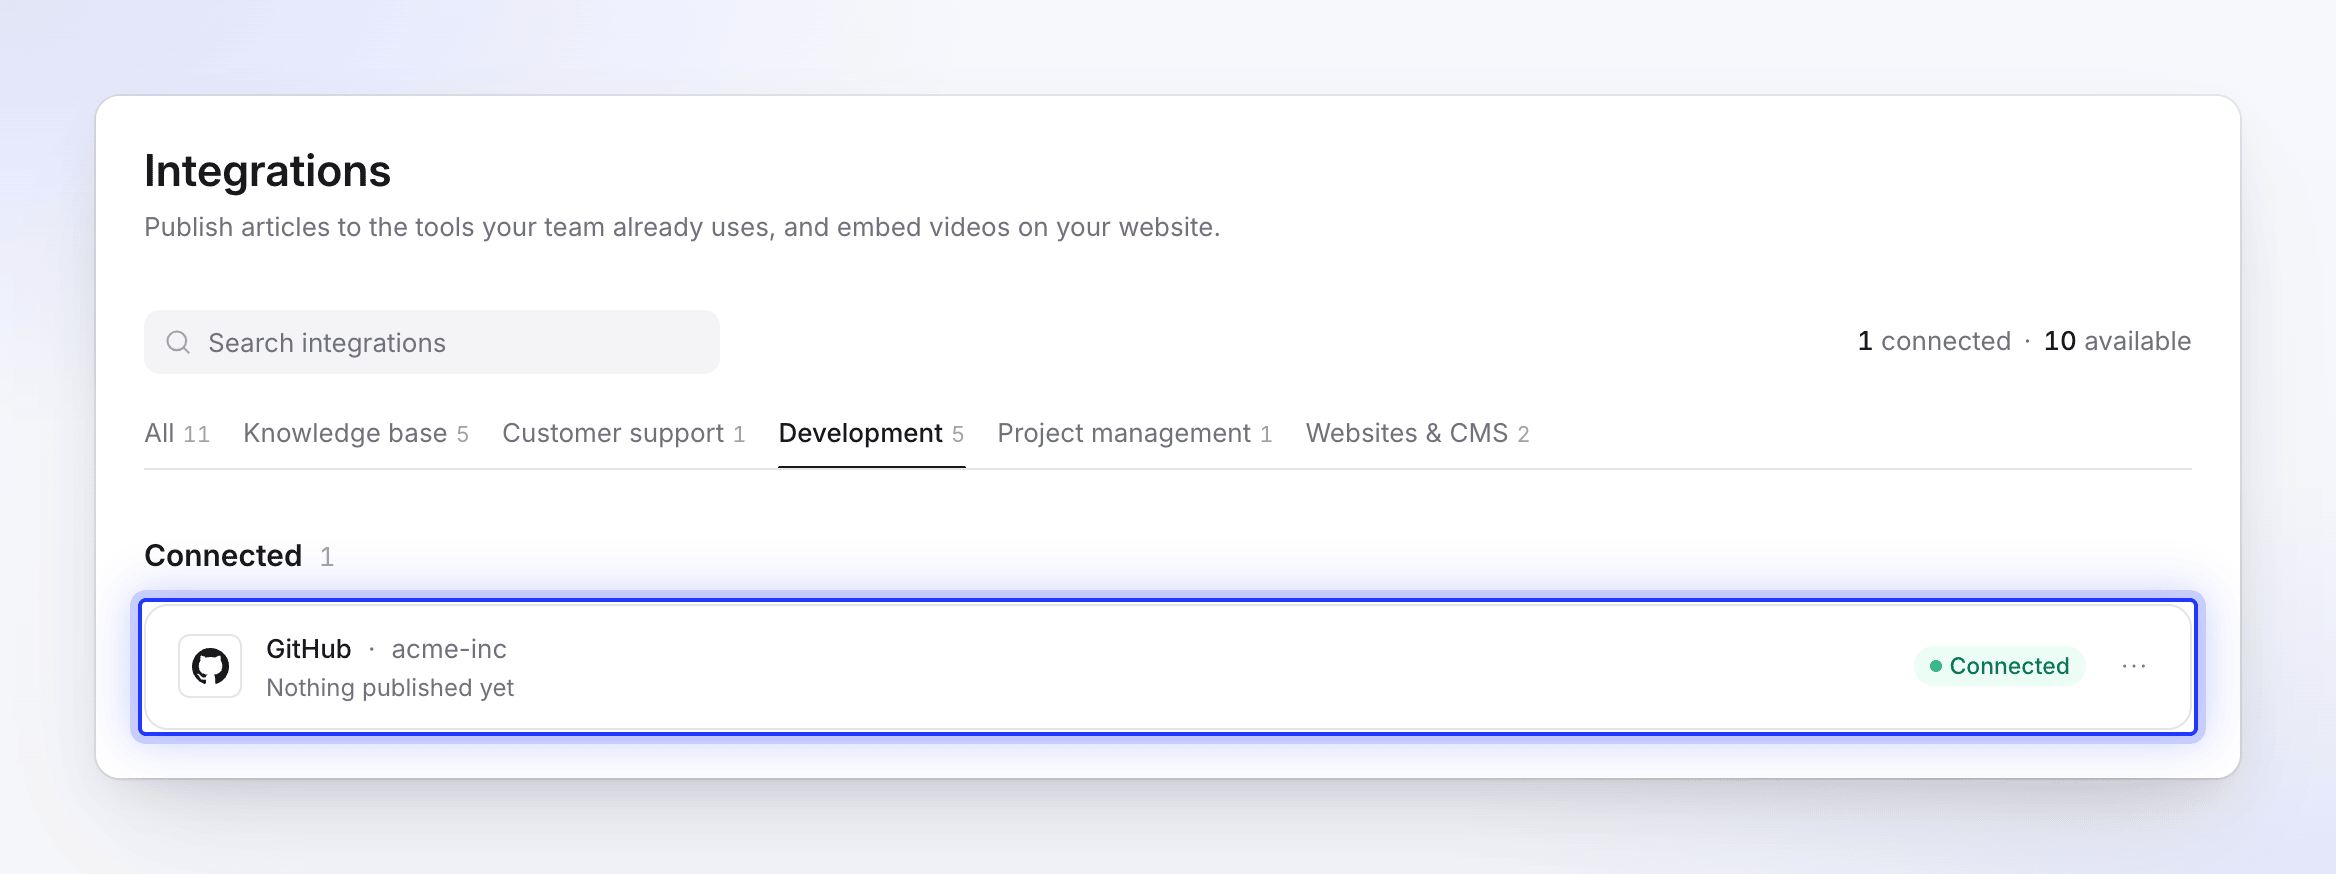
Add or remove repositories later
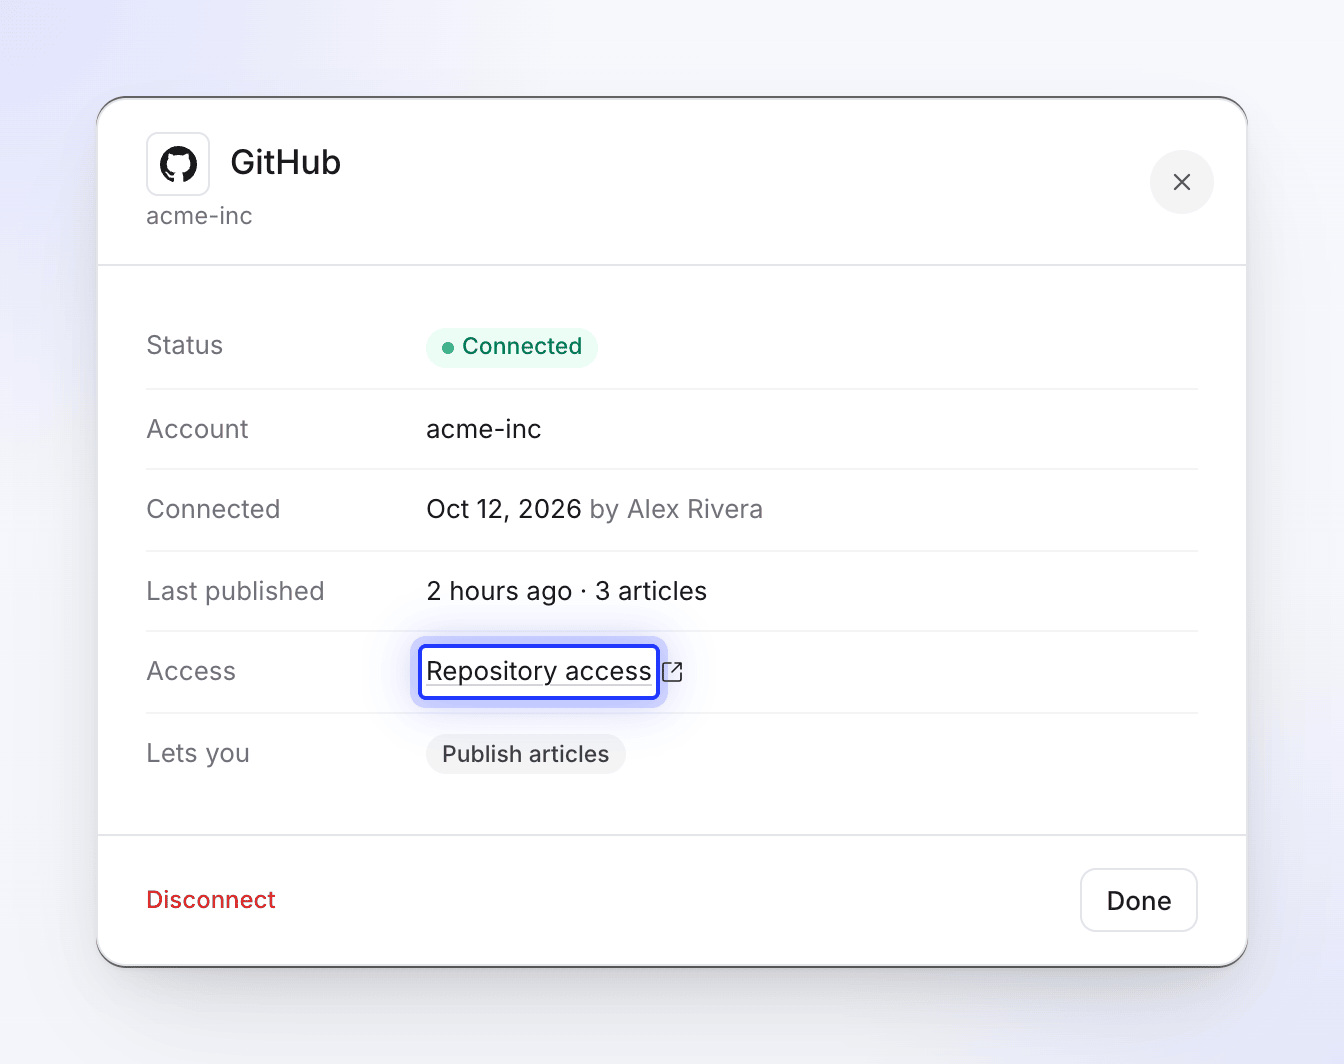
Clevera only sees repositories the app is installed on. To change that, open Integrations, click GitHub, and under Access click Repository access. On GitHub, open the account, click Configure and change the repository list. New repositories show up the next time you open the Publish tab.
Publish an article
Open the Publish tab
In the editor, click Share and open the Publish tab. Under Publish the article, GitHub shows Connected and a Publish button.
The article is published in the language you have open in the editor. Switch language in the top bar first to publish a translation.
Choose the account and repository
Click Publish next to GitHub. Then choose where the article goes:
Field What to pick Notes Account Your personal account or an organization Only shown when your repositories belong to more than one account Repository The repository for the file Lists up to 100 repositories, most recently updated first. The first one is selected for you Folder A path such as docsorarticles/guidesStarts as docs. Leave it empty for the repository root. Folders that don't exist yet are created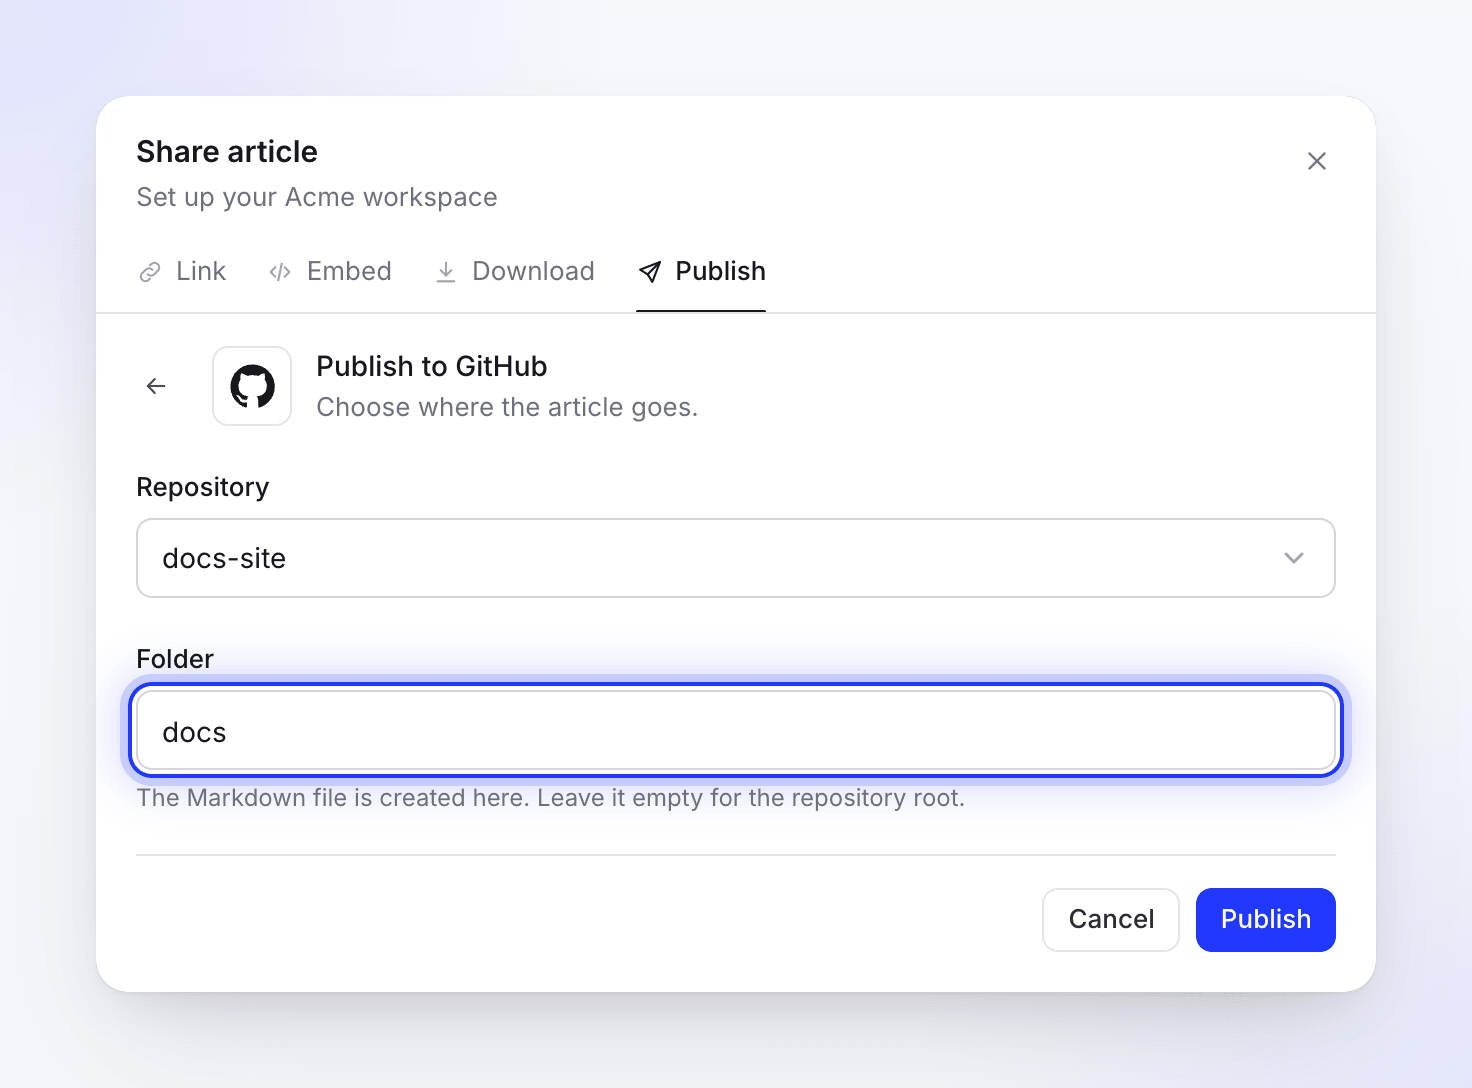
The file goes to the repository's default branch, in the folder you type. Publish
Click Publish. You see "Checking for an existing article…", then "Publishing…". When it's done you see "Published to GitHub." and the file opens on GitHub in a new tab.
Where the file goes
- Branch: the repository's default branch (usually
main). Clevera commits straight to it; it doesn't open a pull request and you can't pick another branch. - File name: the title in lowercase, with spaces turned into hyphens, ending in
.md. "Create your first invoice" becomescreate-your-first-invoice.md. - Commit message:
Add article: <title>, orUpdate article: <title>when you replace an existing file. - Commit author: the GitHub account that connected the integration.
What the file looks like
Clevera writes GitHub-flavored Markdown with a short front matter block at the top:
---
title: "Create your first invoice"
created_at: "2026-10-12T09:30:00+00:00"
updated_at: "2026-10-12T10:05:00+00:00"
source: "Clevera"
---
| In the Clevera article | In the Markdown file |
|---|---|
| Headings, bold, italic, strikethrough, inline code, links | Standard Markdown |
| Bulleted, numbered and nested lists | Standard Markdown lists |
| Checklists | Task lists (- [ ] / - [x]) |
| Tables | Markdown tables; the first row becomes the header |
| Code blocks | Fenced code blocks with the language |
| Callouts | GitHub alerts (> [!NOTE], > [!TIP], > [!WARNING], > [!CAUTION]) |
| Toggles | A collapsible <details> section |
| Screenshots and images | Image links to Clevera-hosted files (see below) |
| YouTube videos | A thumbnail that links to the video |
| Underline, highlight, superscript, subscript | Plain text (Markdown has no equivalent) |
| Step blocks you added by hand | A "Step N" heading with the step's text only |
If the video's share link is on, the file starts with a quoted line, Watch the video tutorial, that links to the video player. GitHub doesn't play embedded videos in Markdown, so it's a link rather than a player. If the share link is off, there's no video line, and turning the link off later makes an existing one stop working.
Images
Screenshots aren't copied into your repository. Each image in the file links to the file on Clevera's servers through a signed address that works for one year from when you publish. To keep images working, publish the article again (choose Replace the existing article) within the year; each publish renews the links.
Anyone who has the image address can open the image, even if the repository is private.
Use it with a docs site
Most static-site generators that build from a repository (such as Docusaurus, MkDocs, Jekyll or Hugo) read title from the front matter and ignore fields they don't know. A common setup:
- Point the Folder at the folder your docs site reads, for example
docsorcontent/guides. - Publish each article there; your site's normal build picks up the new commit.
- Check whether your generator renders GitHub alerts and
<details>; some show alerts as plain quotes.
Update an article you already published
Publishing only goes one way. Edits you make in Clevera stay in Clevera until you publish again, and changes made to the file on GitHub never come back to Clevera.
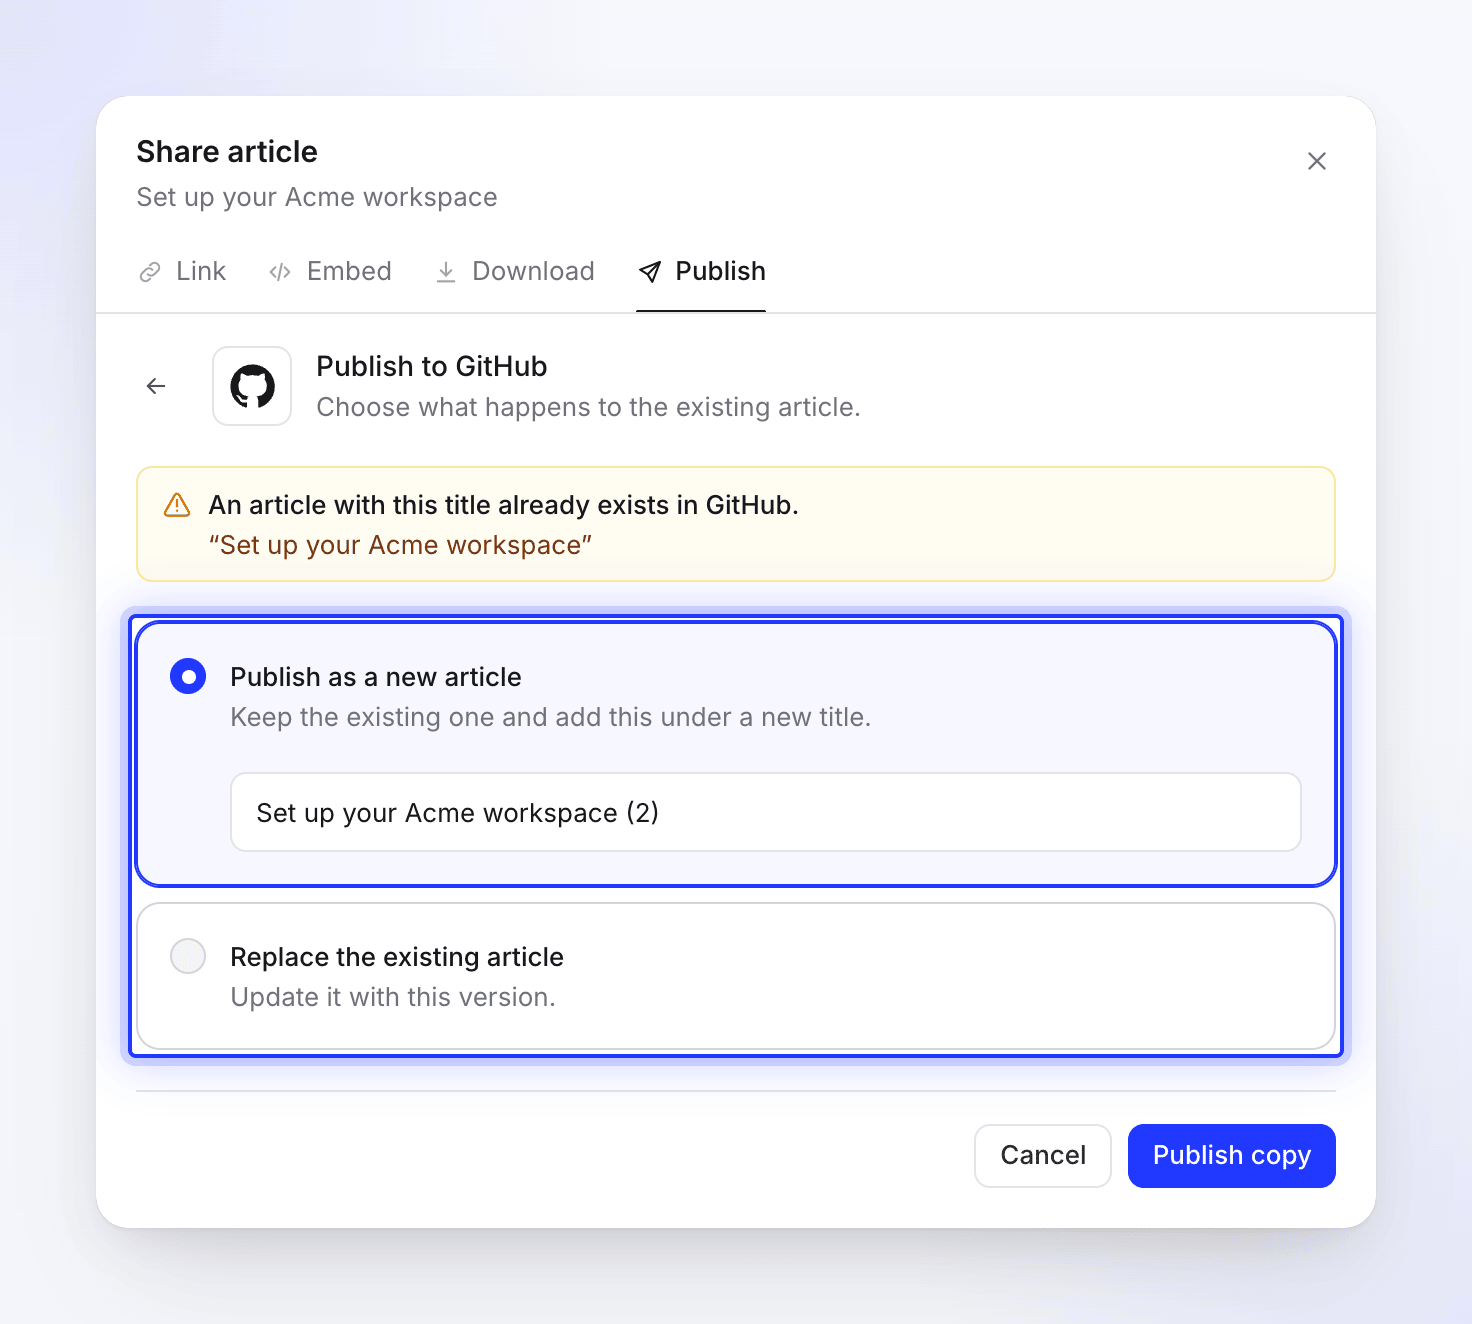
When you publish to the same repository and folder, Clevera finds the file with the same name and asks what to do: "An article with this title already exists in GitHub." Click View it to open the existing file, then choose:
| Option | What happens on GitHub |
|---|---|
| Publish as a new article | "Keep the existing one and add this under a new title." Clevera suggests a title such as "Create your first invoice (2)", which becomes a new file. Click Publish copy. |
| Replace the existing article | "Update it with this version." The same file is overwritten in a new commit. Click Replace. |
If the title changed in Clevera, the file name changes too, so publishing creates a new file next to the old one. Delete or rename the old file on GitHub yourself.
Nothing in Clevera deletes files from your repository.
Disconnect GitHub
- Open Integrations, click the ⋯ menu on the GitHub row and choose Disconnect (or click GitHub and then Disconnect).
- Confirm. "You can no longer publish to it from the editor. Content you already published stays in GitHub."
Disconnecting deletes Clevera's access token. To remove Clevera's access on GitHub too, uninstall the Clevera AI app (GitHub Settings → Applications → Installed GitHub Apps → Configure → Uninstall) and revoke the authorization under Authorized GitHub Apps.
Troubleshooting
| You see | What to do |
|---|---|
| "Integrations are included in Pro and Custom plans." | Upgrade the workspace to Pro. See Choose a plan. |
| No Connect button on the Integrations page | Only the owner or an Administrator can connect. Ask one of them. |
| "Connect GitHub on the Integrations page first." | GitHub isn't connected in this workspace yet. Ask an owner or Administrator to connect it. |
| "No repositories in this account." | Install the Clevera AI app on that account, or add the repository to it through Repository access. If repositories were there before, reconnect GitHub. |
| A repository is missing from the list | The list shows the 100 most recently updated repositories the app can reach. Make a commit to the repository, or narrow the app to fewer repositories. |
| "Couldn’t load your GitHub locations" | Click Try again. If it keeps happening, reconnect GitHub. |
| "Failed to create file in GitHub." | Check that the connected account can push to the default branch. Branch protection that requires pull requests or reviews blocks Clevera's commit; allow the commit, or publish to a repository without that rule. |
| "Your GitHub connection expired. Reconnect it to publish." | Open Integrations and click Reconnect on the GitHub row. |
| "Connection failed:" followed by GitHub's reason | You declined the authorization or GitHub refused it. Click Connect again and authorize. |
| "Invalid authorization state. Please try again." or "Authorization expired. Please try again." | The sign-in took too long or ran in another tab. Start again from Connect. |
| "Too many connection attempts. Please try again later." | Wait a minute; you can start up to 5 connections a minute. |
| "Article content is empty or invalid." | The article has no content in this language. Generate or write it, then publish again. |
| "No article found. Please generate an article first." | The video has no article in the language you have open. Generate it, or switch language. |
| "Too many publish attempts. Please wait a moment before trying again." | You can publish up to 20 times a minute. Wait a minute. |
| "Failed to publish to GitHub. Please try again." | Try again. If it keeps failing, reconnect GitHub and contact support. |
| The connection shows Needs attention or Error | Click Reconnect on the row and authorize again. |