

Edit a social clip
Find your way around the social clip editor: change words, pictures, voice-over lines, music, sound effects and captions by hand, use the timeline and shortcuts, and see what only the assistant can change.
A social clip opens in its own version of the editor: the video in the middle, the assistant on the right and a timeline you can show when you need it. Most changes are a sentence to the assistant, and you can also change words, pictures, voice-over lines, music, sound effects and captions by hand.
Before you start
- You need edit rights on the clip. Without them the assistant is unavailable and you can only look.
- Social clips are made by the AI director, which writes every scene as motion design. That's why scenes have no design settings of their own: you change their words by hand, and anything else through the assistant.
- Editing by hand is free. Assistant requests, a new voice-over line and captions use credits.
The clip editor at a glance
| Area | What it holds |
|---|---|
| Top bar | The clip's title (click to rename), Undo, Redo, Revision history, the language menu with Translate…, Share and ⋯ |
| Video | Click words, pictures or shapes on it to select them. A thin outline shows what a click would select; outlines never appear in the exported video. |
| Right column | Assistant (open by default) or Clip settings, switched from the icon rail at the edge of the video. Selecting something shows its options here. |
| Timeline | Collapsed at first. Press T or click Show timeline to open it. |
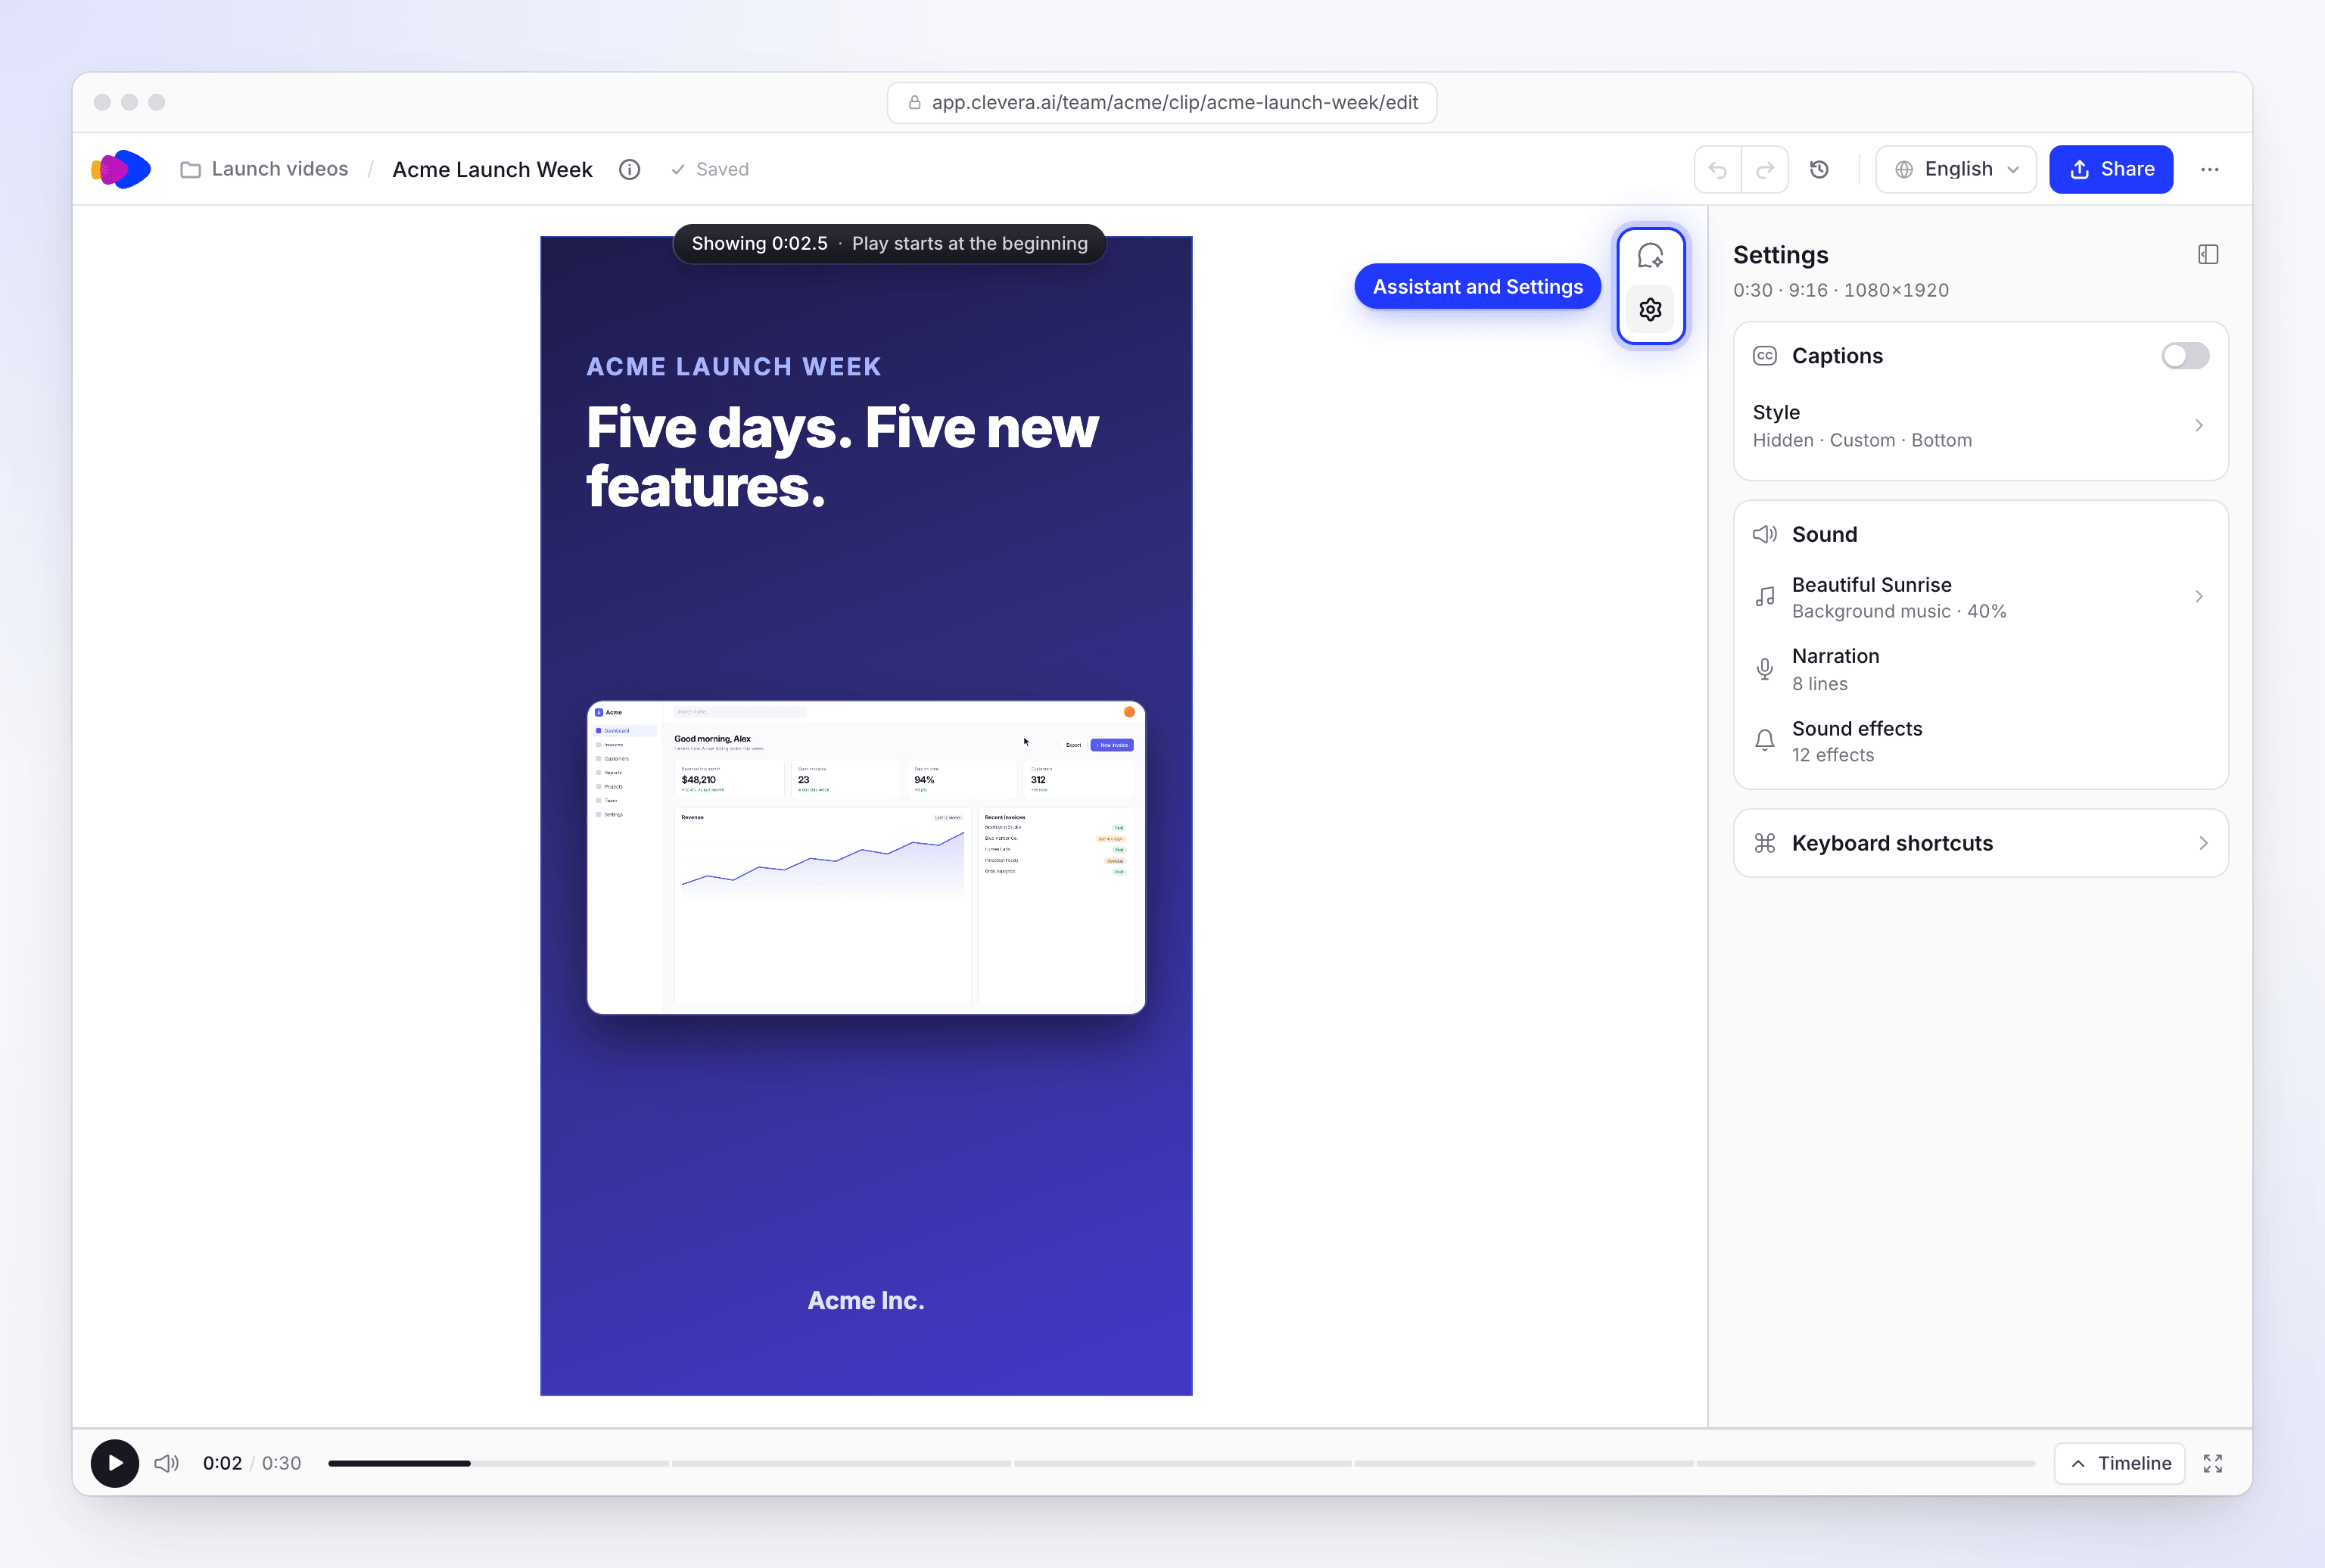
Clip settings
Click Clip settings on the icon rail. The Settings page shows the clip's length, shape and size (for example "1:00 · 16:9 · 1920×1080") and three sections:
| Section | What you can do |
|---|---|
| Captions | Turn Show captions on or off, or open the caption style. Without captions: Set up captions ("Words on screen as the narration speaks"). |
| Sound | The music (track and volume, or Add music), the number of Narration lines and Sound effects. Click a row to select it. |
| Keyboard shortcuts | The full list (below) |
Change the words on screen
Click the words
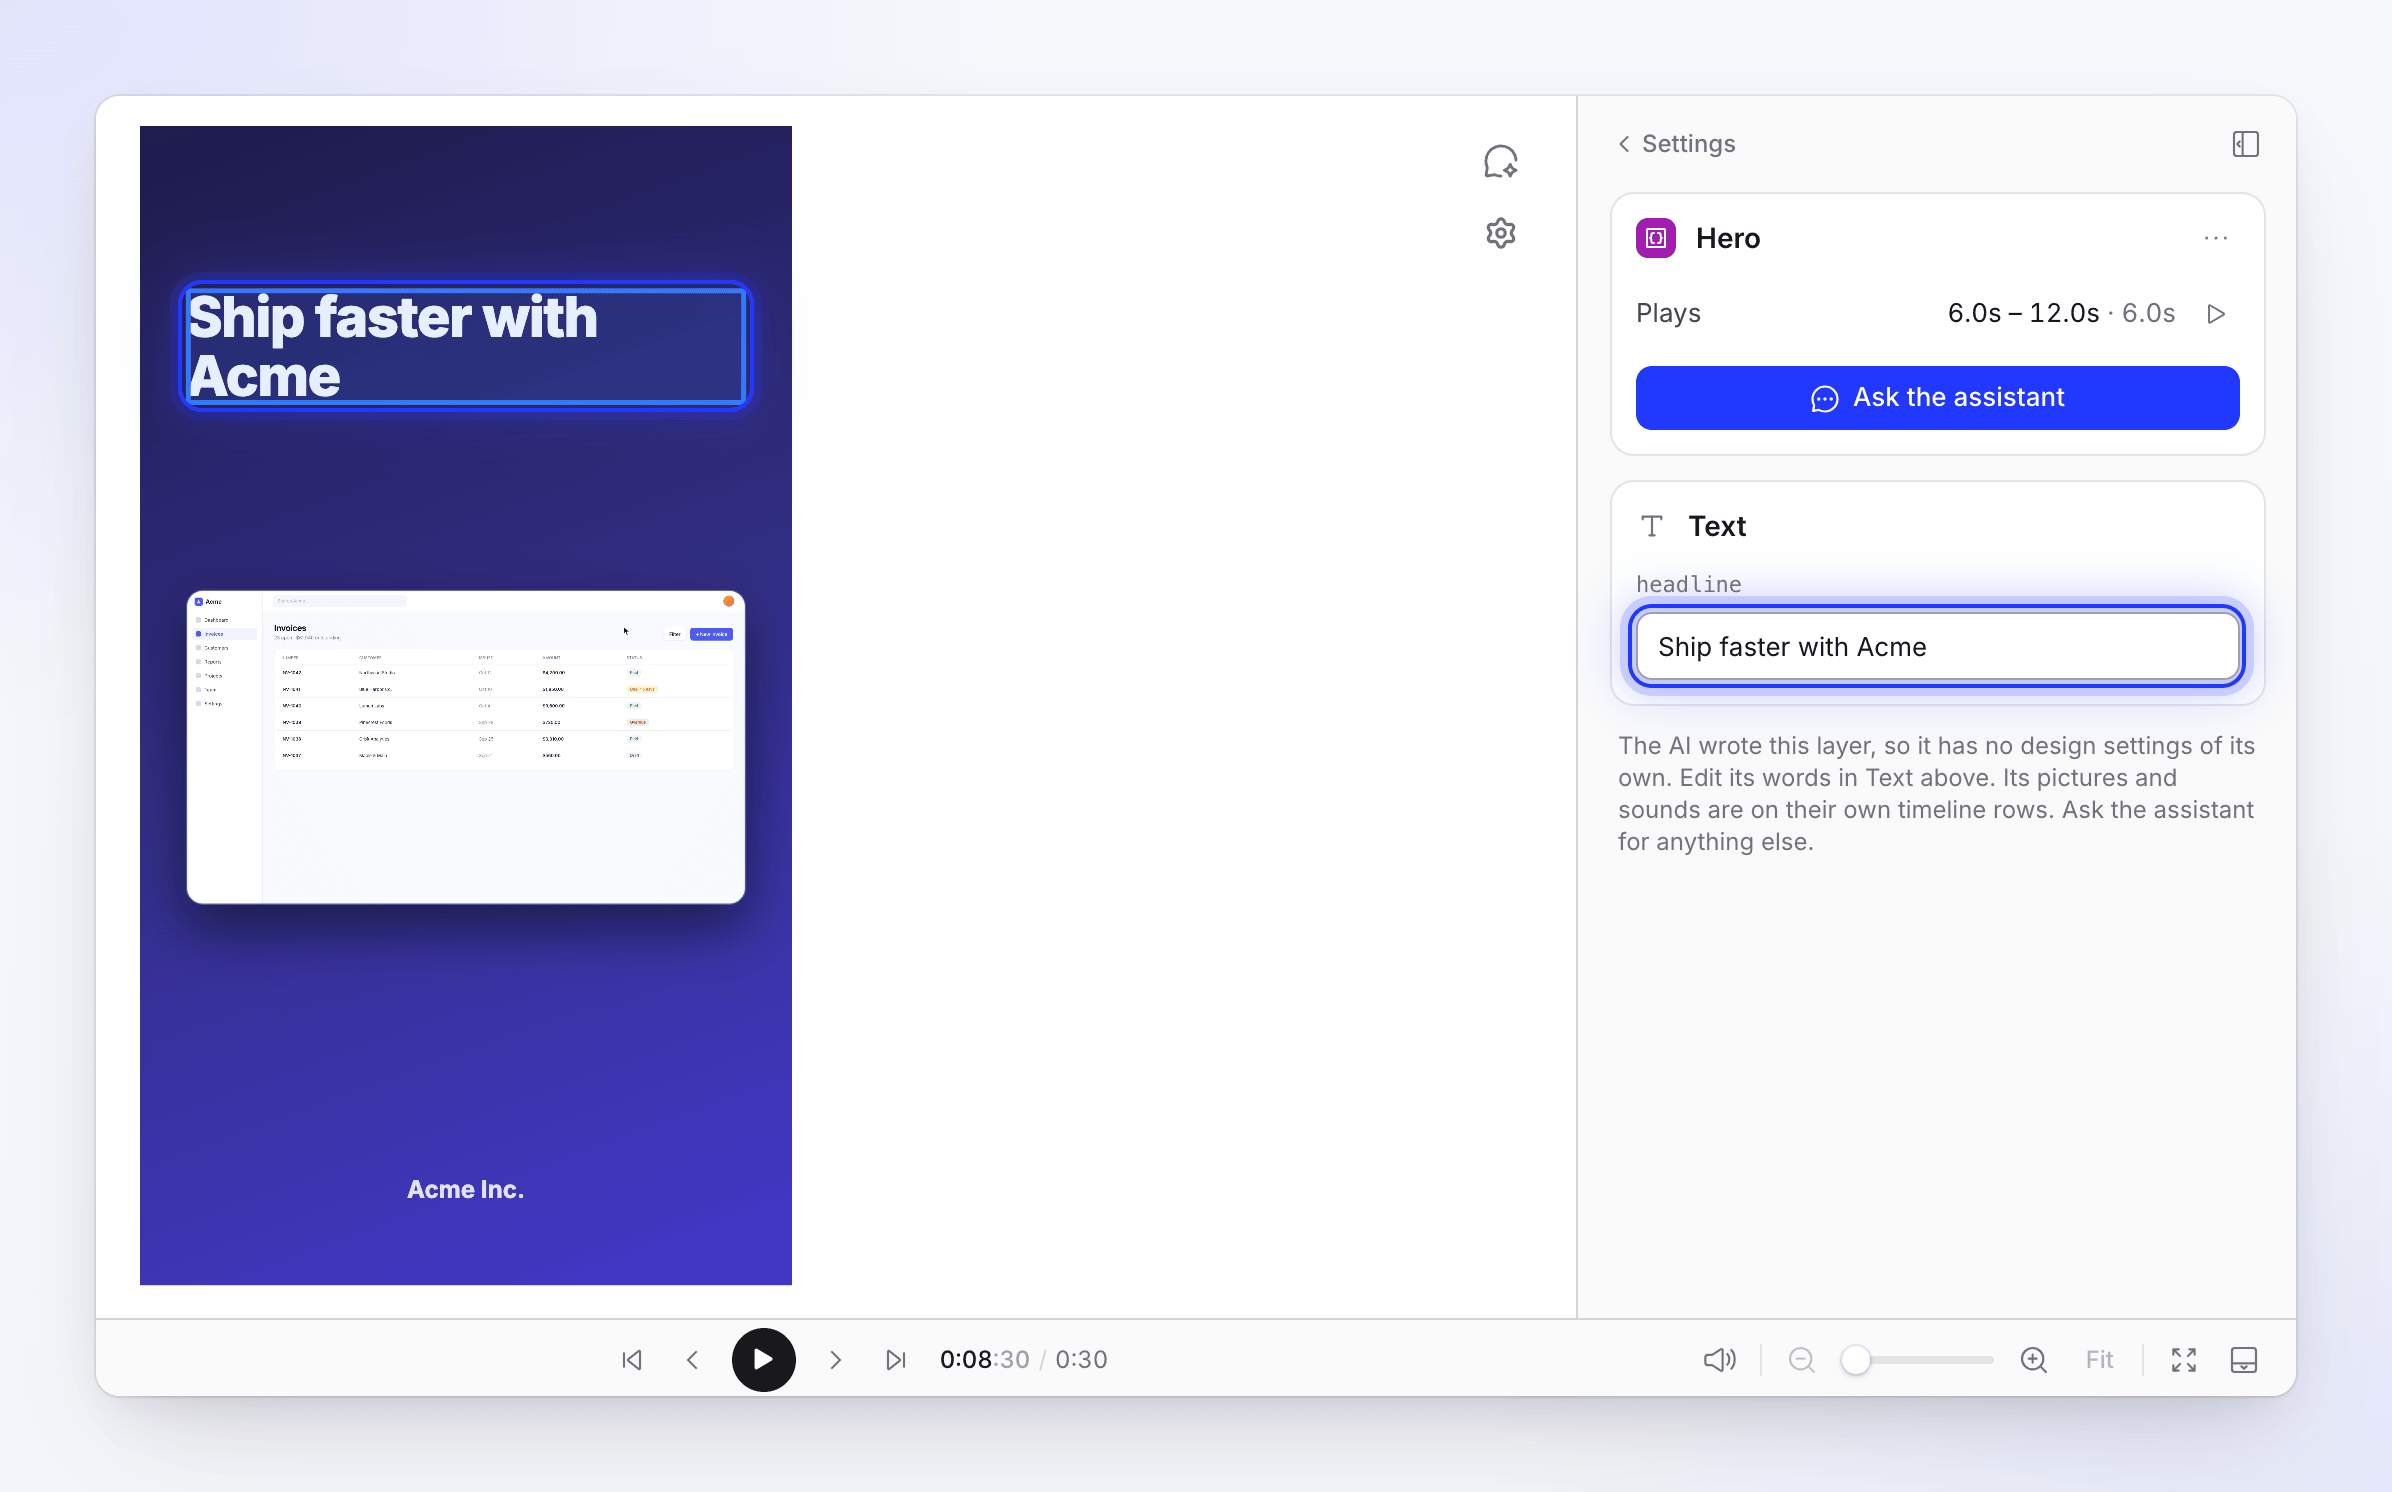
Click the words on the video, or select the scene on the timeline. The scene's options open with its Text section, and the matching field is ready to edit.
Type the new words
Hovering a field outlines its words on the video. Press Shift Enter for a new line.
Save
Press Enter or click away. The scene updates at once.
If a scene has no Text section, its words are part of its design. Ask the assistant to change them, for example "Change the headline in scene 2 to 'Ship faster'".
Swap a picture or video
- Click the picture on the video, or its block on the timeline.
- In its options, click Replace (or Choose an image if it's empty).
- Pick one from your media library, or upload a new one. Images can be JPG, PNG, WebP or SVG up to 8 MB; videos MP4, MOV, WebM or AVI up to 100 MB.
A picture shown inside a scene says "Inside" and the scene's name. Its size and position there change it only inside that scene; Reset puts it back to the scene's framing.
Change a voice-over line
Select the line
Click the voice-over line on the timeline. Its Script card opens.
Edit the words
Click Edit and change the text.
Regenerate
Click Regenerate. The line is recorded again in the clip's voice ("Generating…"). Play it with Play voiceover.
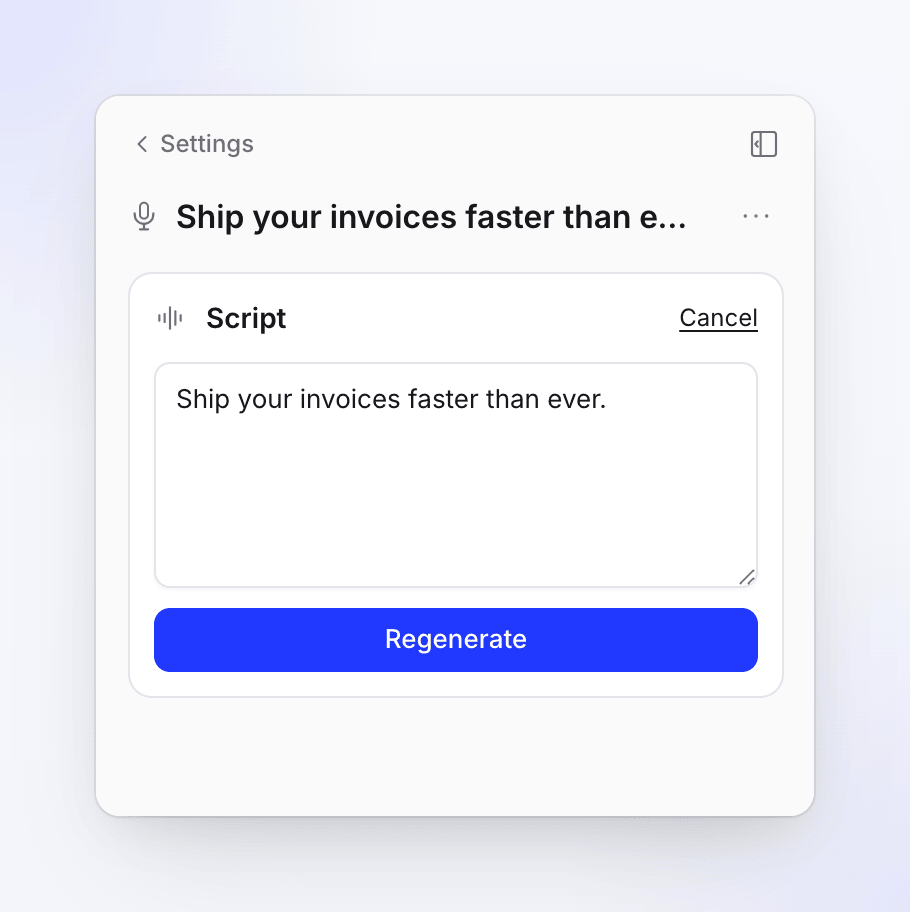
The line is recorded again in the clip's voice.
The voice itself belongs to the clip and can't be switched, by hand or by the assistant. A new recording can be longer or shorter than the old one; if it no longer fits, ask the assistant to adjust the timing.
Music and sound effects
Music: open Clip settings → Sound and click the music row, or select the music on the timeline.
| Setting | What it does |
|---|---|
| Track | Choose music from the library (search the tracks), Upload audio of your own (MP3, WAV, OGG or M4A, up to 20 MB), or Remove track |
| Volume | Default 20% |
| Loop | Repeats the track. Disabled when the track was cut to fit: "This track is cut to fit the video, so it does not loop." |
| More options | Fade in and Fade out. Then Fit ("Cut into pieces that land on the video's beats.") for a track cut to fit, or Start at for one that isn't. Ducking ("The track dips under the voice along these points.") appears when the track has dip points. |
Sound effects: select one on the timeline. Use Effect to pick another from the library (with a preview button), Upload audio, or Remove sound. Set Volume, Loop, Fade in and Fade out. Add a new one with + (Add an element (A)) → Sound Effect.
For music or sounds picked for a reason ("Why this music?") or a different mood, ask the assistant.
Captions
Open Clip settings → Captions, or + → Captions. Captions are made from the voice-over, so a clip without one shows "Add a voiceover to caption".
- Generate captions makes them; ⋯ → Regenerate captions… makes them again from the current voice-over, keeping their style.
- Style them with Style (the caption looks), Position (Top or Bottom), Font and Size, plus the Highlight, Layout, Text, Box, Outline and Shadow groups.
The settings are the same as in other videos; see Change the style, background and captions.
Add an element
Press A or click + (Add an element (A)) in the timeline toolbar. New elements are "Added at the playhead".
| Group | Elements |
|---|---|
| Text & graphics | Text Box, Shapes, Animated Emoji, Highlight, Blur |
| Media | Image, Video, UGC Character (an AI avatar, which uses credits by time on screen), Recording Clip |
| Sound | Sound Effect, Background Music, Voiceover, Audio |
| Whole video | Captions |
Each element's options work as described in Add and edit elements.
Use the timeline
| To | Do this |
|---|---|
| Move a block in time | Drag it |
| Make music, a sound, a picture or a text block shorter or longer | Drag its edges |
| Make a scene or a voice-over line shorter or longer | Ask the assistant. These can be moved but not trimmed by hand. |
| Remove the selected block | Delete or Backspace |
| Nudge the selection | ← / → (one frame) |
There's no split tool in the clip editor.
Keyboard shortcuts
| Key | Action |
|---|---|
| Space | Play / pause |
| A | Add an element |
| \ | Show / hide the side panel |
| T | Show / hide the timeline |
| H | Revision history |
| G | Placement grid |
| ← → | Nudge the selection one frame |
| Delete | Remove the selection |
| ⌘ Z / Ctrl Z | Undo |
| Esc | Back one step |
The camera on a screen recording
Screen recordings inside the AI's scenes get their zooms and pans planned with each scene, and they're part of the scene's design. To change them, ask the assistant: closer, wider or no zoom, focus on the click or on the result, stay longer on a moment, or show another moment. The assistant plans the camera again; single camera moves inside a scene can't be edited one by one.
A Recording Clip you add yourself (+ → Media → Recording Clip) works differently: select it, then in its options open Segments → Edit to change its cuts and camera moves (Follow cursor or Advanced, with a Zoom level).
What you can't change in a clip
| Can't change | Why, and what to do instead |
|---|---|
| The shape (aspect ratio) | It's chosen when the clip is created. Create a new clip in the shape you want. |
| The voice | It belongs to the clip. Make a new clip with another voice. |
| The background, by hand | "The assistant made this background, so it has no settings of its own." Click Ask the assistant to change it. |
| A scene's design, by hand | "The AI wrote this layer, so it has no design settings of its own." Ask the assistant. |
| The total length | Scenes can only take time from each other. |
| An AI avatar's lines | Its video is already made. Make a new clip. |
To start over completely, make a new clip from Create. The editor has no "regenerate the whole clip" button.
When a scene can't play
If a scene shows "This layer can't play", the editor shows its last good frame (or nothing) in its place. Click Ask the assistant to fix it. A note over the video, such as "This scene couldn't be drawn", has the same Ask the assistant button.
What it costs
| Change | Credits |
|---|---|
| Words on screen, pictures, music, sound effects, timing, caption style | Free |
| Regenerate a voice-over line | Uses credits to record the line |
| Generate captions / Regenerate captions… | A very small amount, for the transcription |
| Assistant requests | Charged for the work each one does. See How assistant edits are charged. |
| Translating the clip | Usually 3–10 credits per language |
| Exporting | Free |