

Keep desktop icons and the menu bar out of a recording
Leave desktop icons, the macOS menu bar or the Windows taskbar out of full-screen recordings, and other ways to keep notifications, private windows and clutter out of your video.
A full-screen recording captures everything on that screen, including the files on your desktop and the menu bar or taskbar. On a Mac, two settings in the Clevera desktop app leave them out of the video while you keep using them as normal. On Windows, you tidy the screen with Windows' own options.
Leave desktop icons and the menu bar or taskbar out
Open the settings from the recording window: click Settings, then look under Recording.
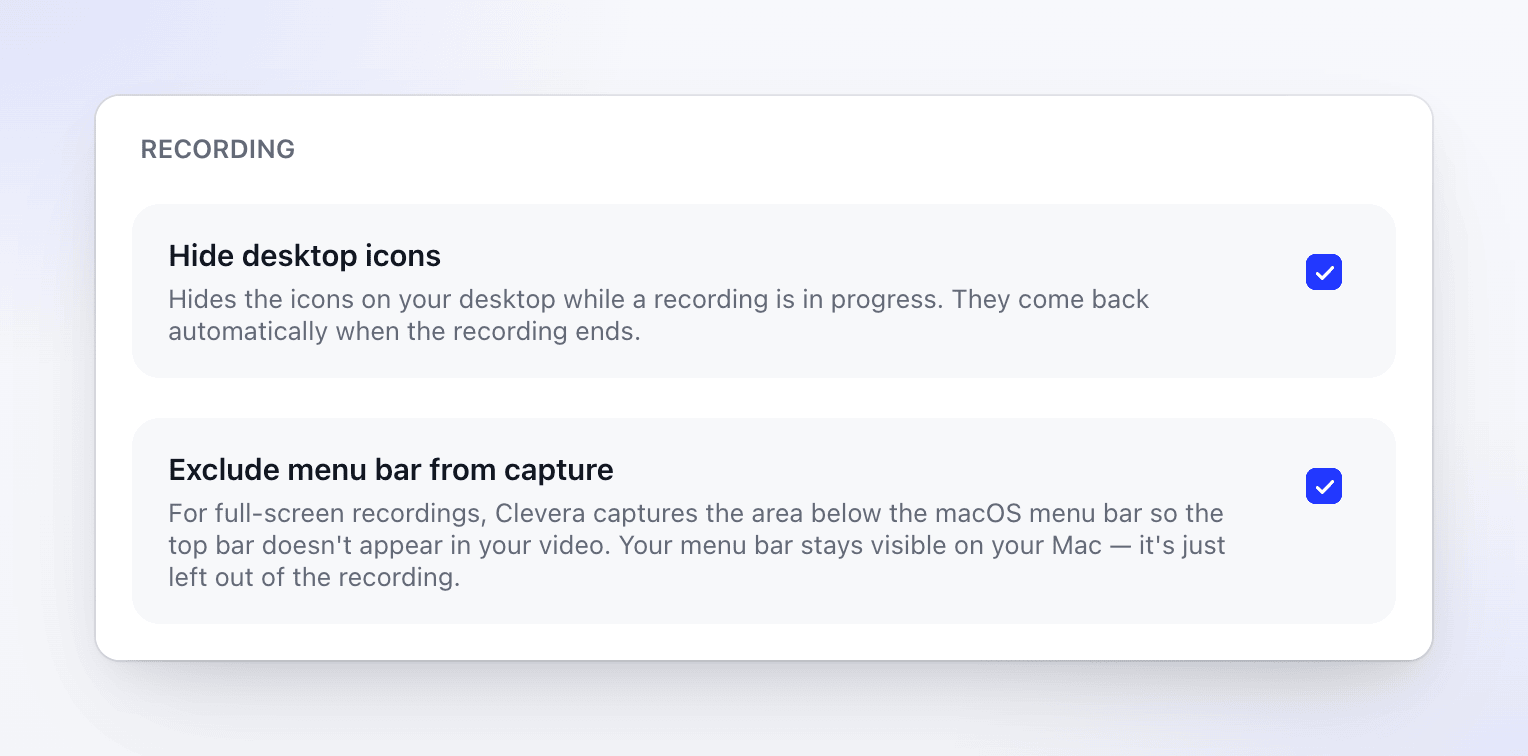
| Setting | Default | What it does |
|---|---|---|
| Hide desktop icons | Off | Leaves the icons on your desktop out of the recording. |
| Exclude menu bar from capture | Off | Leaves the menu bar at the top of the screen out of full-screen recordings. |
Select a setting to turn it on, then click Done. It applies to your next recording.
Hide desktop icons
With Hide desktop icons on, the files and folders on your desktop don't appear in the recording; the video shows your wallpaper instead. On your own screen, the icons stay where they are while you record, so you can still use them.
The setting matters when you record the full screen, a display or an area. A window recording never includes the desktop.
Exclude menu bar from capture
With Exclude menu bar from capture on, a full-screen recording leaves out the menu bar, including the clock, your status icons and any notifications that appear there. The menu bar stays visible and usable on your screen.
The Windows app doesn't hide desktop icons or the taskbar for you. A full-screen recording includes whatever is on that screen, so tidy it before you start:
- Desktop icons: right-click the desktop → View → clear Show desktop icons. Turn it back on after recording.
- Taskbar: open Settings → Personalization → Taskbar → Taskbar behaviors and turn on Automatically hide the taskbar.
- Or record a window or an area instead of the full screen. Nothing outside it is recorded, including the desktop and the taskbar. See Record a window or a custom area.
What's always left out
You don't need a setting for these. Clevera leaves its own windows out of the recording:
- the recording window and the control bar,
- your speaker notes,
- the camera preview bubble (your camera is recorded as its own track),
- the countdown and the target overlays.
On Windows this needs Windows 10 version 2004 (build 19041) or later. On some Windows 10 versions the speaker notes window can still appear.
More ways to keep the shot clean
- Record a window or an area instead of the full screen. Everything outside it stays out of the video. See Record a window or a custom area.
- Silence notifications before you start. Turn on Do Not Disturb (Focus on a Mac, Do not disturb on Windows) so banners don't slide in mid-take.
- Close private things: chat apps, email, other browser tabs and password managers on the screen you record.
- Use sample data: fake names and
example.comaddresses keep real customer details out of the video. - Pause before you open something private, and resume when it's gone. Paused time isn't recorded.