

Build a help center from your app with Autopilot
Build a help center from my app learns your brand, explores your app, sets up a draft site, records how-to videos and writes the articles. Set it up in the agent's setup card; it runs step by step, you approve each step's credits, and you publish the site yourself.
Build a help center from my app is the Autopilot recipe that sets up a whole help center for you. It learns your brand, explores your app, creates a draft site with sections, records a how-to video for each workflow and writes an article for each. It runs in steps: you approve each step and its credits before it runs, and you always publish the site yourself.
Before you start
- Role. Only the workspace owner or an admin can use this recipe, because it creates a docs site. Their role must also be able to record videos. Anyone else sees the recipe card greyed out, with the reason as a tooltip.
- Your website and your app's address. The website gives the brand; the app address is where the AI signs in to record the how-to videos.
- A sign-in, if your app needs one. Save it first under Autopilot → App sign-ins, or add it from the form. See Save an app sign-in.
- Room on your plan. Your plan holds a set number of help centers. At the limit, the form asks you to pick an existing help center to build into. See What are doc sites.
You don't need a help center for this recipe. It's the recipe the other help-center recipes point you to when you have none.
Set it up
Open the recipe
In Autopilot, click the Build a help center from my app card under Or start from a recipe. You can also click New task and pick it, or type what you want in What should Autopilot do?, for example "Build me a help center". The agent panel opens with the setup card: "Here’s the setup. Check it and click Continue."
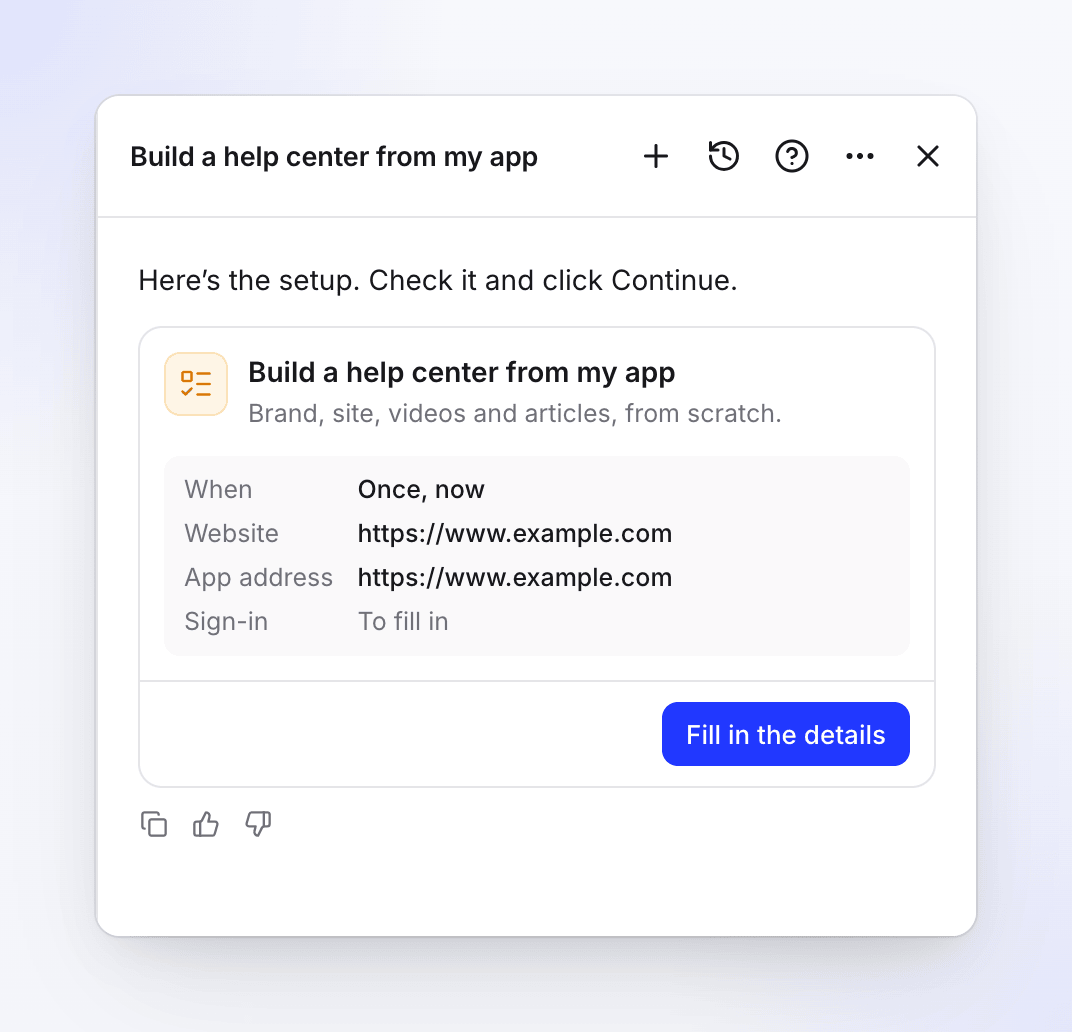
The card sums up the setup. Rows still empty read To fill in. Fill in the details
Click Fill in the details. The dialog holds the whole form, described in The setup form. Fill it in and click Continue. Close keeps what you typed: the card saves your edits, so you can come back to them later, even after a reload.
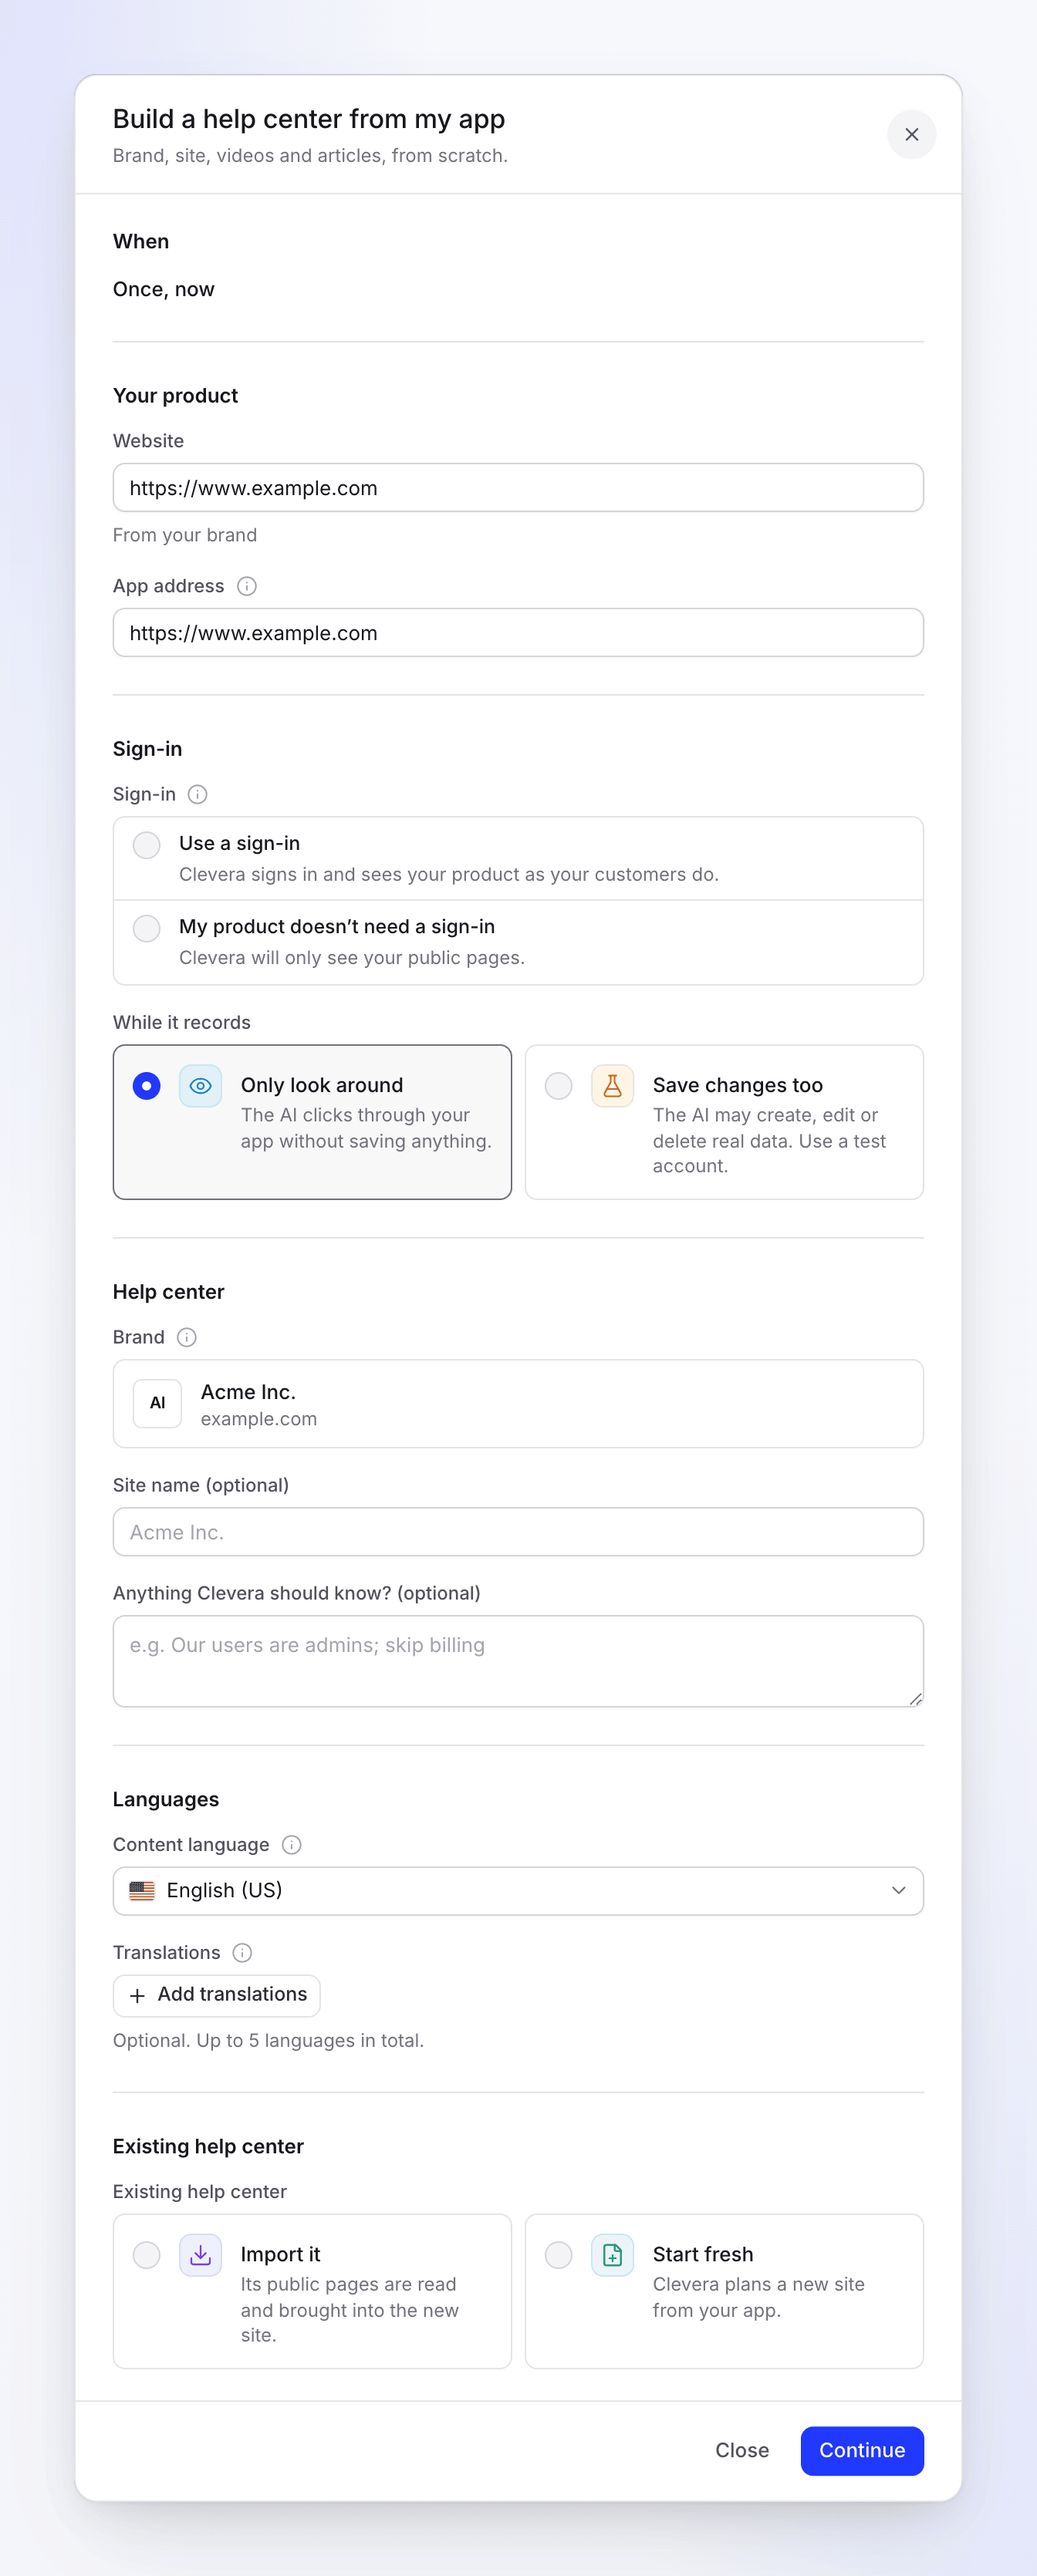
The whole form in one dialog. Check the review and create the task
Clevera checks the setup and shows a review: When ("Runs once, now"), Changes in your app (only if you allowed them), Import (only if you import), Typical run ("240–560 credits") and Language. Click Back to change something, or Create task. The card then says Task created, with Open the task.
Approve each step
Clevera plans the first step right away. Planning is free and takes a few minutes; it posts in the same chat when the plan is ready, and the task waits under Needs you. Untick what you don't want and click Run. Each later step is planned and shown to you the same way.
The setup form
| Section | Field | Options and defaults |
|---|---|---|
| When | — | Once, now. This recipe only runs once. |
| Your product | Website | Your brand's website, else your workspace's. "From your brand" shows under it when it comes from your brand. |
| App address | Follows Website until you change it. "Where the AI signs in to record the how-to videos." | |
| Sign-in | Sign-in | Use a sign-in ("Clevera signs in and sees your product as your customers do.") or My product doesn’t need a sign-in ("Clevera will only see your public pages."). Nothing is picked for you, except a single saved sign-in that matches the app's address. |
| While it records | Only look around (default): "The AI clicks through your app without saving anything." Save changes too: "The AI may create, edit or delete real data. Use a test account." | |
| Help center | Brand | Your brand, with its logo and website. With several brands you pick one. With none: "No brand yet. Clevera learns it from your website first." The site's colors, logo and fonts come from it. |
| Site name (optional) | Defaults to your brand's name. Up to 80 characters are kept. | |
| Anything Clevera should know? (optional) | Up to 2,000 characters, for example "Our users are admins; skip billing". | |
| Languages | Content language | The site's default language; articles are written in it. Starts on your workspace's content language. |
| Translations | Optional. Up to 5 languages in total, the content language included. Each translation is made once the articles are ready. | |
| Existing help center | Existing help center | Import it ("Its public pages are read and brought into the new site.") or Start fresh ("Clevera plans a new site from your app."). You must pick one. |
With Use a sign-in, pick a saved sign-in from Choose a sign-in, or Add a sign-in… to save a new one without leaving the form. The login is saved encrypted under App sign-ins; the task only keeps a reference to it.
Import an existing help center
Pick Import it, then your platform under Import from: Intercom, Zendesk, Help Scout, GitBook, ReadMe, Mintlify, Document360, Docusaurus or Another docs site. Enter its public https:// address in the address field that appears (for example Zendesk address) and tick I own this content or may copy it. The import reads public pages only and is free. Platforms that import with a token, such as Confluence and Notion, are imported from the site's settings once it exists. See Import and export a doc site.
What each step does
The task runs in four steps, in order. Each step is planned, shown to you, and only runs after you click Run.
| Step | What happens | Cost |
|---|---|---|
| Brand | Learns your logo, colors, fonts and voice from your website. Skipped when Clevera already knows your brand. | Free |
| Site and videos | Explores your app, then proposes the site, its sections and one how-to video per workflow | Each video shows its credits |
| Articles | Plans an article for each new video, written from it, plus overview articles for sections that need one | Each article shows its credits |
| Review and publish | A checklist for you. Nothing is made here. | Free |
Site and videos
The plan groups its lines:
- Site: the help center it creates, with its name, address, languages, the assistant, the contact form, the look from your brand, and header links to your website and sign-in page. These lines are free.
- Sections: the proposed sections and the groups inside them. A section you already have says "Already on your site; the new articles go into it."
- Import: only if you asked for one. "Free. Your existing articles, approved as they are yours."
- Videos: one line per how-to, each with its credits. Workflows your library doesn't cover yet come ticked; the rest start unticked. A line says "Already covered by" a video when you have one.
Review and publish
The last step lists Sections and articles, Approve the articles, Assistant, Appearance, Contact form, Languages, Preview and Your own domain. Approve the articles (Approve all, or one by one), open the preview, then click Publish site. You can also finish open rows later under Doc sites.
Clevera never publishes the site for you, even when your site publishes automatically: articles Autopilot writes wait for approval, and only the owner or an admin can approve and publish.
Cost and time
| Setting it up in the agent | Free |
| Planning each step | Free |
| Brand, site lines, import, review | Free |
| Each video and article | Shown on its plan line before you run it |
| A typical build | 240–560 credits, 1–3 hours (mostly recording the videos one after another) |
You are charged for what each item really uses, not the estimate. The task's receipt shows every line. See Read a task's receipt.
What you get
- A draft help center in your brand, with sections, and your imported articles if you imported.
- A how-to video for each workflow you ticked, in your default collection (set under Autopilot → Settings).
- Draft articles in their sections, in every language you picked.
When the build is done, the task page offers Keep your help center current: "When your app changes, Clevera finds the videos and articles that need updating." Click Set it up to open that recipe. See Keep your help center up to date.
Troubleshooting
| What you see | What to do |
|---|---|
| The recipe card is greyed out | Your role can't create a help center. Ask the workspace owner or an admin. |
| "Add your website’s address." | Enter your public website. |
| "Add the address to go on." / "This doesn’t look like a web address." | Fill in Website or App address with a full address. |
| "Choose a sign-in, or say your product doesn’t need one." | Pick Use a sign-in or My product doesn’t need a sign-in. |
| "Pick a sign-in, or add one." | Choose a saved sign-in, or Add a sign-in…. |
| "Your plan holds 1 help centers. Pick one to build into." (the number follows your plan) | A Help center picker appears. Pick an existing help center to build into, or upgrade. |
| "Pick where your help center is." | Pick a platform under Import from. |
| "Use the public https:// address of your help center." | The import address must be public and start with https://. |
| "Confirm you may copy this content to import it." | Tick I own this content or may copy it. |
| "This platform imports with a token. Import it from Docs settings once the site exists." | Pick Start fresh, then import from the site's settings. |
| "You can’t make a help center and record videos in this workspace." | Ask the workspace owner or an admin. |
| "Ask an admin of this workspace to publish the help center." | Only the owner or an admin can publish the site. |
| "Approve at least one article first." | Approve an article before Publish site. |
| The task shows Waiting for a sign-in | Clevera met a sign-in page without a sign-in. Click Add a sign-in, or Go ahead with public pages. See Save an app sign-in. |