

Set up SSO with SAML 2.0
Connect Clevera to your identity provider with SAML 2.0: the Entity ID and ACS URL to give your IdP, signing and Name ID settings, the attributes Clevera reads, every setup field, testing and turning SSO on.
Connect Clevera to your identity provider (IdP) with SAML 2.0 so your team signs in with their company account. This article lists every field in Clevera's setup dialog, the exact values your IdP needs, and how to test and switch it on.
For what SSO changes for your members, read Understand single sign-on first. For step-by-step IdP screens, see the guides for Okta, Microsoft Entra ID and Google Workspace.
Before you start
- You're the owner of a workspace on a Custom plan.
- You can create a SAML app in your IdP, or you're working with someone who can.
- You know every email domain your team uses, such as
acme.exampleandeu.acme.example.
Values to give your IdP
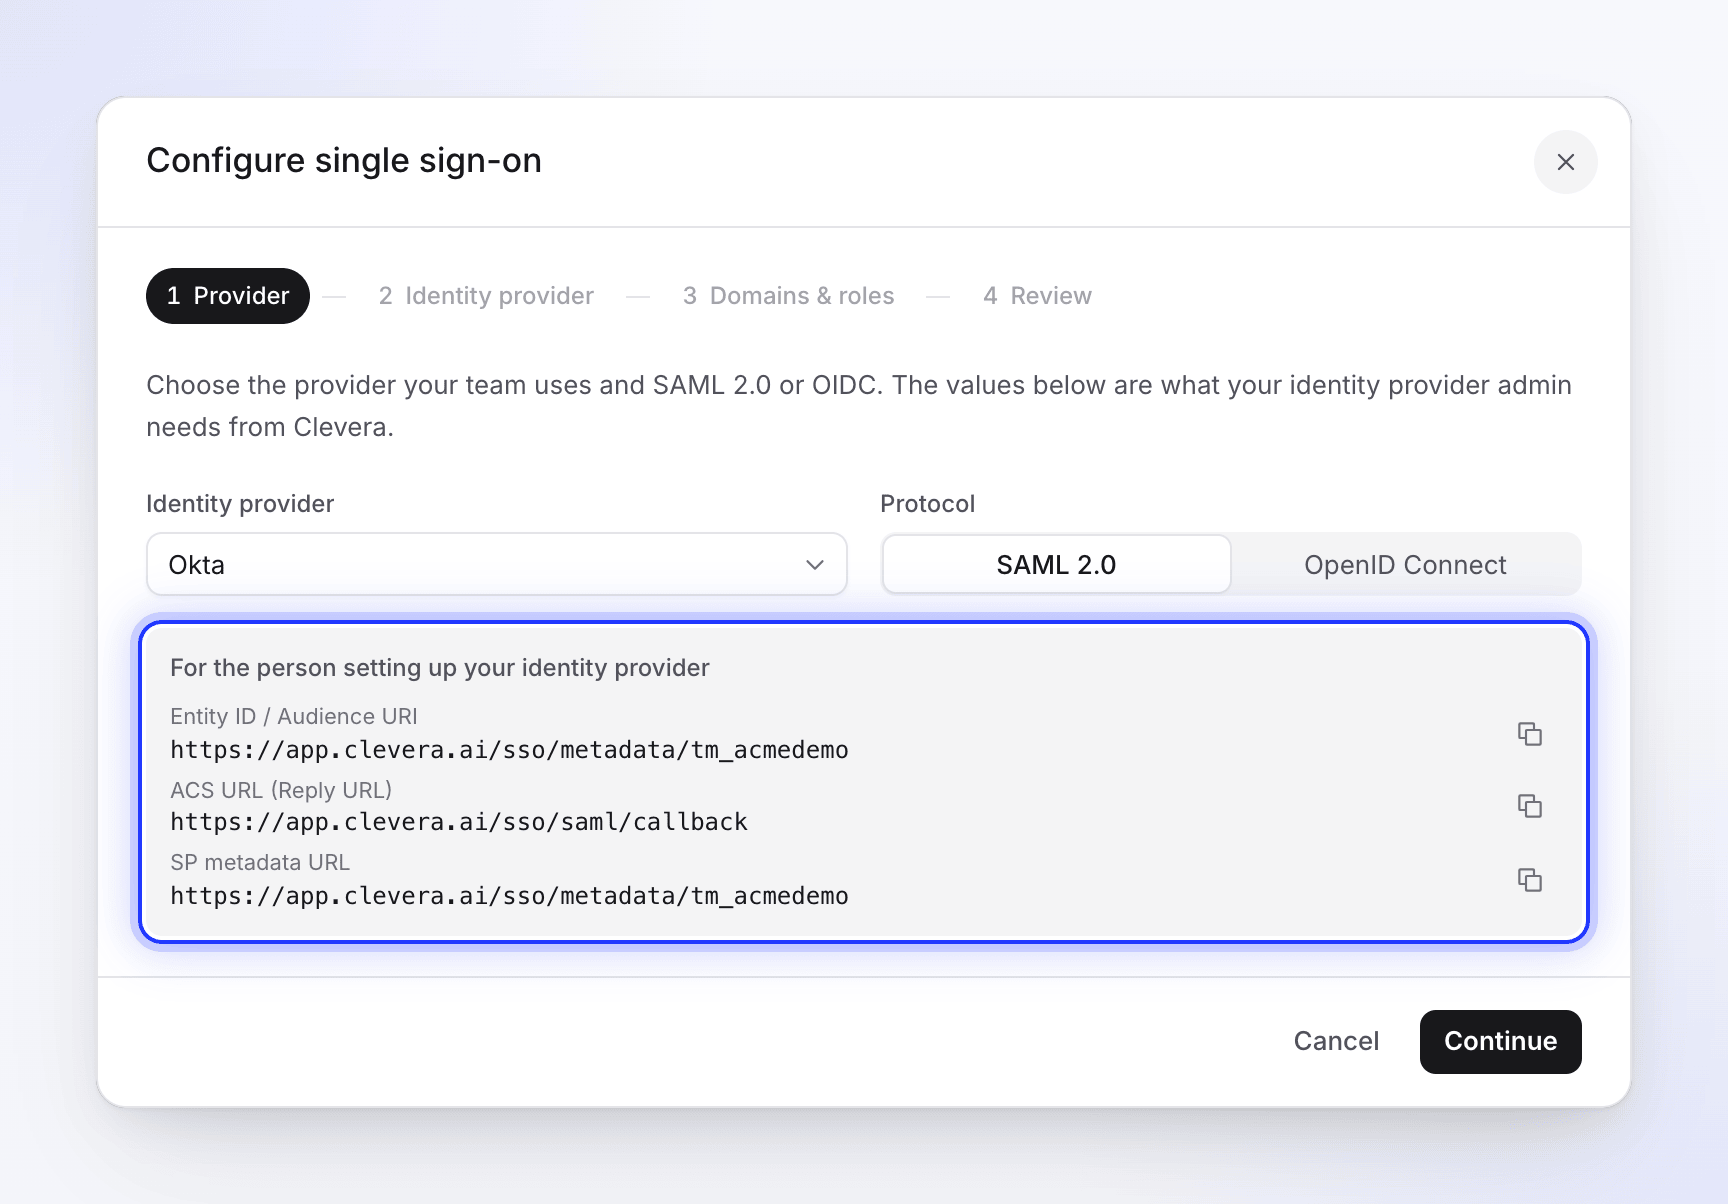
Clevera shows these in the setup dialog under "For the person setting up your identity provider", each with a copy button. Copy them from there: the Entity ID contains your workspace's own ID.
| Clevera label | What it is in your IdP | Value |
|---|---|---|
| Entity ID / Audience URI | Audience URI, SP Entity ID, Identifier | https://app.clevera.ai/sso/metadata/ followed by your workspace ID |
| ACS URL (Reply URL) | Assertion Consumer Service URL, Single sign-on URL, Reply URL | https://app.clevera.ai/sso/saml/callback |
| SP metadata URL | Service provider metadata | Same address as the Entity ID. It serves Clevera's SAML metadata as XML, for IdPs that can import it. |
Set up the app in your IdP like this:
| IdP setting | Set it to |
|---|---|
| Name ID format | EmailAddress (urn:oasis:names:tc:SAML:1.1:nameid-format:emailAddress) |
| Name ID value | The person's work email |
| Signing | Sign both the SAML response and the assertion. SHA-256 is recommended. |
| Assertion encryption | Off. Clevera doesn't accept encrypted assertions. |
| Signed authentication requests | Not required. Clevera sends unsigned requests. |
| Binding for the ACS URL | HTTP POST |
| Default RelayState, IdP-initiated sign-in | Leave empty. Sign-in must start on the Clevera sign-in page. |
Attributes Clevera reads
The email comes from the Name ID. If the Name ID isn't an email address, Clevera looks for the first of these attributes:
| Purpose | Attribute names Clevera accepts, in order |
|---|---|
email, http://schemas.xmlsoap.org/ws/2005/05/identity/claims/emailaddress, User.Email |
|
| First name | firstName, http://schemas.xmlsoap.org/ws/2005/05/identity/claims/givenname, User.FirstName, first_name |
| Last name | lastName, http://schemas.xmlsoap.org/ws/2005/05/identity/claims/surname, User.LastName, last_name |
| Display name (used when there's no first or last name) | displayName, http://schemas.xmlsoap.org/ws/2005/05/identity/claims/name, User.Name, name |
Names are only used when Clevera creates a new account. With no name attributes at all, the account is named after the part of the email before the @. Clevera reads no group or role attributes: everyone created by SSO gets the default role you choose below.
Connect your IdP in Clevera
Open the Security tab
Open the workspace menu at the top of the sidebar, choose Team settings, then Security. Under Single sign-on, click Set up SSO. The Configure single sign-on dialog opens.
Provider
Choose your Identity provider (Okta, Microsoft Entra ID (Azure AD), OneLogin, Google Workspace, JumpCloud, or Custom SAML/OIDC Provider) and set Protocol to SAML 2.0. Copy the values in the grey box into your IdP, then click Continue.
The provider's name is what members see on the sign-in button, for example Continue with Okta. With Custom SAML/OIDC Provider, the button reads Continue with SSO.
Identity provider
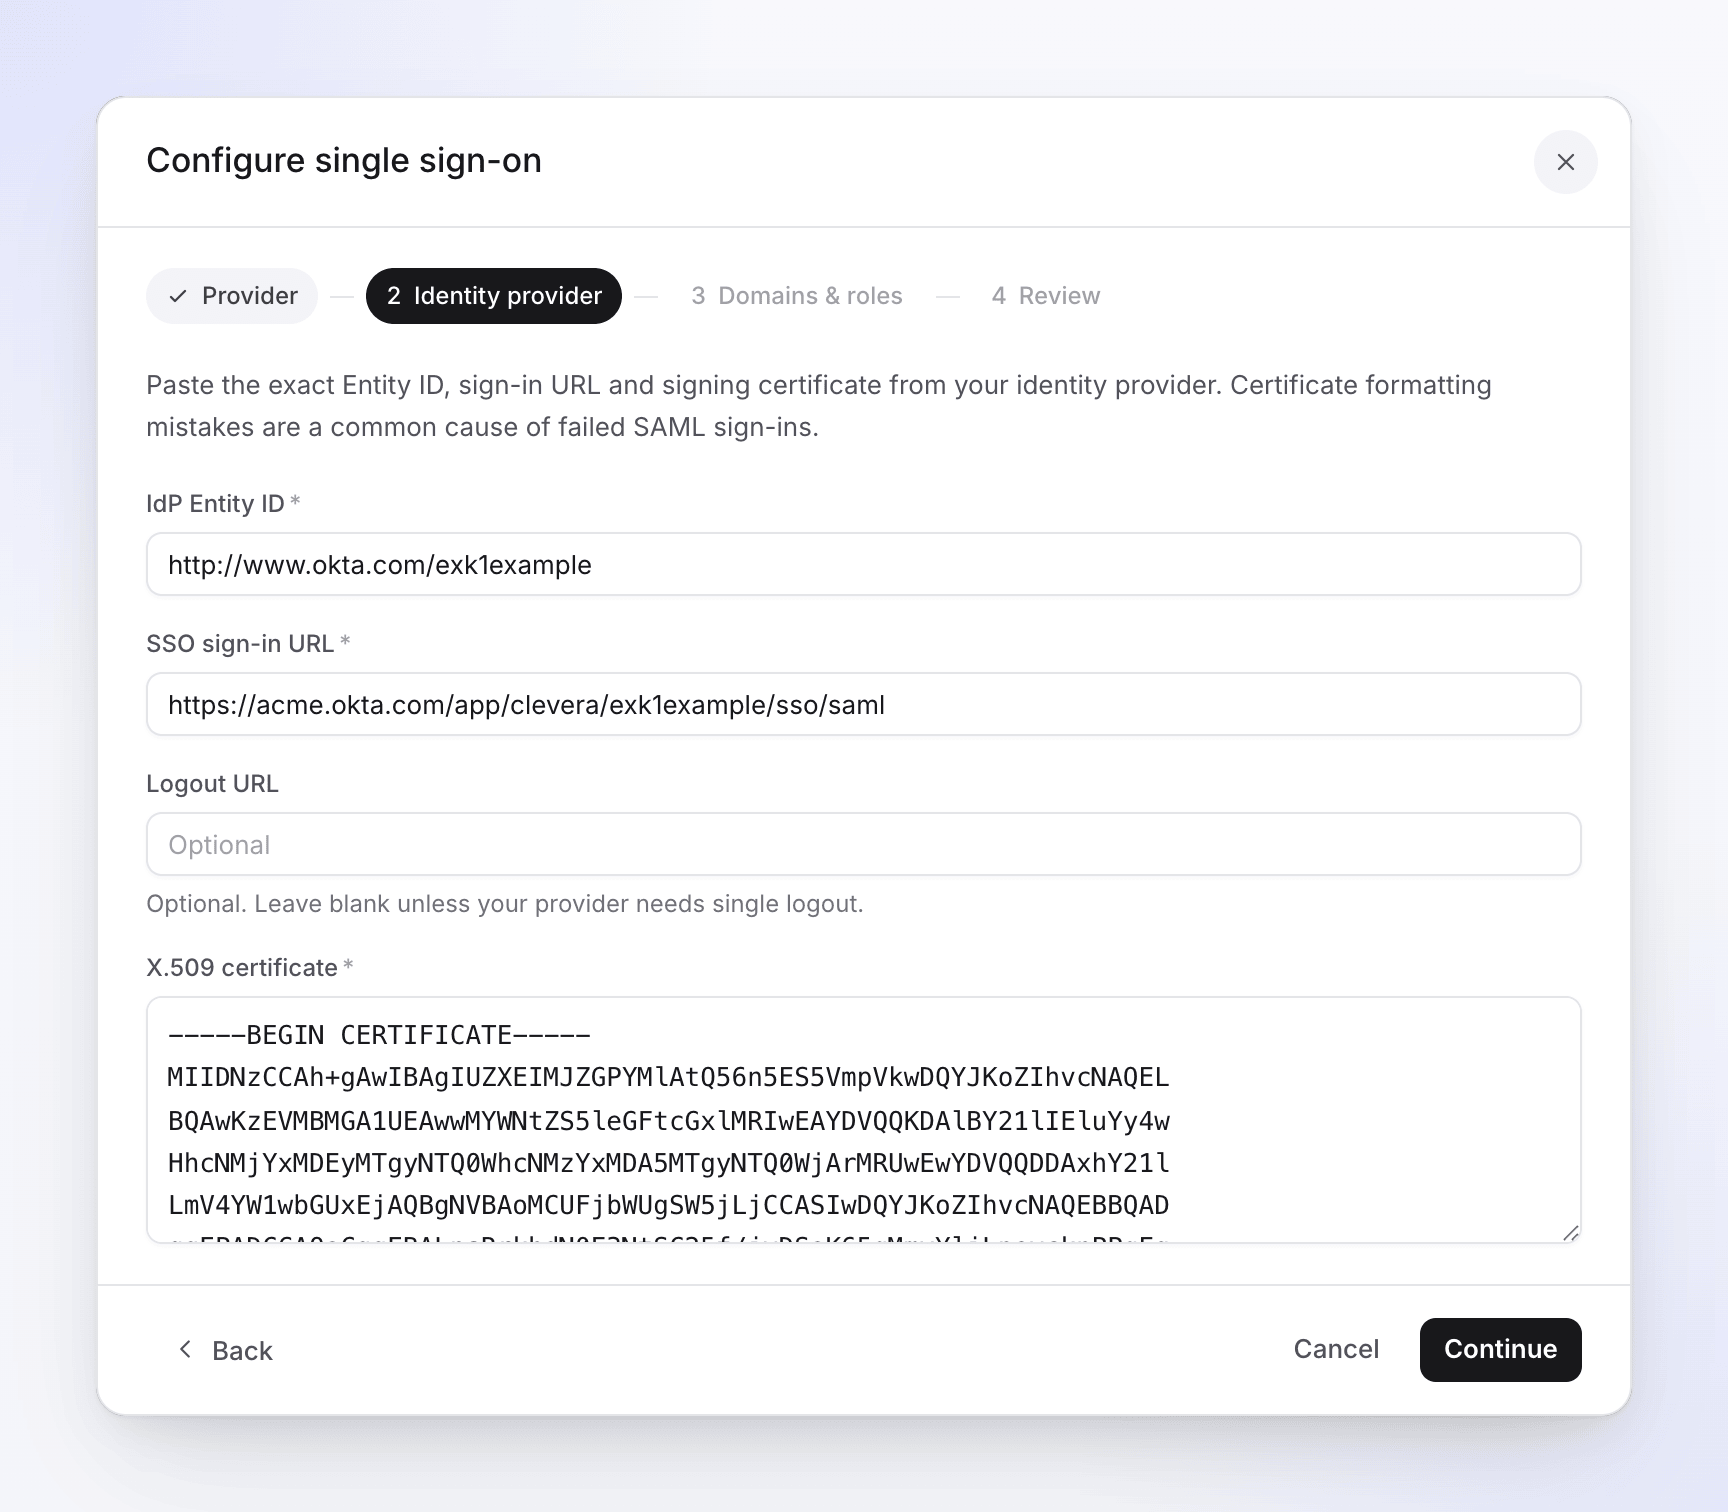
Paste the values from your IdP's SAML setup page. See the field reference. Click Continue.
Domains & roles
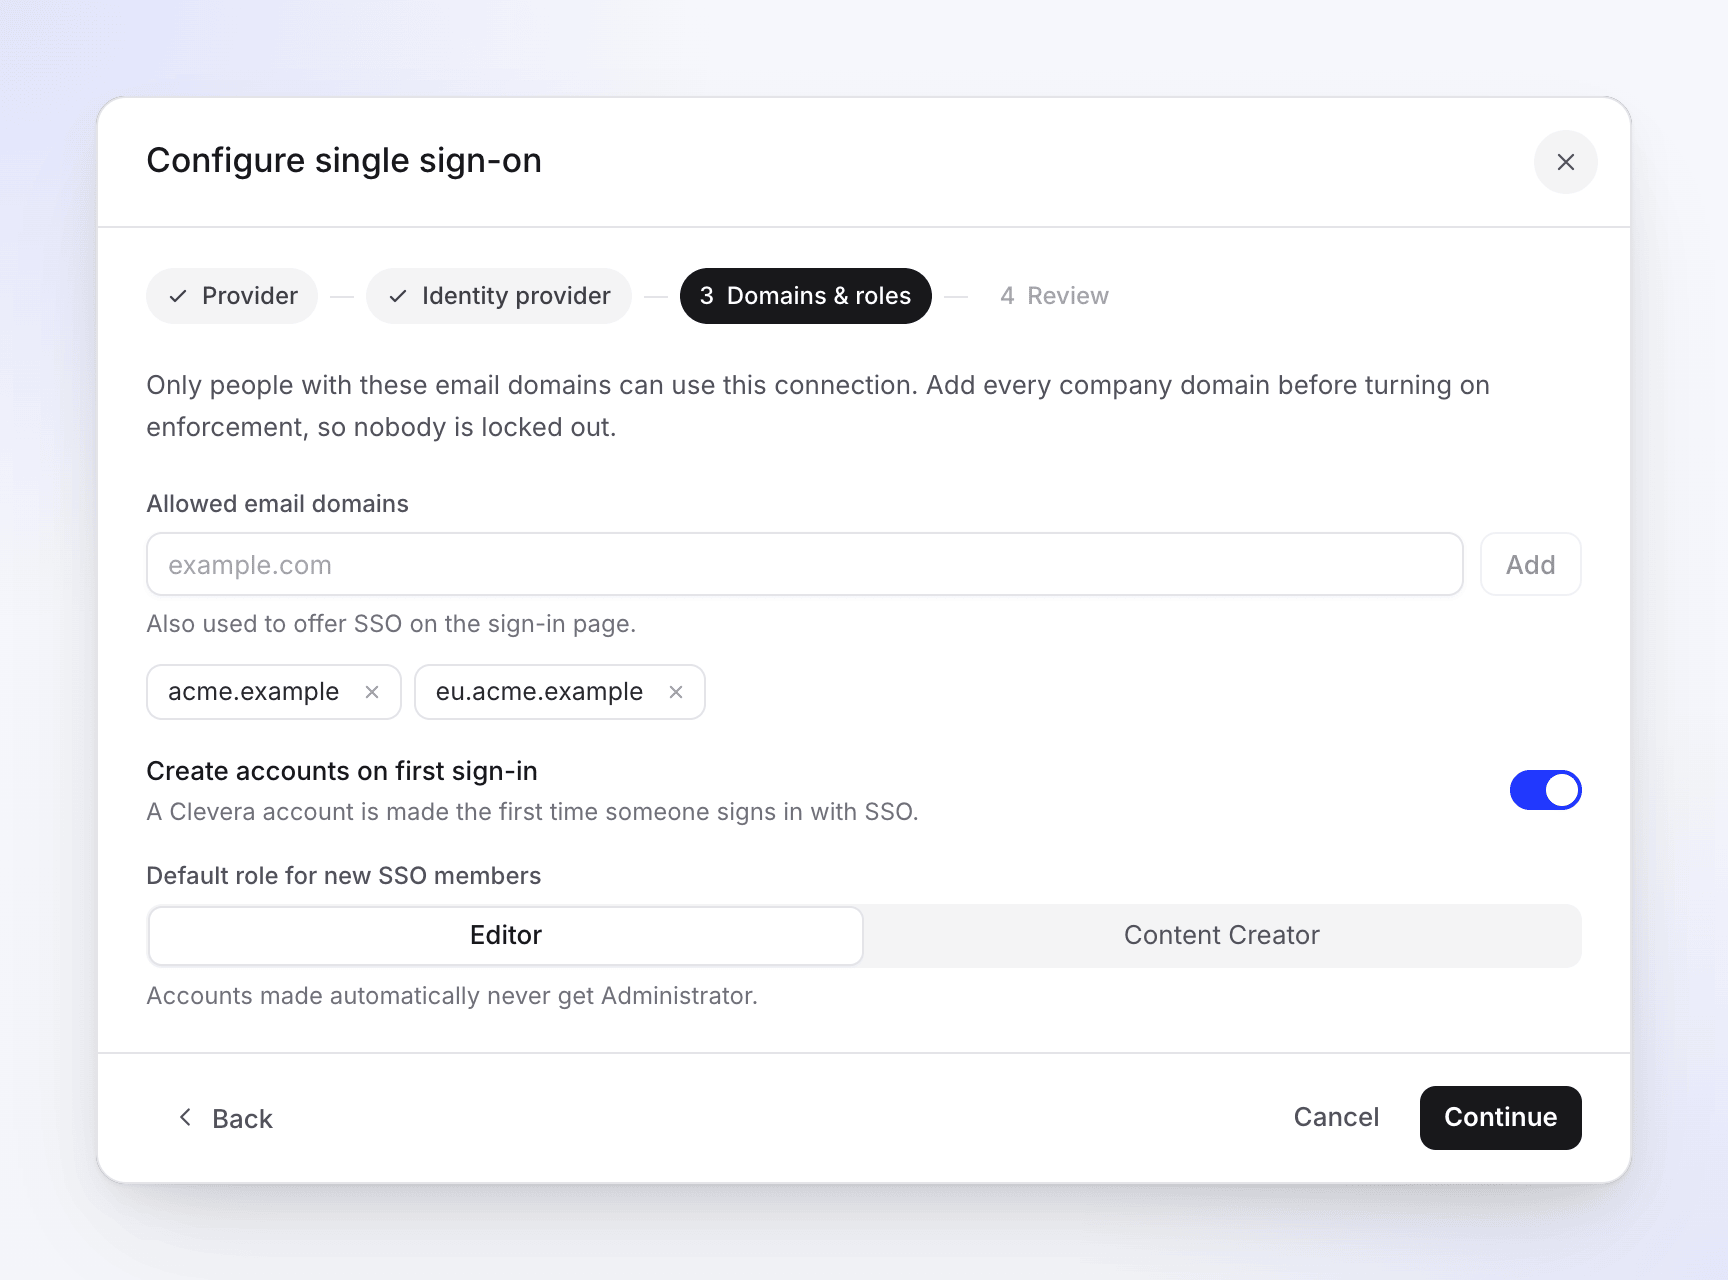
Type each email domain under Allowed email domains and click Add (or press Enter). Then choose whether to Create accounts on first sign-in and pick the Default role for new SSO members. See Domains and roles.
Review
Check the summary and click Save configuration. You see "SSO configuration saved. Run a test, then turn it on." Saving doesn't turn SSO on.
Identity provider fields
| Field | Required | What to paste | Where your IdP calls it |
|---|---|---|---|
| IdP Entity ID | Yes | The IdP's issuer, exactly as your IdP shows it | Identity Provider Issuer, Entity ID, Microsoft Entra Identifier |
| SSO sign-in URL | Yes | The URL Clevera sends people to for sign-in (HTTP Redirect binding) | Identity Provider Single Sign-On URL, Login URL, SSO URL |
| Logout URL | No | Your IdP's single logout URL. "Leave blank unless your provider needs single logout." | Single Logout URL, Logout URL |
| X.509 certificate | Yes | Your IdP's signing certificate | X.509 Certificate, Certificate (Base64) |
The certificate
- Paste the whole certificate. The
-----BEGIN CERTIFICATE-----and-----END CERTIFICATE-----lines are optional; spaces and line breaks are ignored. - Use the Base64 (PEM) text, not a binary
.cerfile. If you downloaded a file, open it in a text editor and copy its contents. - Clevera stores it encrypted and never shows it again. When you edit the connection later, the field says "A certificate is stored. Leave blank to keep it."
- Run test tells you if the certificate can't be read or has expired.
Domains and roles
| Setting | What it does | Default |
|---|---|---|
| Allowed email domains | Only people with these email domains can use the connection. The domains also decide when the sign-in page offers SSO. At least one is required. | None |
| Create accounts on first sign-in | "A Clevera account is made the first time someone signs in with SSO." The new account joins this workspace. | On |
| Default role for new SSO members | The role new accounts get: Editor, Content Creator or Administrator. Administrator is only offered when Create accounts on first sign-in is off: "Accounts made automatically never get Administrator." | Editor |
About domains:
- A domain matches exactly.
acme.exampledoesn't covereu.acme.example; add each one. - Type the domain only (
acme.example), not an email. A leading@is removed. - A domain can belong to one Clevera workspace only. If another workspace already uses it, saving shows "The domain acme.example is already assigned to another team." Contact support if that's your domain.
Content Creators use a creator seat; Editors don't. If the default role is Content Creator and every creator seat is taken, someone who joins through SSO becomes an Editor instead, so SSO never puts you over your seat count. Add a seat and change their role in Team settings → Members when you're ready. See Understand workspaces, roles and creator seats.
Test the connection
Run the check
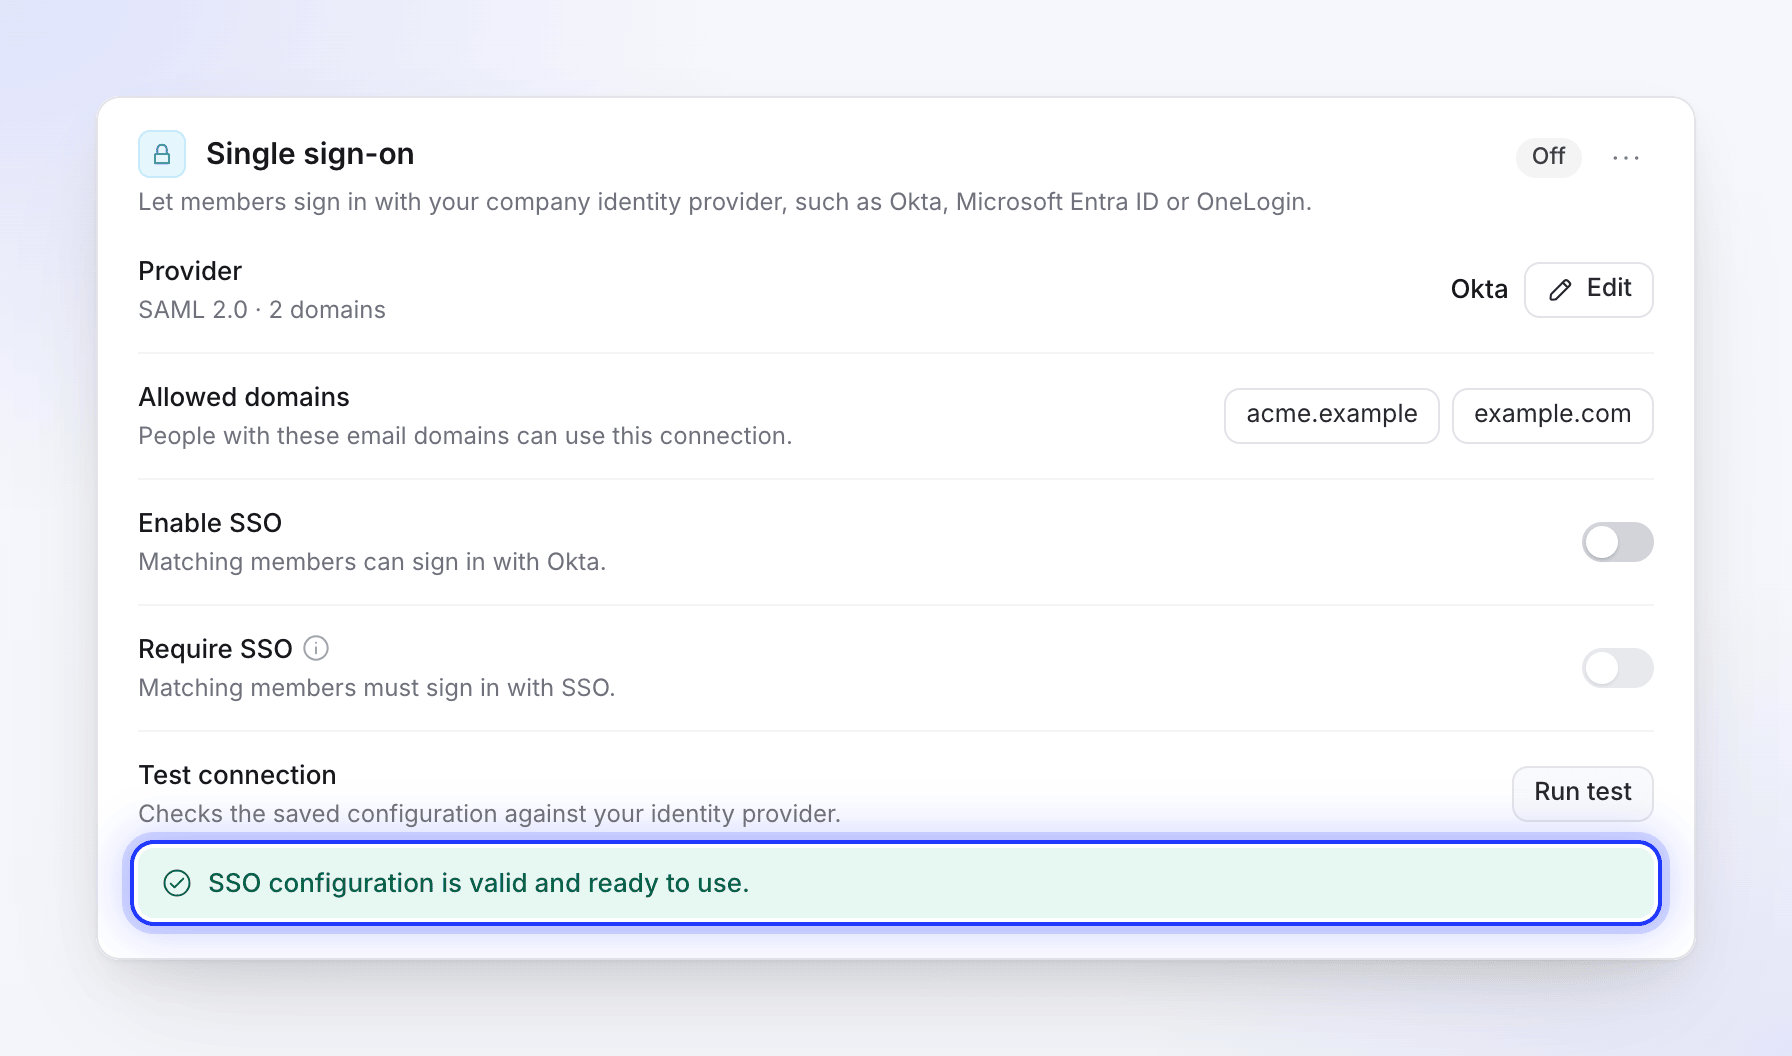
Back on the Security tab, click Run test next to Test connection. It checks the saved settings: that the Entity ID, sign-in URL and certificate are there, the URL is valid, and the certificate is readable and not expired.
You see "SSO configuration is valid and ready to use." or "SSO configuration has issues that need to be resolved." with a list. See Fix SSO sign-in problems.
Run the test before you switch SSO on. Turn SSO on
Switch on Enable SSO. You see "SSO turned on." The status badge changes from Off to Active.
Sign in as a test member
Open a private browser window, go to the Clevera sign-in page and type the email of a member (or a new person, if accounts are created on first sign-in). Click Continue with your provider and sign in at your IdP. You should land on that person's Clevera home page in your workspace.
Your own session isn't affected, and as the owner you can always sign in with your password.
Run test doesn't contact your IdP, so the real sign-in in step 3 is the only full test. Start it from the Clevera sign-in page: a test started from your IdP's dashboard is refused.
Require SSO
When everyone can sign in, switch on Require SSO ("Matching members must sign in with SSO."). You see "SSO is now required." and the badge reads Active · enforced.
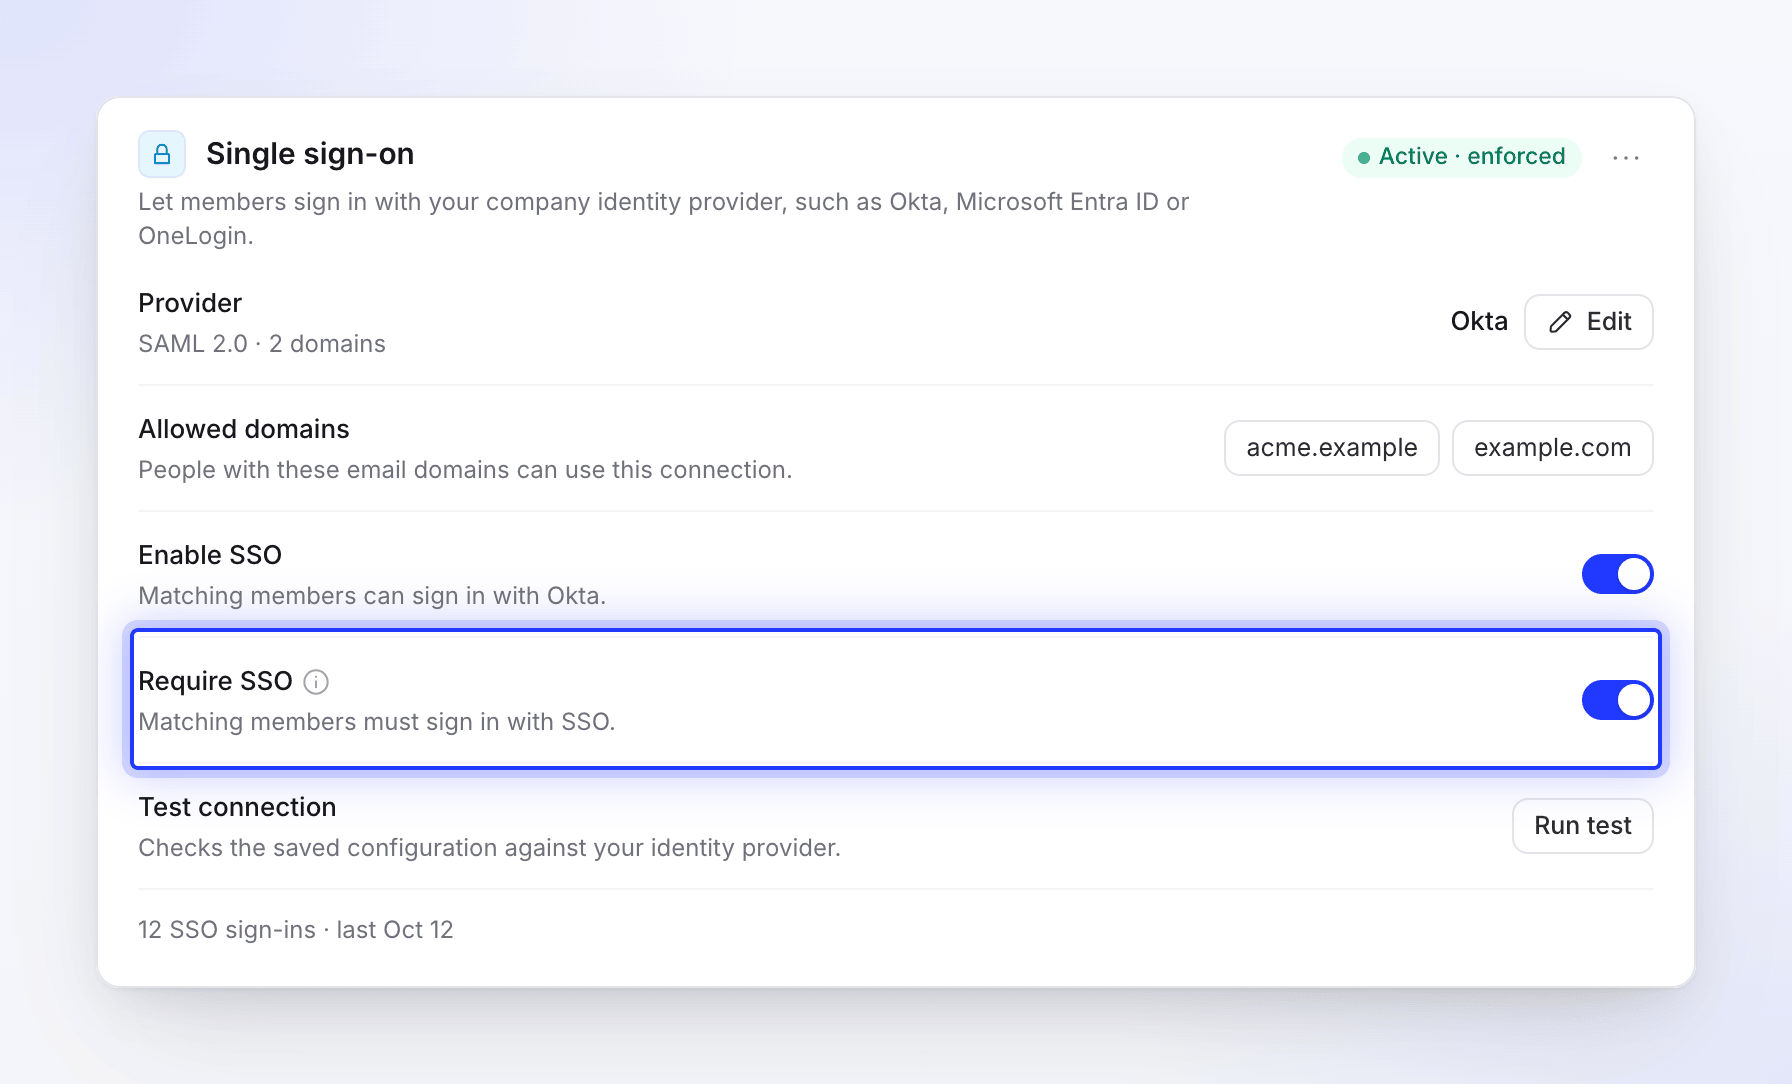
From then on, members on your domains can't use a password or Google, and someone new on your domains can't create a Clevera account with a password: they get their account by signing in with SSO. You can only turn it on while Enable SSO is on, and turning Enable SSO off also turns it off.
Single logout
If you fill in Logout URL, Clevera's metadata also lists a logout address: https://app.clevera.ai/sso/saml/slo (HTTP Redirect binding). When your IdP sends a logout request there, Clevera signs the person out and sends them back to your IdP.
Signing out in Clevera doesn't sign people out of your IdP.
Change or remove the connection
- Change it: click Edit next to Provider. The dialog opens with your saved values; leave the certificate blank to keep it.
- Turn it off for a while: switch off Enable SSO. The settings stay saved.
- Remove it: open the menu next to the status badge and choose Remove SSO configuration, then Remove SSO. "Members who sign in with SSO will need to reset their password to keep signing in."
The Provider row shows the protocol and how many domains you have. Once people use SSO, a line such as "12 SSO sign-ins · last Oct 12" appears at the bottom of the section.